Connecting to the file share
While you’re in the administration menu, make a note of the Server LAN IP Address. It’s the address of the router, which will now be your file server address.
1. From the Start menu, select Run, then two backslashes followed by the IP address of the router. I’ve shown this in Figure 7-15 using the IP address of my router, which is 192.168.99.1.
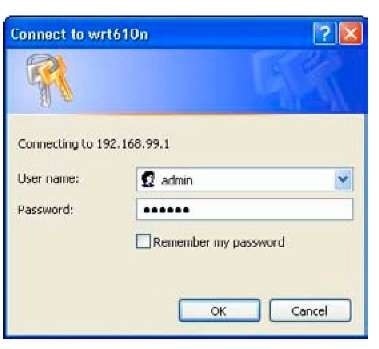
2. After you click OK, you are asked to log in (see Figure 7-16).
3. Type the admin user and password where prompted and select OK (you can also select the Remember my password box if you don’t want to have to log in all the time).
Figure 7-15:
Connecting to the file share.
Figure 7-16:
Logging in to the file share.
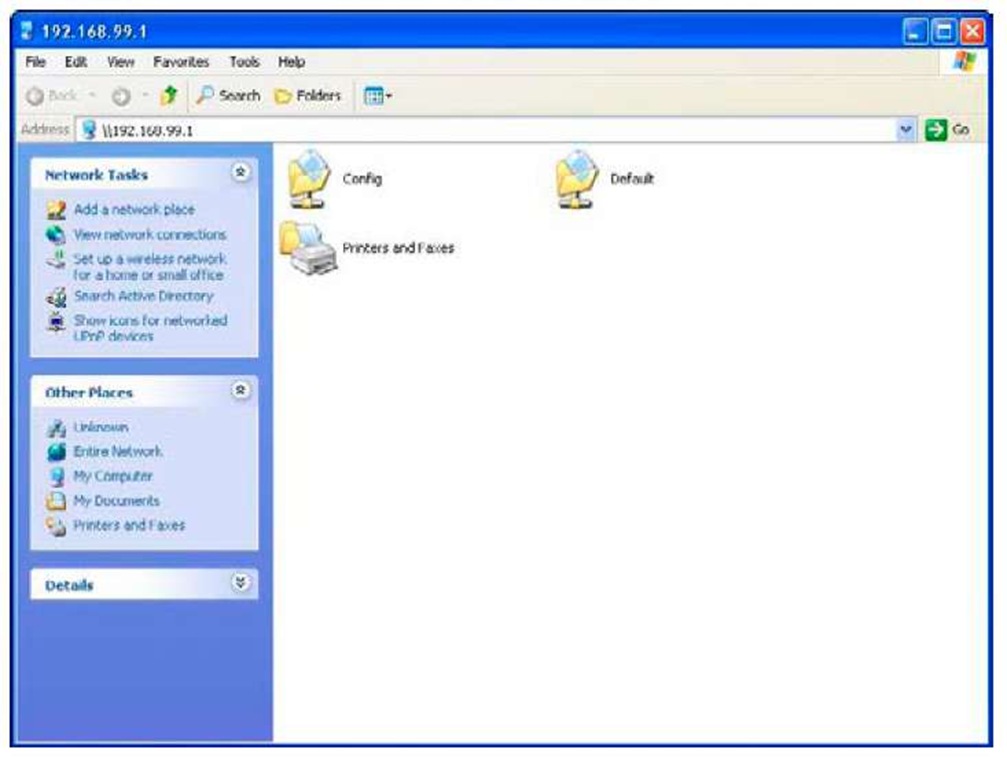
After you’ve logged in, you see a list of file shares available (see Figure 7-17). The Config file share contains a link to the administrative interface of the router; the Default file share is the one you set up earlier.
Figure 7-17:
The list of file shares
With this all done, you have a centralized place to put your files that never goes away!
Make sure to back up your data, either by periodically burning files to DVD or making copies on other computers. Or, the other way around, this central file share makes a fine backup site for your local files, should something happen to your laptop.
Some of these devices have some features on top of the file sharing. For instance, the Linksys WRT610N can act as a media server which will be auto-detected by Windows Vista and some other universal plug and play capable software. Any media files on the shared hard drive will be instantly accessible to your audio software!
Adding an Access Point
It’s possible that you’ve got some wireless dead spots in your network, or even a whole area such as an outside workshop. Moving your router around might help things out, but at some point you need a second access point.
The general idea behind a second access point is that you plug it into your internal wired network and give it the same wireless settings as the router. If the radios are on two different channels, then your computer will pick which radio to associate with, based on signal strength. If you roam from one radio’s space to the other, then your computer moves over to the other access point.
That’s the theory, anyway. In practice, I’ve found that the built-in Windows wireless software doesn’t do a great job here, and that you’re better off using your manufacturer’s software if you plan on roaming between wireless zones. The worst case is that you have to reconnect when you move from one zone to the other.
This is a very effective technique for expanding your network. Your only requirements are an access point and a cable to go from wherever the access point is back to your Internet router.
The trouble I’ve found with access points is that they’re hard to find. I was at an office supply store doing some research, and I found a dozen varieties of wireless routers, but no access points.
Fear not! You’ll soon learn how to turn a router into a simple access point. If you’re upgrading your router anyway, you can keep your old router to provide lower-speed coverage to a different area of your place.
We’re going to be turning off some features that make it easier to connect to your router, but nothing that’s irreversible. If you’re stuck, do a factory reset on the router and you’ll be able to connect again. Usually this involves pushing the reset button while rebooting your router. When in doubt, check the product documentation.
Converting a router into an access point
A wireless router is really a regular wired router with a built-in access point. All you need to do is avoid using the router part, and you’ve got yourself an access point.
Wireless routers generally have one Ethernet port that goes to the Internet, and about four ports for connecting wired devices into your internal network. These four internal ports are bridged to the wireless side, meaning that they are on the same network.
With that in mind, if you connect the internal ports of two routers together you’ve got yourself two wireless networks that are connected. See what I mean in Figure 7-18. The goal here is to provide some extra coverage in the basement where the signal is low.
Figure 7-18:
Connecting two routers.
As long as those two radios are on different channels, it doesn’t matter which one you’re connected to because you’ll always be in the same network. A few things to keep in mind, though:
♦ Only one of the routers can be connected to the Internet. The other router’s Internet port is not used.
♦ You need a special cable called a crossover cable to connect two routers together. It looks the same as a regular cable but one of the ends has some of the wires crossed.
♦ Only one DHCP server is needed for the whole network. If you had two DHCP servers going, there would be a lot of confusion. To make things simple, the DHCP server goes on the router that’s connected to the Internet.
♦ The two routers must have different IP addresses. If they were the same, they’d fight, and your computer would not know how to get out to the Internet. Again, in the interests of simplicity, the router connected to the Internet will keep its address; the other router will pick a new one.
Despite having these four caveats, it’s not too hard to do, especially if you do it in the right order.
To keep things straight, the router that connects to the Internet is called the Internet router. The new router is called the expansion router.
Reconfiguring the expansion router
The first order of business is to reconfigure the expansion router. The easiest way to do this is to plug your computer into the router on one of the Internal ports, with the Internet disconnected.
The router I’m using is an older Linksys device that I’m repurposing to expand my wireless footprint. As usual, it may look different than yours, but the concepts are still the same. To reconfigure the expansion router, follow these steps:
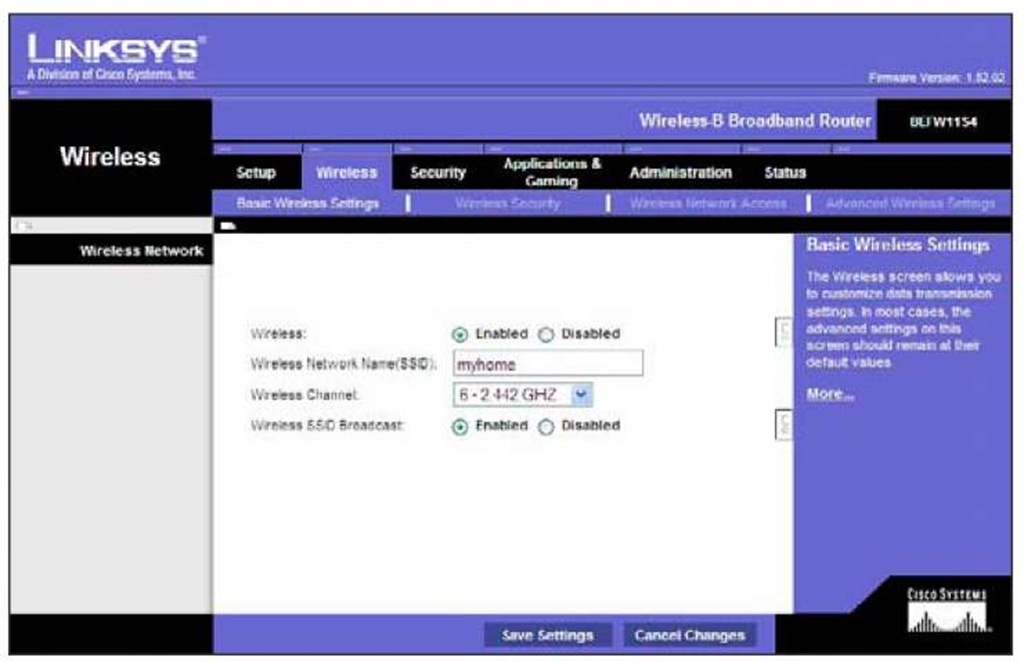
1. Navigate to the Wireless menu and change the network name (SSID), so that it is the same as that on your Internet router.
Remember that case matters! See Figure 7-19.
Figure 7-19:
Reconfiguring the SSID on the expansion router.
2. After you’ve set the SSID, move over to the Wireless Security menu and change the security mode and key to the same thing as what you’re using on the Internet router, as shown in Figure 7-20.
Disable DHCP on the expansion router and change its address to something that doesn’t conflict with the Internet router.
On this access point, both tasks happen on the same screen. If your router has the features split, then make sure to change the address last! After you change the address, you won’t be able to connect to the router until you hook it into the Internet router, at which point you’d have two DHCP servers, which wouldn’t be great!
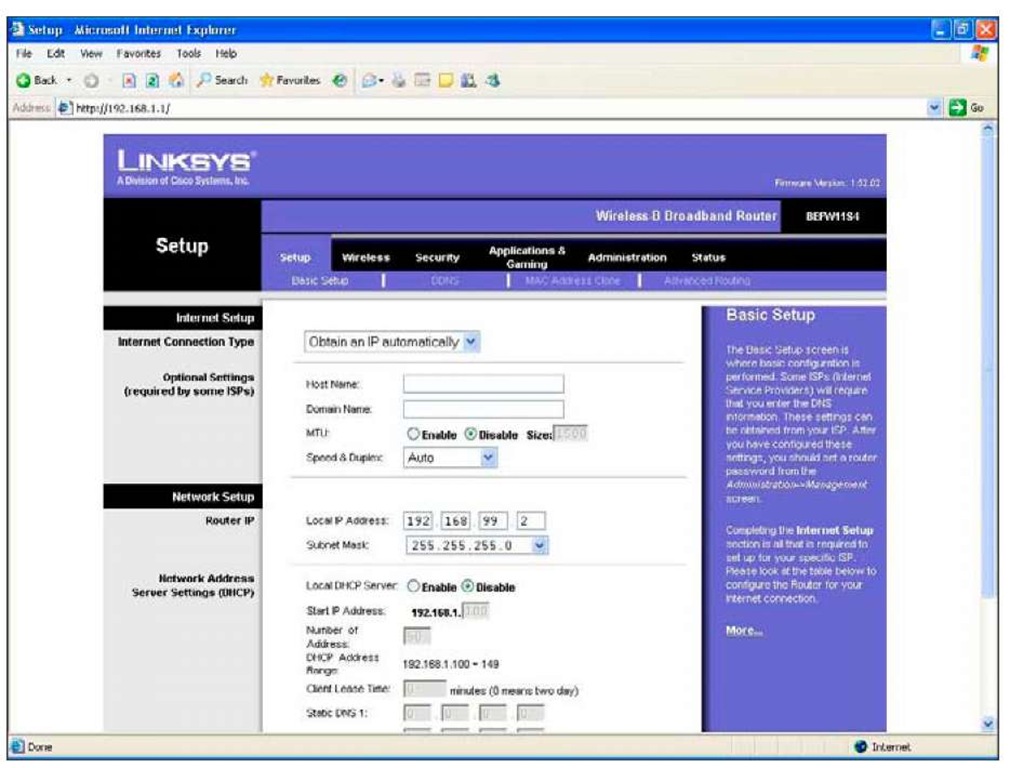
Figure 7-21 shows the screen to disable DHCP and change the IP address.
3. Change the Local DHCP Server setting to Disable.
4. Change the local IP address to something different than that of the Internet router. My Internet router’s address is 192.168.99.1, so I’m using 192.168.99.2 for the expansion router. Note that the first three numbers are the same, only the last one differs.
Figure 7-20:
Reconfiguring the wireless security on the expansion router.
Figure 7-21:
Disabling DHCP and changing the IP address on the expansion router.
You might also note that the Internet connection stays on Obtain an IP automatically. This setting doesn’t really matter anymore because the expansion router won’t be plugged into the Internet.
5. Click the Save button.
After you save the settings, you will lose connection to the router because it’s using a new address. (This is expected, and it’ll come back in the next step.)
You should already have a crossover cable run from your Internet router to the expansion router.
6. Plug this cable into an internal port on each router.
The port number doesn’t matter, but it has to be the internal port. Don’t use the Internet port on the expansion router!
You can now connect to either router using their address in your Web browser. You can access the Internet, and any other computer on your network, while associated to either of the access points. In fact, you shouldn’t even know which network you’re on!


