Sharing Files Wirelessly
Sharing files between computers over a network, wired or wireless, is nothing new. However, you do find a few disadvantages:
♦ The computer with the files on it has to be turned on. The current trend is to save energy by turning off computers when they’re not in use — which is good.
♦ The computer with the files on it has to be connected to the network.
If the file you need is on a laptop that’s not at home, you’ve got a problem.
♦ It’s more difficult and less secure to share files with the Internet. If you want to grab some of your home files when you’re at work, for example, the usual solution is to expose one of your home computers to the Internet.
Add to this that external USB storage is becoming larger and cheaper. For much less than $200, you can get a 1TB disk that can be used on any computer in your house, without having to take anything apart. Unfortunately, after you plug one of those bad boys into your laptop, you have no more mobility!
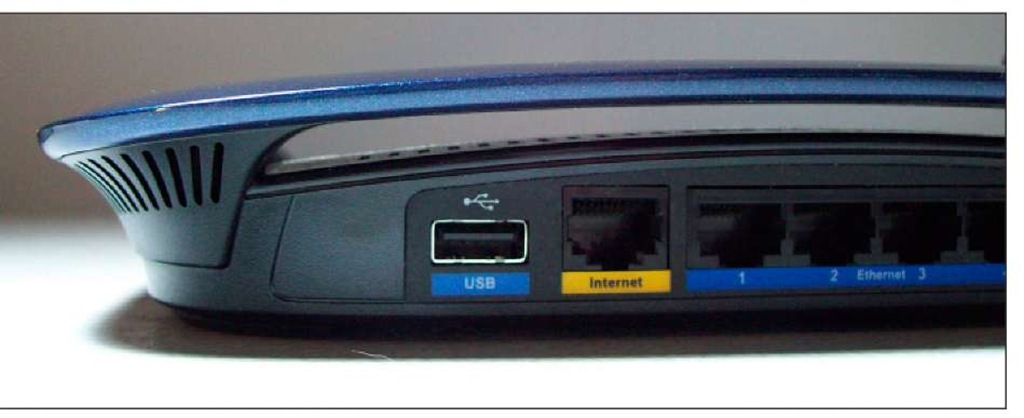
With the latest crop of home you simply plug the external hard drive into the router, configure file sharing, and presto! You have a permanent file server that you can store your stuff on. In Figure 7-8, I show a picture of the back of a Linksys WRT610N which has such a feature.
Figure 7-8:
A USB port on a router for an external storage device.
A router draws far less power than a computer, is always available, and its position in the network is ideal for performance. The router is also able to share files to both the internal network and the Internet at large because it sits on both of those networks.
Setting up file storage
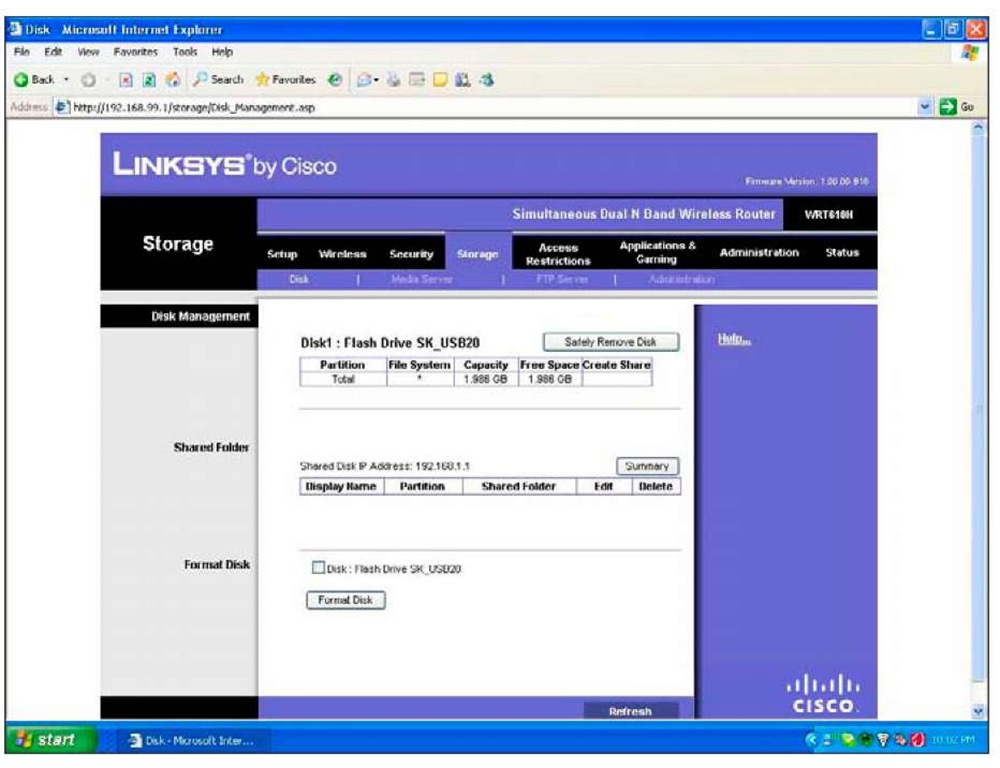
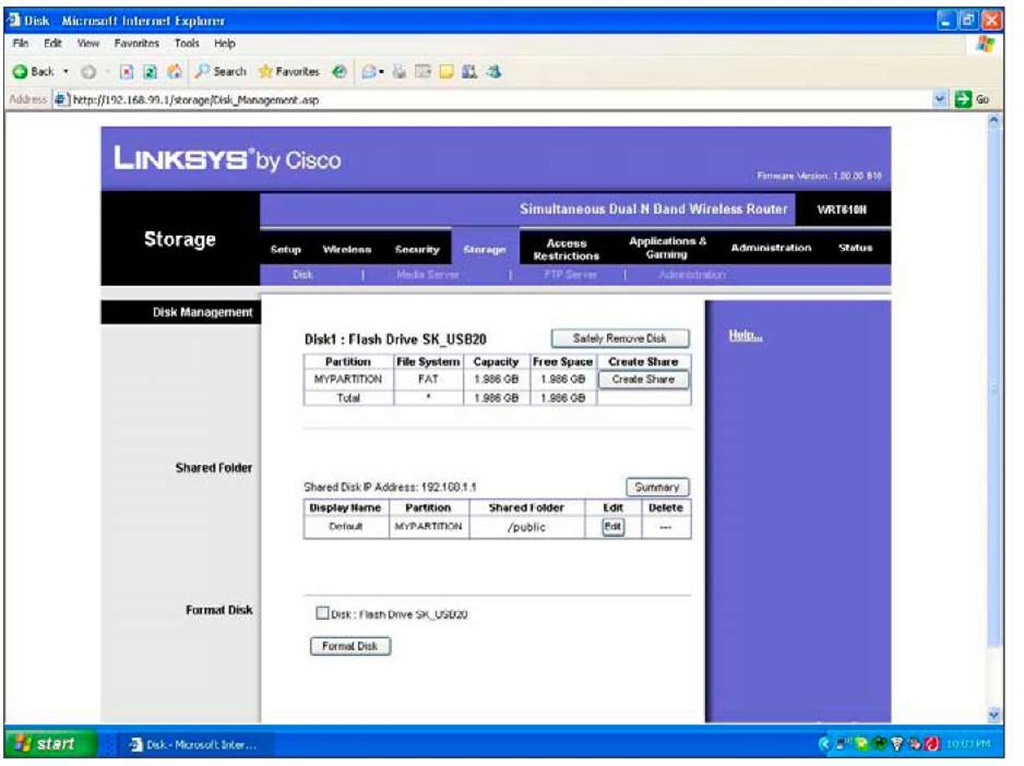
Start by plugging your USB storage device into the USB port on your router and then log in to your router’s administrative interface. On the Linksys WRT610N you access the storage configuration from the Storage menu, which is shown in Figure 7-9.
The menu shows you details about the disk that’s currently plugged in. Above, you can see I have a 2GB flash disk drive plugged in. This is a good sign because it means the router has recognized the drive. If you don’t see any drives, double-check that the USB cable is plugged in all the way and that the hard drive has power.
Figure 7-9:
The storage menu.
The disk details, shown in Figure 7-9 also include a column called Create Share. Depending on how your disk is set up, you may or may not see a button in that column that also says Create Share. If you do see the button, then you can skip the next section. If your view is like that shown in Figure 7-9, you need to format the disk.
Formatting the disk
Disks must be formatted and partitioned before they can be used. This process lays out certain structures on the disk that the computer uses to remember where files are placed and which parts of the disk are free.
You can format a disk many different ways; however, not all formats are supported by the router. It’s easy to determine if you have to format your disk again — if you have the option to create a share, then you don’t have to format the disk. Additionally, you can see some partitions listed in the top table.
Formatting a disk deletes everything on that disk. Gone! Kaput! Copy your stuff off the disk to another computer before you format; otherwise, it’s gone!
Follow these steps to format a disk:
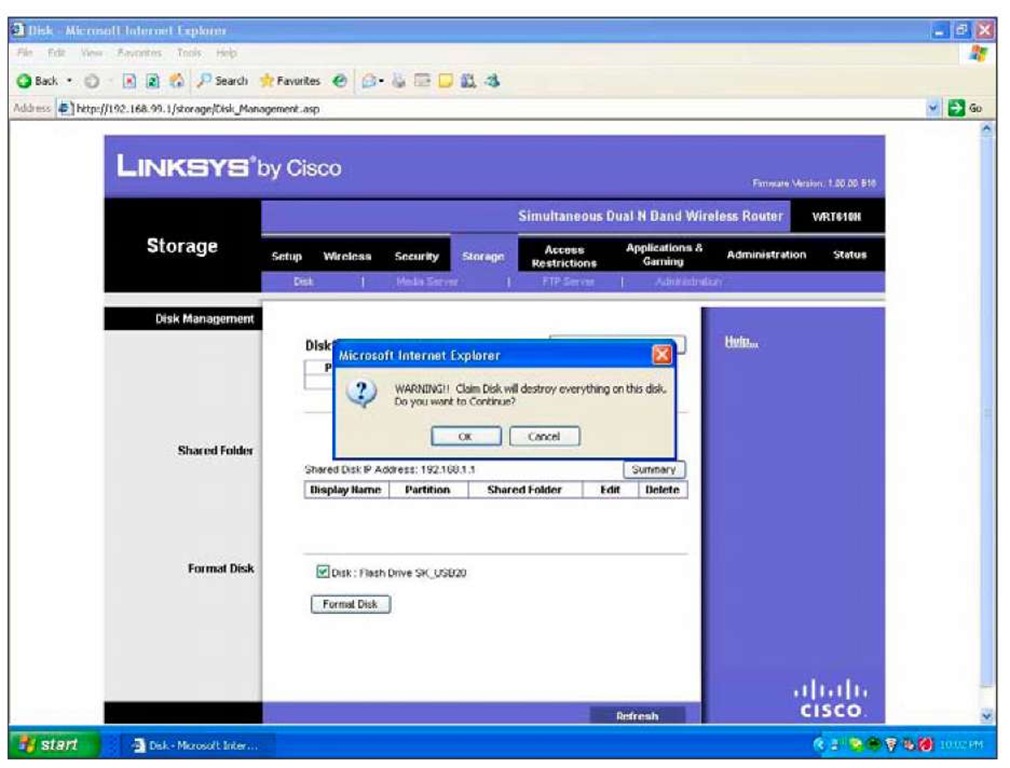
1. After you back up your data, look down to the Format Disk section of the Web interface. Check the button next to the name of the disk and push the Format Disk button.
You receive a warning indicating that everything on the disk will be deleted, as shown in Figure 7-10.
Figure 7-10:
A warning before formatting a disk.
2. If you are sure you’re ready to format the disk, click the OK button.
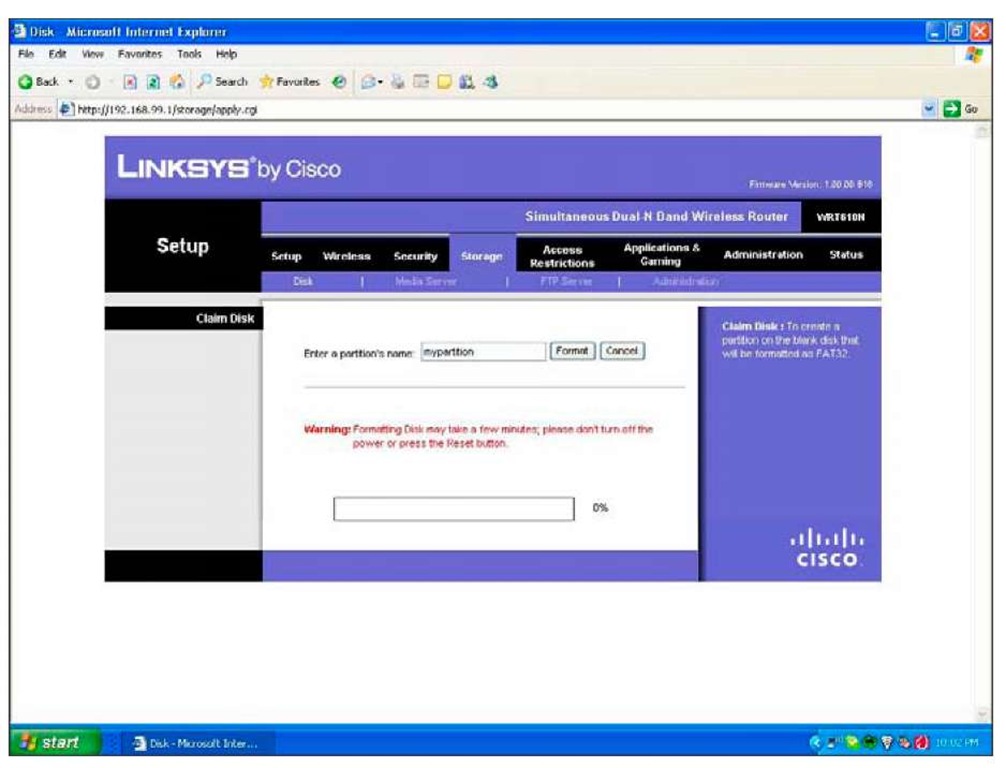
After you’ve done that, you are asked to supply the name of a partition (see Figure 7-11).
A partition is a way to split out a disk into multiple logical disks. This formatting process assigns one partition to the disk, using all available space, so the name of the partition isn’t that important.
3. Type the name of a partition and click the Format button.
You are asked again to confirm that you’re okay with any data on the disk being wiped clean, after which the router can chug away while it formats the disk. This may take a few minutes, depending on the size of your disk.
After the formatting is complete, you are returned to the main storage menu (see Figure 7-12) showing the partition that was just created. Note that the Create Share button shows up along with the partition.
Figure 7-11:
Supplying the name of a partition.
Dealing with security
After you format the disk, the router creates a directory called public and shares it out with the name of Default. When you connect to a network share you must provide a username and password to connect with, which prevents the wrong people from getting at your data.
The router has created two users by default and given them access to the share. One user, guest, can only read the data, while the admin user can read and write. This is okay, but you want to set the passwords to something you know and control. To do so, follow these steps:
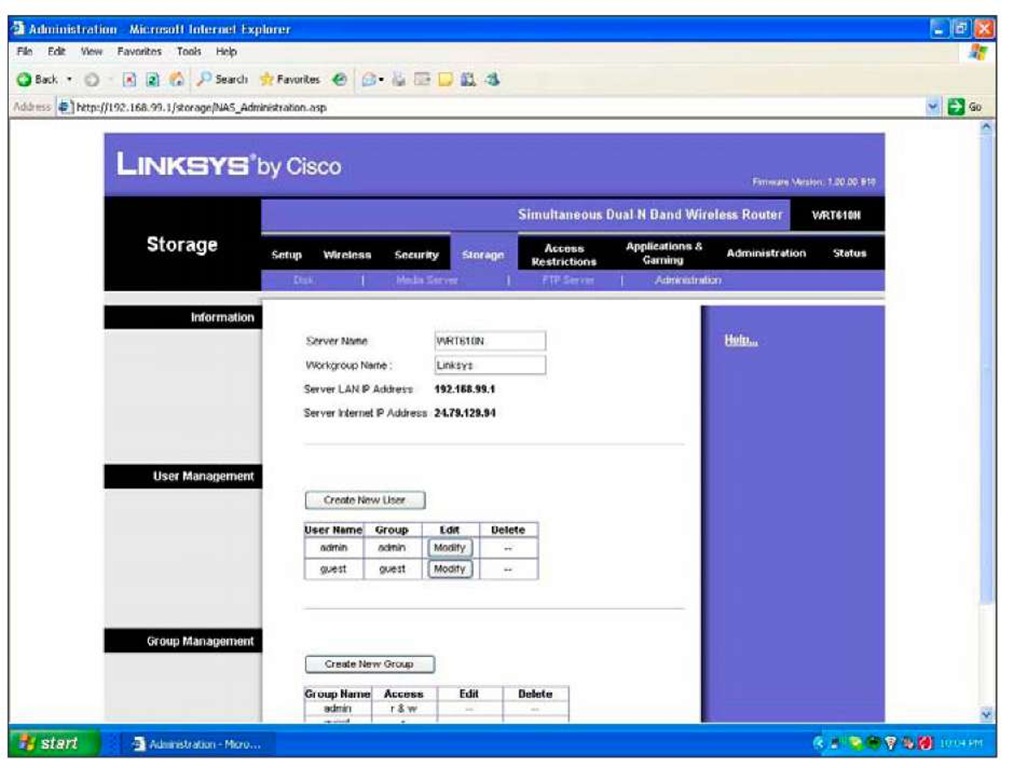
1. Select the Administration submenu (the one to the right of FTP server, not the one to the left of Status) to see a list of the users and groups as shown in Figure 7-13.
Figure 7-12:
The storage menu showing the disk has been properly partitioned.
Figure 7-13:
Showing the users and groups.
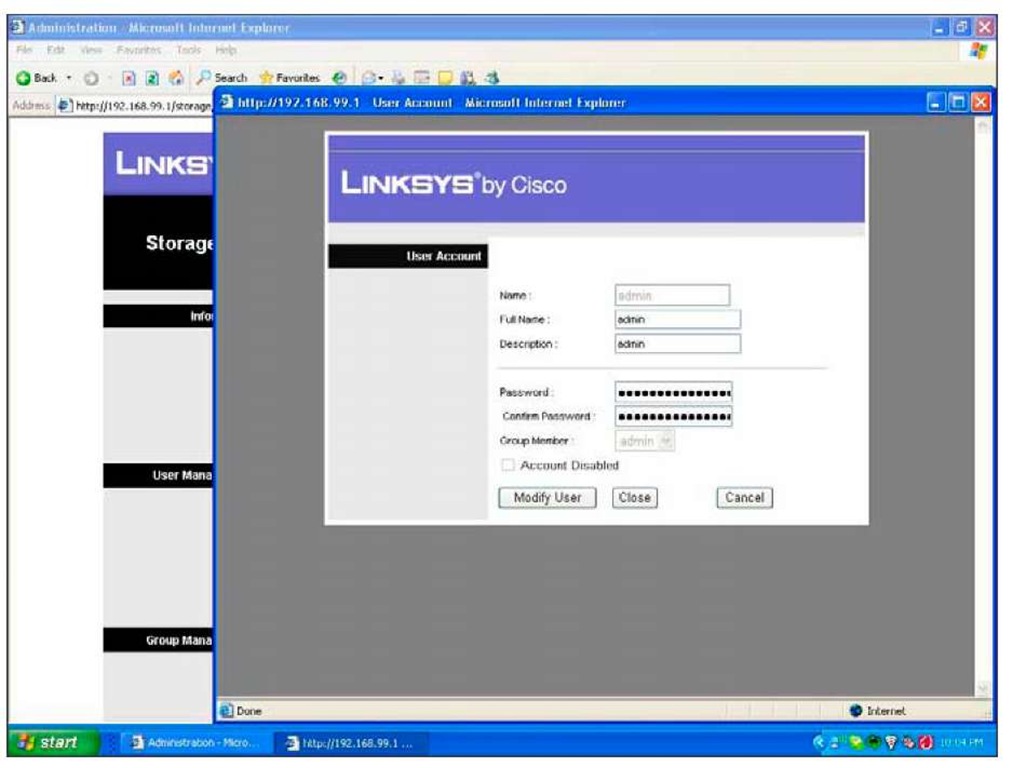
2. Click on the Modify button next to the Admin user, and a new window, like the one in Figure 7-14, appears.
Figure 7-14:
Modifying the admin user.
3. Type a new password in the Password field and then confirm it in the field below.
4. Finally, click Modify User to save the change. Repeat this process for the Guest user.
