Technique
Save Time By
Printing one picture at a time, quickly and easily
Printing bunches of pictures on that expensive paper
Posting your pics to the Web
Some Windows XP features still leave me breathless long after the novelty has worn off. The Photo Printing Wizard certainly deserves mention as one of the Windows XP little-known gems.
You may not have noticed it because you mistakenly thought the Print option just gave you a tired old Print dialog box. In fact, Print has a lot more to it — give it a try and you’ll see why.
If you’re working with digital pictures in the traditional 4:3 aspect ratio — at resolutions of 2048 x 1536, 1600 x 1200, 1280 x 960, 1024 x 768, 800 x 600, and 640 x 480, or even accurate scans of 35 mm film — the Photo Printing Wizard takes all the guesswork out of printing pictures. It crops and rotates and squeezes the most printable room out of those outrageously expensive fancy papers. It’s quite a wizard.
This technique shows you how to get those bits on paper — or on the Web — and save yourself all sorts of time.
Using the Photo Printing Wizard
The Photo Printing Wizard provides a fast, easy way to print pictures stored on your computer. Whether you’re looking for professional-quality prints on special photographic paper, or a handful of wallet-size photos on plain paper for your kids’ Valentine cards, this wizard delivers the best possible prints, within the limits of your printer and its paper.
The wizard takes the guesswork out of arranging prints on a page, as well. That photo paper is expensive, and the wizard uses every square inch. Table 43-1 shows you how many pictures fit on an 8 )2-by-11-inch page.
Table 43-1: How Many Pictures Fit on a Sheet?
| Size of Print | Pictures Per Page |
| 8 x 10 | 1 |
| 5 x 7 | 2 |
| 4 x 6 | 3 |
| 5 x 5 | 4 |
| Wallet | 9 |
| Contact Print | 35 |
If you have one or more pictures ready to print, you’re ready for the Photo Printing Wizard. Here’s my favorite timesaving way to use the wizard:
7. Use Windows Explorer (for example, choose Start My Pictures or Start My Computer) to navigate to the picture(s) you want to print.
Every picture or photo album folder (as shown in Figure 43-1) has Print Pictures on the Picture Tasks list.
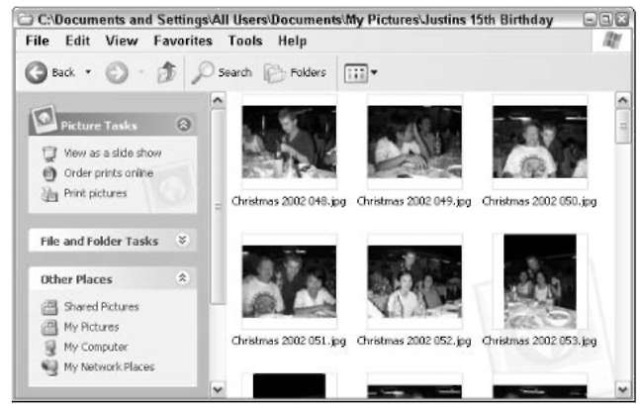
• Figure 43-1: A photo album folder.
Every folder has a type. It’s easy to get at the Photo Printing Wizard if the pictures you want to print are located inside a folder that Windows identifies as a picture or photo album folder. If you don’t see Print Pictures at the top of the task pane of the folder that contains
your pictures, the folder hasn’t been set up as an official picture or photo album folder. You can set a folder’s type by hand — see Technique 20. In this case, you can turn any folder into a picture or photo album folder.
2, If you want to print only one picture, click that picture once; then click Print Picture. If you want to print more than one picture, select them and click Print Pictures.
The Photo Printing Wizard kicks in.
2% Click Next.
The Picture Selection dialog box appears (as shown in Figure 43-2). If you preselected a picture, a check mark appears above it. If you didn’t select anything before starting the wizard, all the boxes are checked (also as shown in Figure 43-2).
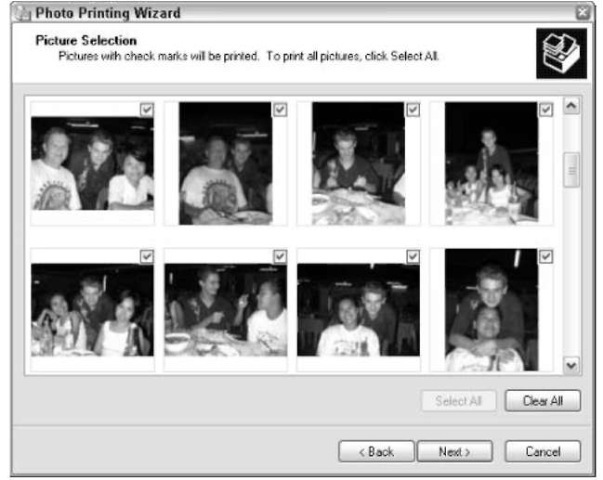
• Figure 43-2: Pick the pics to print.
4, Choose the pictures that you want to print.
Some forethought is worthwhile at this point — although you can always come back. If you’re printing on expensive paper and you don’t want to waste any, look at the sizing options in Table 43-1 and determine how many pictures you want to print. Then pick that many pictures from the
Picture Selection dialog box. For example, if you’re going to print 4 x 6s, you can pick three, six, nine, or twelve pictures to print.
5. Click Next.
6, Choose the printer you want to use from the drop-down box, as shown in Figure 43-3.
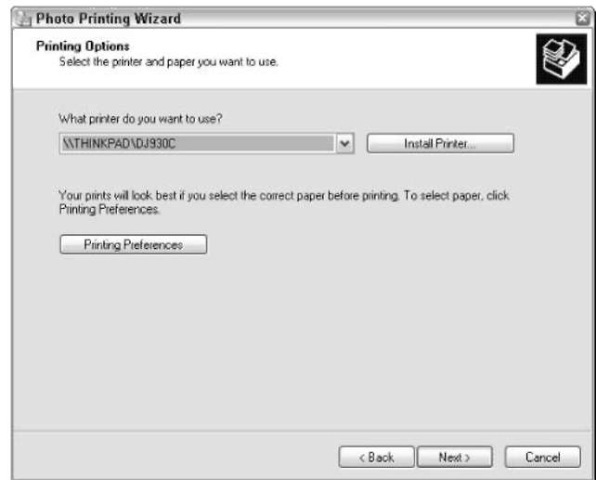
• Figure 43-3: Pick a printer and paper.
7 If you’re printing with anything other than plain paper, make sure that you click the Printing Preferences button and tell Windows about it. Click Next.
8. In the Layout Selection dialog box (see Figure 43-4), pick a print size and layout for the page, but be aware that many layouts require that the photos be cropped — sides of the pictures will be cut away, so the pictures match the print size you choose.
See Table 43-2 for details.
9. If you want to print each picture more than once, pick the number of times in the Number of Times to Use Each Picture box.
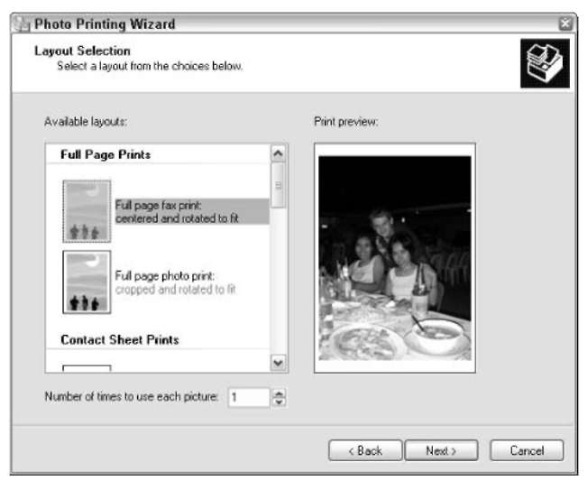
• Figure 43-4: The cropping details aren’t obvious. Consult Table 43-2.
Table 43-2: What the Layout Options Really Do
| This Option | Does This to Pictures with a 4:3 Aspect Ratio |
| Full page fax | No cropping. |
| Full page photo | Cropped slightly to print the largest picture possible. |
| Contact sheet (35 | Pictures are not cropped or rotated, and the filename appears underneath each picture. |
| pictures per page) | |
| 8-x-10-inch prints | Cropped significantly on the shorter edges. |
| 5-x-7-inch prints | Cropped significantly on the longer edges. |
| 4-x-6-inch prints | Cropped very significantly on the longer edges. Pictures of people can have part of the head lopped off. |
| 3.5-x-5-inch prints | Cropped significantly on the longer edges. |
| Wallet prints | Little (if any) cropping; nine on a page. |
The limit is 15. I have no idea why, particularly because two pages of wallet prints result in 18 pictures.
0. Click Next.
The pages start printing immediately. This can be rather, uh, abrupt, so make sure that you’re ready for it.
If you get an Internal Error message at this point — and I frequently do — the most common cause is a printer that isn’t turned on, isn’t connected correctly to your PC, or somehow isn’t accessible over your network. Make sure that the connection to your printer is working. If necessary, go into the Windows Control Panel’s Printer applet (Start Control Panel Printers and Other Hardware) and print a test page.
When the printer is done, click Finish.
Posting Pics on the Web
It’s surprisingly easy to post your pictures on the Web. Microsoft used to give away free space for posting pics, but now you have to pay for a premium MSN account. Fancy that.
These days, almost any Web hosting service sets you up with more than enough room to post tons of pictures, for a small price. (I’ve been using Dundee.net and Asianservers.com for years, but your friends may have better recommendations.) Take your hosting service’s tutorial on setting up a Web page. Chances are good you need either FrontPage or some free file transfer utility to get going. After you have a test page in place, you’re ready to start uploading pictures.
The best personal pic pages (say that ten times real fast) have an index page, consisting of thumbnails of the pictures available on the site. Many people get a program called Adobe
Photo Essentials with their PCs or cameras, and Photo Essentials does yeoman work creating a thumbnail page from a folder of pictures.
My favorite program for transforming a folder of pictures into a bunch of Web pages, including a thumbnail index page, is an odd program from “Alchemist Matt” Monroe who also writes programs that calculate molecular weights, a Rubik’s Cube solution monograph, a canonical reference of more than 500 versions of T was the Night Before Christmas, and. . . well, you get the idea. My kind of guy.
To use Alchemist Matt’s program
7. Download HTML Photo Gallery Cataloger from
jjorg.chem.unc.edu/personal/monroe/.
2. Unzip the file and double-click HTMLPhotoGallery.msi to install the program.
3. Run the program by choosing Start All Programs HTML Photo Gallery Cataloger.
You see the program’s only dialog box in Figure 43-5.
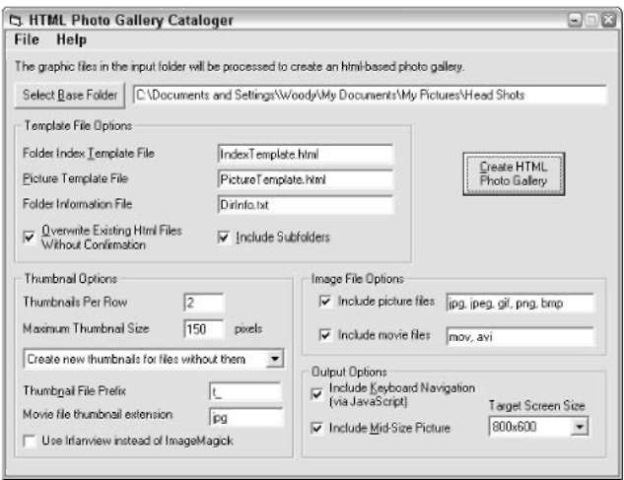
• Figure 43-5: HTML Photo Gallery Cataloger creates a page of thumbnails and turns a bunch of pictures into interlocked Web pages.
4, Pick a folder that contains all the pics you want to post, and click Create HTML Photo Gallery.
Wait a few seconds (or minutes), and you end up with a file called index.html that contains thumbnails of all the pictures in the folder, along with a series of HTML files (including navigation buttons) that can be posted on any Web site (see Figure 43-6).
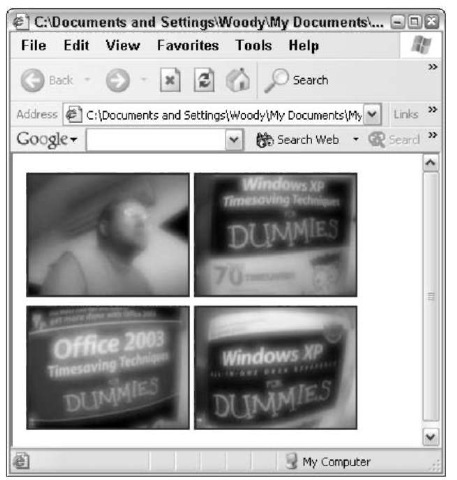
• Figure 43-6: A folder of pictures turned into an interlocked bunch of Web pages, complete with a page of thumbnails, ready to upload to my Web hosting service. Total time: about 30 seconds flat.
