Technique
Save Time By
Changing the Registry quickly and easily
Telling Windows how to speed up disk cleanup by ignoring squishable files
No doubt you’ve just finished Techniques 68 and 69, and you’re ready for a somewhat more complex Registry tweak.
Good. This one’s my favorite because it’s straightforward and quick — and if you ever have Windows run through its Disk Cleanup routine, making this one simple Registry change saves you eons of time.
There are very few worthwhile Registry changes that Tweak UI doesn’t handle. (I talk about Tweak UI extensively in Technique 5.) If you want to change your Registry settings based on a trick you saw posted on the Internet, or written up in a topic or magazine, first check to make sure that Tweak UI can’t handle it. This is one of few worthwhile changes that TweakUI can’t touch.
Scanning for Squishers
Windows XP has a remarkably thorough Disk Cleanup routine that helps you recover space on any disk. Here’s how it goes:
7. Choose Start My Computer, right-click a hard drive, and choose Properties.
The Properties dialog box appears, as shown in Figure 70-1.
2, Click the Disk Cleanup button.
I discuss this topic in Technique 56. Windows examines the contents of the disk to see how much space can be saved (see Figure 70-2).
Windows actually checks every file on the hard drive and sees how much space you can save by compressing files.
Unfortunately, the “Scanning: Compress Old Files” activity can take ages.
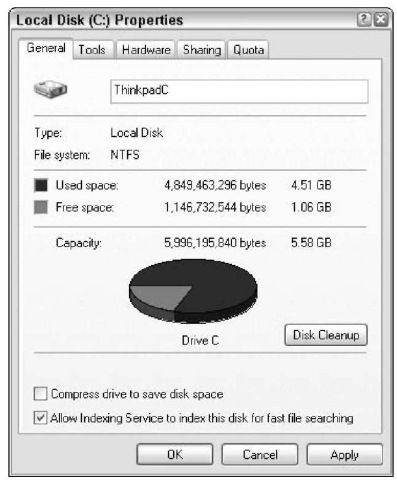
• Figure 70-1: A hard drive’s properties.
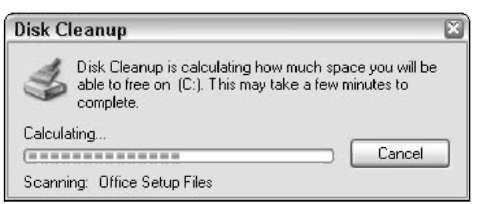
• Figure 70-2: Scanning and scanning and scanning.
With hard drives as cheap as they are nowadays, why compress a whole drive?
Speeding Up the Scan
You can set a Registry entry to turn off the scan for potentially squishable files. Here’s how to set it:
7. Choose Start Run, type regedit, and press Enter.
The Registry Editor appears.
2. In the Registry Editor, double-click the left side down to HKEY_LOCAL_MACHINE\ SOFTWARE Microsoft Windows Current Version Explorer Volume Caches Compress Old Files.
Yes, that’s the name of the key (see Figure 70-3). Don’t blame me.
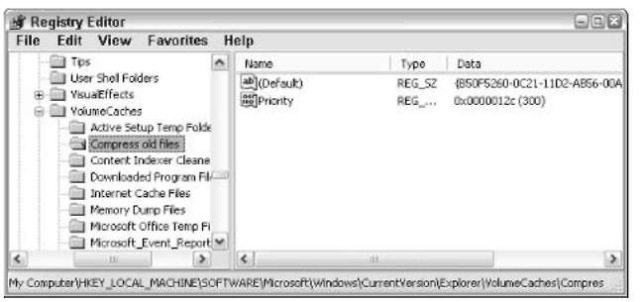
• Figure 70-3: The offending value.
3. Click once on Compress Old Files, and then choose File Export.
This is a how you back up a key to a .reg file (see Figure 70-4).
4 In the Export Range area at the bottom, make sure that the Selected Branch option
is selected, with HKEY_LOCAL_MACHINE\
SOFTWARE\ . . . and so on in the text box underneath the option.
5. Navigate to a location for the backup (in Figure 70-4, I put it on the desktop). In the Save as Type drop-down list, choose Registration Files (*.reg). Type a name for the .reg file and click Save.
It’s unlikely that you’ll ever want to change the key back, but if you ever change your mind, double-click this .reg file and this part of the Registry gets restored to its former settings. You never know.
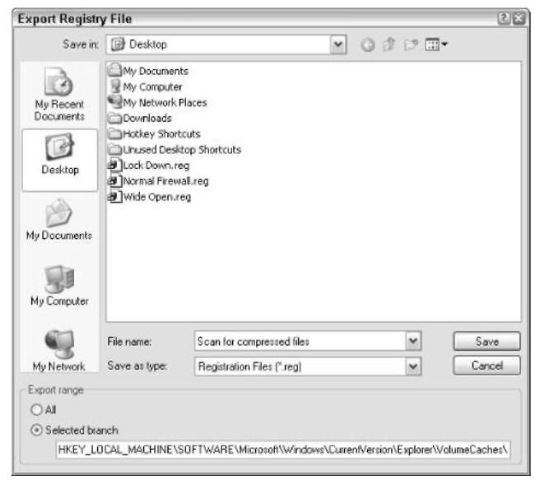
• Figure 70-4: Export this small key as a .reg file.
After exporting the key, return to the Registry Editor.
6, In the Registry Editor, double-click (Default).
(Default) is a valid value name, just like any other. You see the Edit String dialog box, as shown in Figure 70-5, without a value name.
7 Delete the stuff in the Value Data text box and click OK.
The Registry Editor looks like Figure 70-6. 8, Choose File Exit to close the Registry Editor.
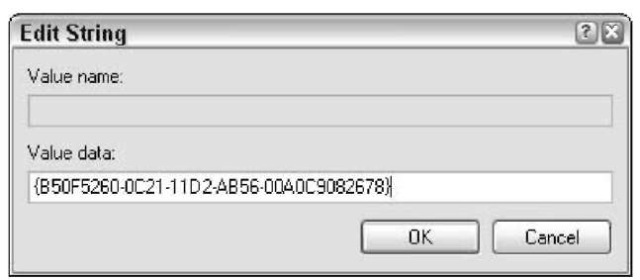
• Figure 70-5: Delete the value data.
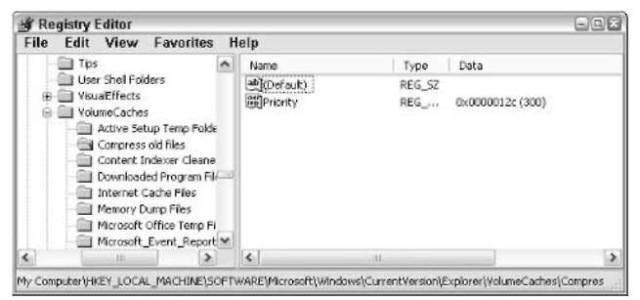
• Figure 70-6: A dean (Default) value.
9, Hold onto your hat. Choose Start My Computer, right-click a hard drive, choose Properties, and then click the Disk Cleanup button.
I bet the Disk Cleanup scan runs in one-tenth the time it took before. Slick, huh?
10. If you change your mind and you really, really want Disk Cleanup to run like a slug, er, to scan for files to compress, just double-click the .reg file you created in Step 5.
The Registry reverts to its former entry, and Disk Cleanup falls back into the Stone Age.
