Technique
Save Time By
Installing your scanner the right way — the first time
Coaxing your scanner into delivering the highest possible quality scans
Minimizing the size of the scanned files
Windows XP delivers great scanner support — primarily because Microsoft wanted to build outstanding digital camera support into Windows, and scanners kind of came along for the ride. As long as you have recently purchased a new scanner, the method you use to scan an image is remarkably similar to the one for bringing digital pictures in from a camera.
Although the computer part of getting a scanner to work has become much simpler with the advent of Windows XP, some things never change. In particular, the grunt work — cleaning the scanning bed, dusting the pictures, and on and on — hasn’t changed one bit. If you want good scans, you have to work at it. The advantage, of course, is that you only have to do the work once.
This technique shows you the whiz-bang side, but it doesn’t neglect the lowly dust speck that can make your scanned documents very hard to read. I show you how to save time when you set up your scanner. I also show you how to get your scans right the first time, so you don’t have to go back and retrace your steps.
Getting Your Scanner to Work
Almost all modern scanners come with built-in Windows Image Acquisition support. Even if you aren’t sure whether you have a WIA-compliant scanner, as long as it has a USB or FireWire cable, here’s the best way to install it:
1, Plug it in.
About nine times out of ten, that’s all it takes.
Okay, okay. I skipped over some of the details. In fact, one key detail — unlocking the lamp — is easy to overlook.
Two years ago, I always recommended that Windows XP users throw away the software from their scanner manufacturer, and rely on the software that’s built into Windows XP. I don’t know why, but in the past two years, scanner manufacturers have improved their software enormously. So it is with great fear and trepidation that I’m changing my longstanding advice: I now recommend that you read the instructions that come with your scanner, and install the software per the manufacturer’s instructions.
Try these few tricks to get your scanner working:
Take some time to get the scanner located on top of your desk so you aren’t constantly bumping into it. You need to allow room around all the edges, because sooner or later you’ll try to scan something that doesn’t fit on the bed.
Before you install the software, log on to the manufacturer’s Web site and verify that you have the most recent version.
Make sure your scanner is turned off before you plug it into the wall, and make sure it’s off before you plug the USB cable into your PC.
After you remove all the tape and gunk from the scanner, make sure you unlock the lamp. Almost all scanners ship from the factory with their lamps locked to prevent the lamps from sliding around while they’re in transit. When you unpack the scanner, you should see two or three (or ten) pieces of paper that tell you to unlock the lamp, typically by sliding a mechanical switch from one side to the other. It’s very easy. But you have to do it.
Guess who forgot to unlock the lamp the last time he installed a scanner.
Understanding DPI
Scanners can produce very coarse scans — which don’t take much time and don’t occupy much disk space — or they can produce very fine scans — which . . . well, you get
the idea. The fineness of the scan is measured in dots per inch, or dpi. In theory, you want to match the fineness of your scan to the work at hand: No need to make a very fine scan if you’re going to post it on a Web page. In practice, it behooves you to scan at a finer level — at a higher dpi — than your final product requires. Why? Reducing the fineness of a picture is easy (you can use the image resizer I describe in Technique 42, for example). If you want something finer, you have to go back and scan the original again. Windows XP’s Scanner and Camera Wizard has settings for 75 dpi (suitable for pictures on the Web), 150 dpi (good quality document setting or for newspapers), and 300 dpi (right for magazine pictures) and up.
Producing Quality Scans
Every scanner manufacturer’s software is different, but Windows XP’s Scanner and Camera Wizard works with almost every scanner in existence. Getting good scans takes some work. Here’s the fastest way I know to use the Scanner and Camera Wizard to produce outstanding scans:
7. Choose Start Control Panel Printers and Other Hardware Scanners and Cameras (as shown in Figure 44-1). Double-click the name of your scanner.
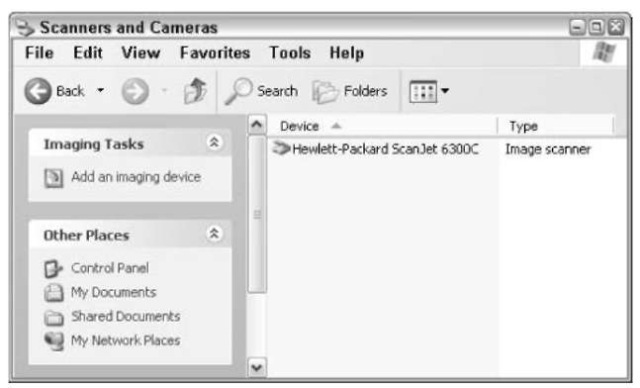
• Figure 44-1: It takes quite a few clicks to bring up the Scanner and Camera Wizard.
You see the Scanner and Camera Wizard’s opening screen.
2. Click Next.
The wizard wants you to choose your color depth preferences (as shown in Figure 44-2).
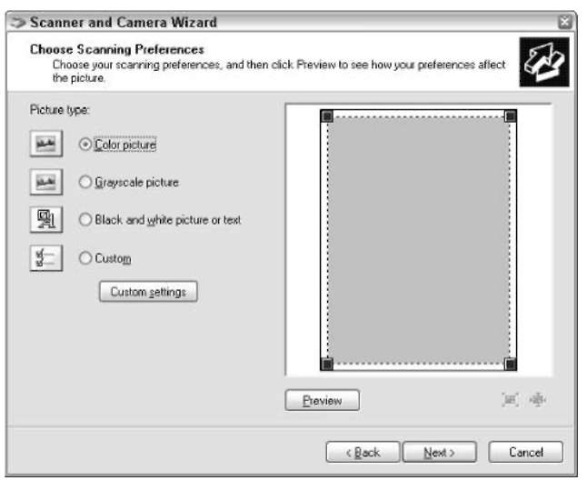
• Figure 44-2: A limited set of options that work under most circumstances.
Here’s what the preferences mean:
► Color Picture: Scans 24-bit color at 150 dots per inch.
► Grayscale Picture: Scans 256 shades of gray (8-bit), also at 150 dpi. Use grayscale when you’re scanning drawings that have many shades of gray.
► Black and White Picture or Text: Scans 1-bit (black/white), also at 150 dpi. Use black and white when you’re scanning typed text on a page, or pictures that don’t have shades of gray.
Changing the resolution to 75, 100, 150, 200, 300, or 600 dpi is easy: Just click the Custom Settings button. But the only way to change the color depth beyond the three preprogrammed settings is by manipulating the picture after you scan it.
Always scan more than you think that you’ll need. In particular, if you’re scanning a high-quality black-and-white photo, scan it as a color picture. It’s easy to cut back on resolution or color depth after you scan a photo. But if you want more color or a higher resolution, you have to scan again.
3. Before you put the photo or page in to scan
► Clean the scanning surface with an antistatic cloth.
► Use a photo brush or compressed air to dust off a photo.
► If the document or photo is smaller than a standard sheet of paper, put a piece of white paper behind it.
► If the original is bound (as in a topic), make sure that all of what you want to scan is flush up against the scanning surface.
4. Choose the color depth that you want for the scan; then click Preview.
Always preview your document before you save it (as shown in Figure 44-3). Too many things can go wrong.
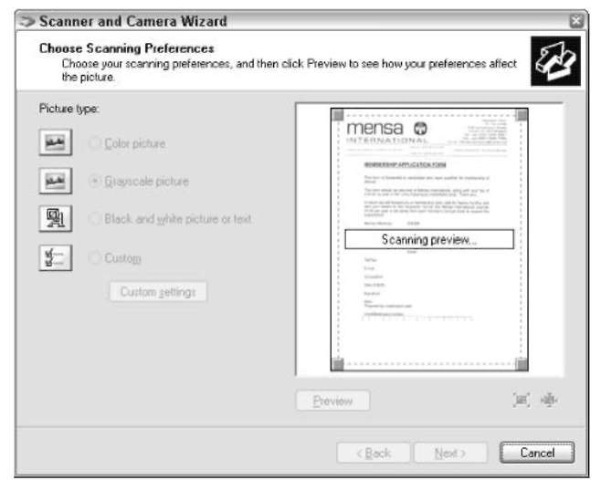
• Figure 44-3: Always preview the scan.
5. Drag the corners around in the preview pane to crop the picture or document; then click the Zoom button to rescan the picture and zoom in on the selected area.
The result looks like Figure 44-4.
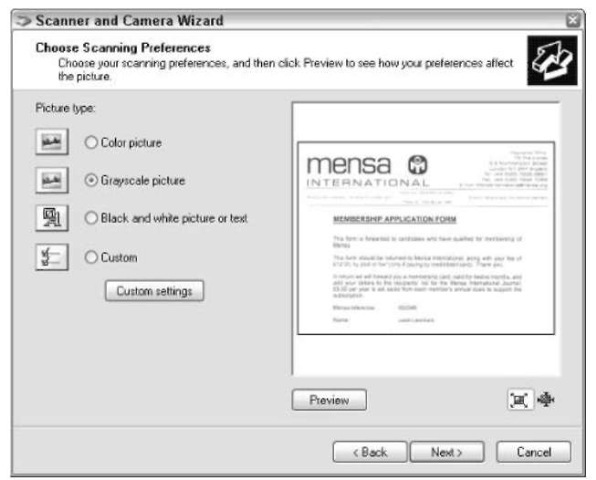
• Figure 44-4: Zoom in on your final selection.
6, When you’re happy with the scan, click Next.
The wizard then asks what kind of picture file you want and where you want to put the file (as shown in Figure 44-5).
7 Consult Table 44-1 to pick a good file format; then type in a name, click Browse to select a location, and click Next.
The wizard performs a final scan, converts the picture to the specified format, and puts it in the location you chose.
8, In the final screens of the wizard, click Next and then click Finish.
9. Check the final scan by using Windows Explorer to navigate to the picture; doubleclick it (as shown in Figure 44-6).
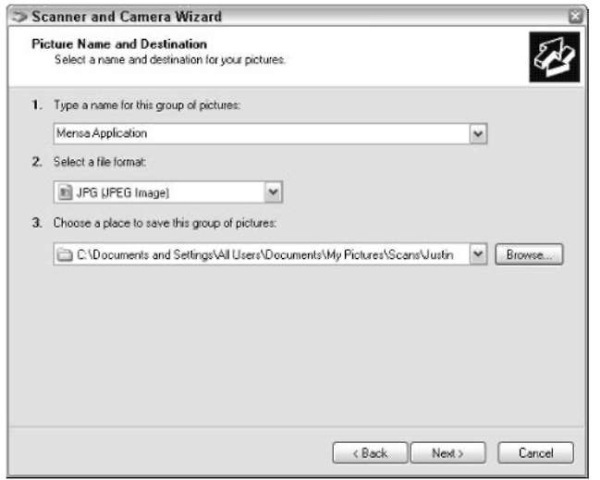
• Figure 44-5: Tell the wizard what kind of file you want to create.
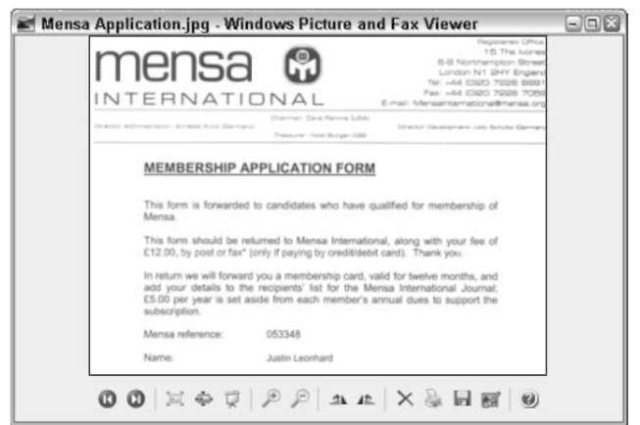
• Figure 44-6: The final scan.
If you see horizontal or vertical lines on your scan, Windows didn’t do it: Chances are good that your scanner is having a bad day or it’s dirty. Less philosophically, plenty of things inside a scanner can go wrong — the lamp, mirrors, the detectors that read pages as they’re scanned, and even power supply fluctuations. All those can cause lines. Windows can’t.
Table 44-1: Scanner File Formats
| Use This Format | For |
| JPG | Most scans. Microsoft doesn’t say how much lossy JPG compression is used — and thus how much |
| of the original image clarity is tossed out — but subjectively, this choice produces decent pictures | |
| and high-quality scans of documents. (See Technique 42.) | |
| TIF | Very high quality scans. If you’re going to try to print a scanned picture or if you need to scan mul- |
| tiple pages into one file, you need TIF. The files are huge: Apparently the wizard doesn’t even apply | |
| lossless compression. | |
| BMP | Not worth the effort. |
| PNG | Rarely used. |
