If your PC has a TV tuner, you can use Windows Media Center to watch and record TV. Windows Media Center saves recorded programs as digital files, which you can view at your leisure.
To record a program manually as it is playing, click Record on the transport controls. (The transport controls are the ones used to play, pause, fast-forward, rewind, stop, and record media; to change channels; and to adjust the volume.)
Alternatively, to configure Windows Media Center to record an upcoming program, right-click the program in the Media Center guide and click Record. (To record all episodes in a series, right-click an episode in the guide and click Record Series.)
If you like, you can program Windows Media Center to automatically record using criteria you set — for example, all episodes of a particular television series. Or you might record all instances of programs that involve a particular keyword, such as the name of an actor, the title of a program, or a phrase such as “alpine ski.”

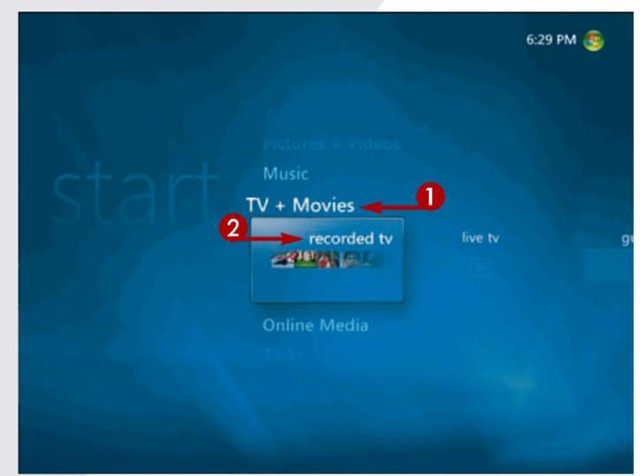
1 On the Windows Media Center Start screen, scroll to TV+Movies.
2 Click Recorded TV.
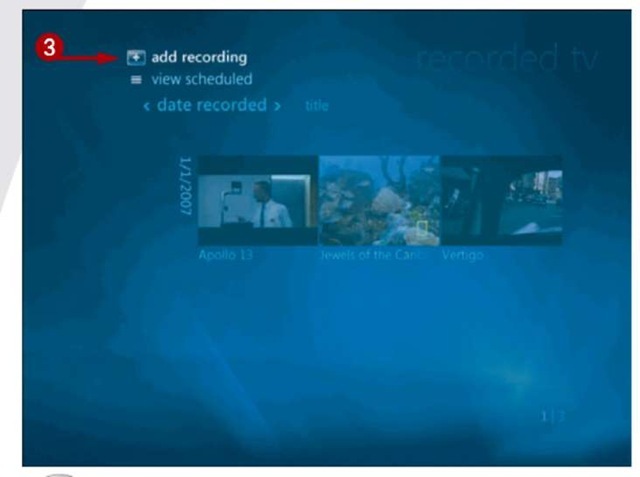
3 Click Add Recording.
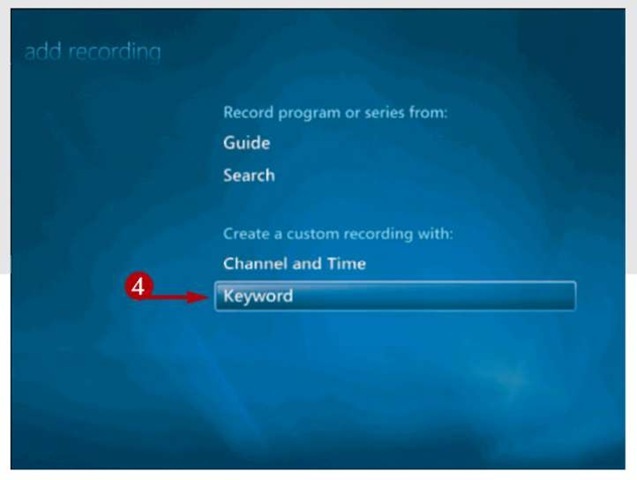
4 Click Keyword.
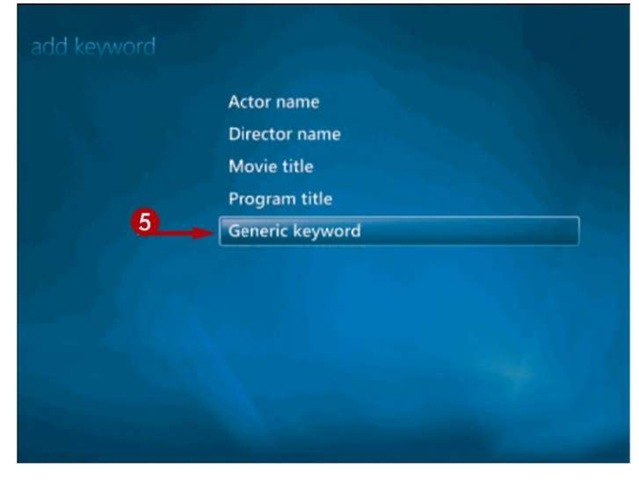
5 Click the type of keyword you want to use — actor name, director name, movie title, program title, or generic keyword.
Tip
More Options!
To set recording options for a single show or a series, scroll to Tasks on the Windows Media Center Start screen and click Settings. Next, click TV, click Recorder, and click Recording Defaults. In the screen that appears, you can specify how long you want to keep recordings, the recordings’ level of quality, and so on.
When you set up Windows Media Center to record a program automatically, you can specify the frequency with which the program should be recorded (every time it plays or once only), the type of show (that is, first run only, first-run shows and reruns, or live shows only), and a daily recording limit (no limit or once per day). You also specify how many episodes of the program you want to keep (a number of your choosing between 1 and 10 or as many as possible), and how long each recording should remain on your hard drive (until you delete it, until you watch it, or until space is needed; alternatively, opt to save the latest recordings only).


6 Enter the desired keyword or phrase.
7 Click Save.
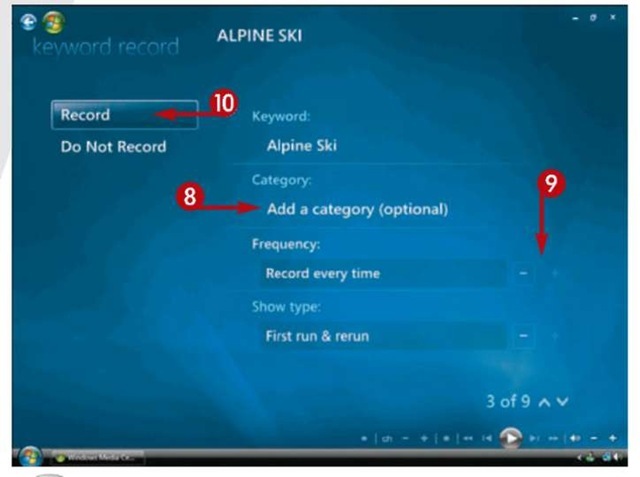
8 Optionally, click Add a Category and choose a category on the screen that appears. (This ensures that Windows Media Center records only those shows in the category you choose.)
9 Click the + or – buttons to specify other criteria, such as frequency, show type, and so on.
10 Click Record.
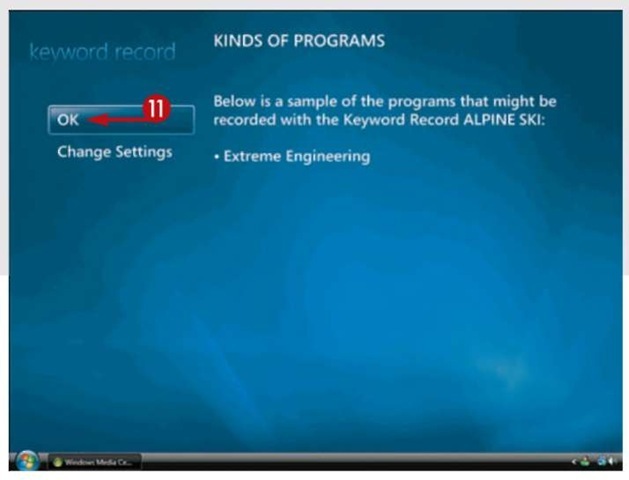
11 Click OK.
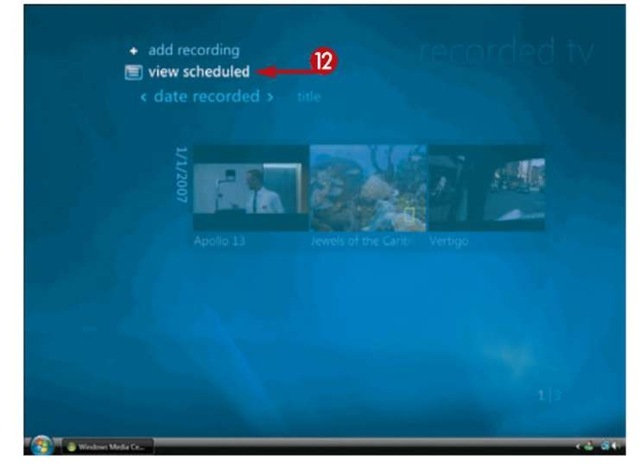
12 To view a list of programs scheduled to be recorded, click View Scheduled.
Windows Media Center displays a list of programs that are scheduled to be recorded.
TIP
More Options!
To record a certain channel at a specific time, click Channel and Time in the Recorded TV screen. Enter the channel you want to record, specify how often and when, and indicate how long Windows Media Center should retain recorded files.
