Like Adobe’s Portable Document Format (PDF), Microsoft’s XML Paper Specification (XPS) allows for the creation of fixed-format documents. XPS documents can be easily viewed, shared, printed, and archived — regardless of what program was used to create them — on many different types of computers.
You can view or print an XPS document even if your computer does not have the program used to create the document installed. For example, if someone creates a document in Microsoft Word but saves it as an XPS document, you can view and print that document even if Word is not installed on your PC.
When a document is saved in XPS format, it mirrors the original document — that is, the document created in, say, Word, Excel, or what have you — page for page. Likewise, if an XPS document is printed, the printed document will mirror the onscreen document exactly.


Save a Document in XPS Format
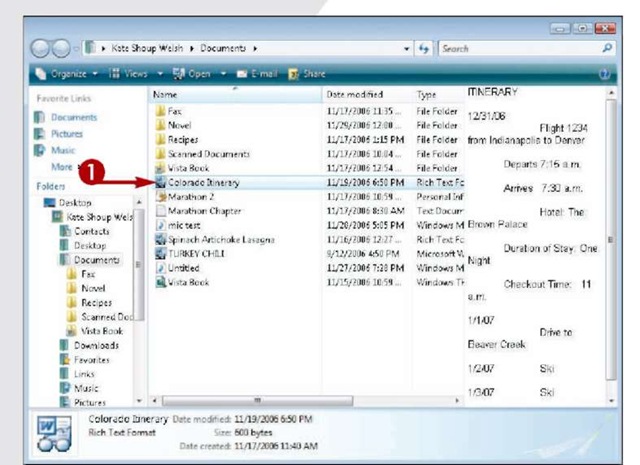
1 Locate the document you want to convert to XPS format and double-click it to open it.

The document opens.
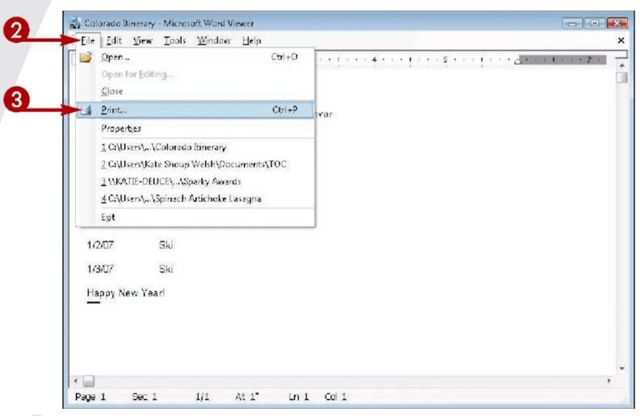
2 Click File.
3 Click Print.

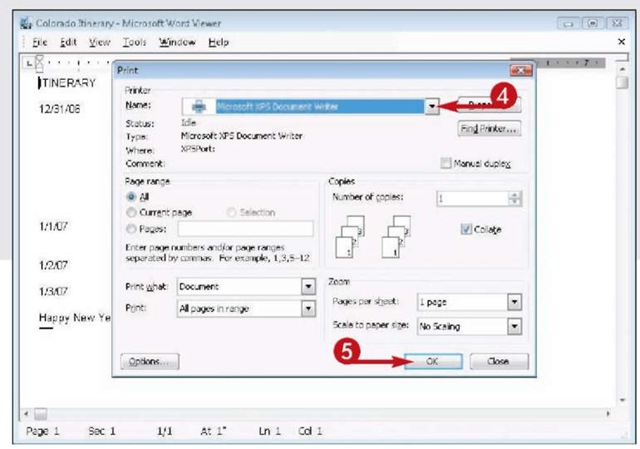
The Print dialog box opens.
4 Choose Microsoft XPS Document Writer from the Name list.
5 Click OK.

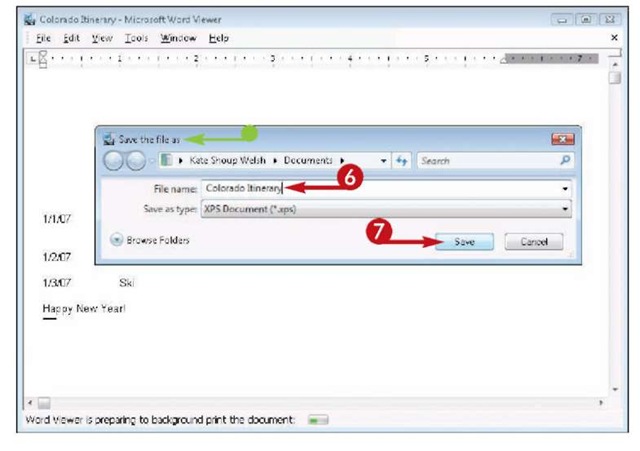
• The Save the File As dialog box opens.
6 Type a name for the file.
7 Click Save.
Windows saves the document in XPS format.
TIP
Attention!
Although PDF offers capabilities — such as editing features — beyond those supported by XPS, XPS is ideal for any user who wants to share a document with a person who does not have access to the program used to create the document.
