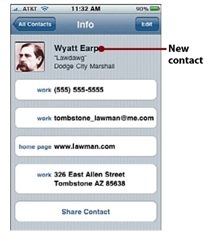
You can create new contacts on your iPhone in a number of ways.You can start with some information, such as the phone number from a recent call, and create a contact from it, or you can create a contact manually “from scratch.” In this section, you learn how to create a contact from a recent phone call, an email message, a location on a map, and manually.
Creating by Syncing
In most cases, the primary way you’ll create contacts is on a computer.You can sync contacts with a computer using iTunes or wirelessly using MobileMe to move that contact information onto your iPhone. See Chapter 4,”Configuring and Synchronizing Information on an iPhone,” to learn how to configure syncing. By the way, the process works in the other direction, too. Any new contacts you create or any changes you make to existing contact information on your iPhone move back to the computer through the sync process.


Creating a Contact from a Recent Call
You can capture a phone number associated with a recent call to add to an existing contact or to create a new one.

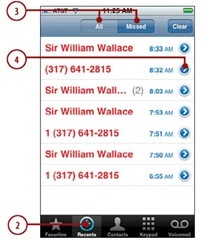
1. On the Home screen,tap Phone.
2. Tap Recents.
3. Tap All to see all recent calls or Missed to see only those calls you didn’t answer.
4. Tap the Info button for the number from which you want to create a contact. The Info screen appears; the label on the screen depends on the kind of call you select. For example, if you select a missed call,the screen label is Missed Call.
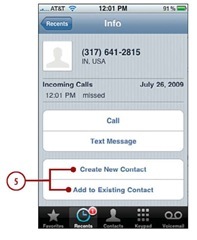
5. To add the number to an existing contact,tap Add to Existing Contact,and the All Contacts screen appears; skip to step 7. Or, to create a new contact,tap Create New Contact.The New Contact screen appears. The iPhone adds the number you selected and labels it,such as mobile.
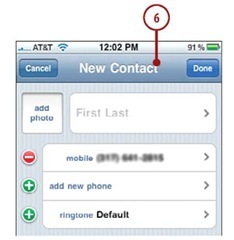
6. Use the New Contact screen to configure the new contact. This works just like when you create a new contact manually, except that you already have some information (in this example,a phone number) for the new contact. See “Creating Contacts on an iPhone Manually” later in this chapter for details. Skip the rest of these steps.
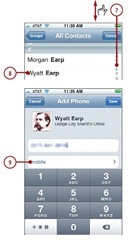
7. Browse the screen or use the index to find the contact with which you want to associate the phone number.
8. Tap the contact.You see the Add Phone screen with the information you’re adding,in this exam-ple,a phone number.
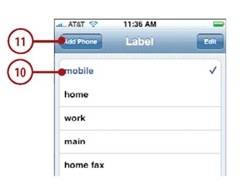
9. Tap the Label field, which is mobile by default. You see the Label screen.
10. Tap the label for the new information.
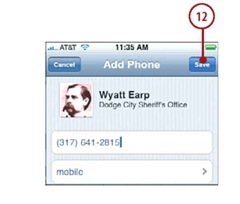
11. Tap Add Phone.You return to the Add Phone screen.
12. Tap Save. You see the contact’s Info screen,which now contains the phone number you added.
Creating a Contact from an Email
When you receive an email,you can easily create a contact to capture the email address. (To learn how to work with the iPhone’s email application, see Chapter 7,”Emailing.”)
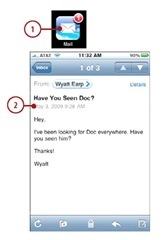
1. On the Home screen,tap Mail.The Mail screen appears.
2. Use the Mail application to read an email message (see Chapter 7 for details).
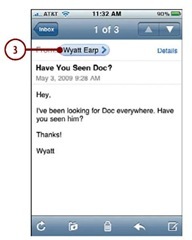
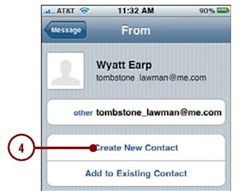
3. Tap the email address from which you want to create a new contact. The Info screen appears;the label of the screen depends on the type of email address you tapped. For example,if you tapped the address from which the email was sent,the screen is labeled From.You see as much information as your iPhone can discern from the email address; this is typically the sender’s name and email address.
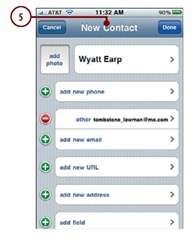
4. Tap Create New Contact.The New Contact screen appears. iPhone adds the name and email address of the new contact you selected.The email address is labeled with iPhone’s best guess,such as other or home.
5. Use the New Contact screen to enter more contact information and save the new contact.This works just like when you create a new contact man-ually,for details,see “Creating Contacts on an iPhone Manually” later in this chapter.
Add to Existing Contact
You can add an email address to an existing contact by tapping the Add to Existing Contact command.You then search for and select the contact to which you want to add the email address. Once saved, that information is associated with the contact.You can also use this command with the Maps application as shown in the next task. For example, suppose you have a contact for a company, but all you have is its phone number.You can quickly find the address using the Maps application and add it to the company’s existing contact information without retyping it.
Creating Contacts on an iPhone Manually
Most of the time,you’ll manage contact information on a computer and move it to your iPhone. Or you’ll use information on the iPhone to create new contacts so you don’t have to start from scratch. When you do have to start from scratch,you can create contacts manually and add all the information you need to them.
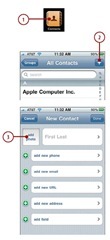
1. On the Home screen,tap Contacts.
2. Tap Add.The New Contact screen appears.You see the information you can include for a contact.You can add more fields as needed using the add field command.
3. To associate a photo with the con-tact,tap Add Photo.You are prompted to use an existing photo stored on the iPhone or to take a new photo with your iPhone’s camera.
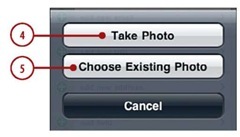
4. To take a photo of the contact, press Take Photo, and skip to step 8.
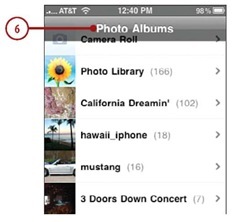
5. To choose an existing photo stored on iPhone, press Choose Existing Photo.The Photo Albums screen appears.
6. Use the Photo Album tools to move to,select,and configure the photo you want to associate with the contact (see Chapter 13).
7. Tap Choose. iPhone configures the photo and saves it to the contact. You return to the New Contact screen and see the photo you selected.
8. Or, use the iPhone camera to capture the photo you want to associate with the contact.
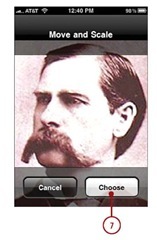
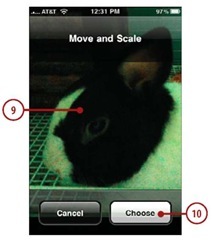
9. Use the Move and Scale screen to configure the photo. (Chapter 13 explains how to use this screen.)
10. Tap Choose.The iPhone saves the photo.You return to the New Contact screen and see the photo you captured and configured.
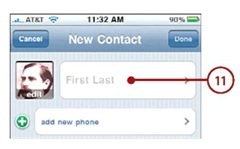
11. Tap First Last (or it could be Last First).The label you see depends on the display preference you set earlier.The Add Name screen appears.
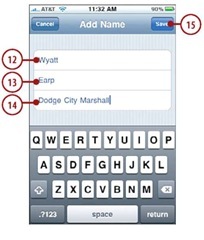
12. Enter the first name.
13. Enter the last name.
Company Contact
If you’re creating a contact for a company or other organization, leave the first and last fields empty. If you don’t want to associate a contact with an organization, leave the company field empty.
14. Enter the company for the contact, if applicable.
15. Tap Save. You return to the New Contact screen and see the information you entered.
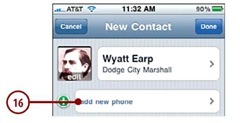
16. Tap add new phone.The Add Phone screen appears.
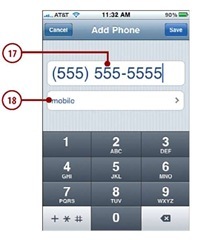
17. Enter the phone number,including area code.
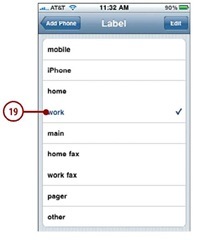
18. Tap the Label bar.The Label screen appears.
19. Tap the label you want to associate with the phone number.You return to the Add Phone screen, and iPhone displays the label you selected.
Custom Labels
You can create custom labels for various kinds of contact information. On the Label screen, scroll down the screen and tap the Add Custom Label option. The Custom Label screen appears. Create the label and tap Save. You can then choose your custom label for the new contact you are creating as well as for contacts you create or change in the future.
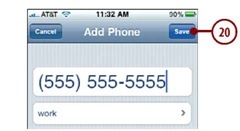
20. Tap Save. You return to the New Contact screen and see the number and label you entered.
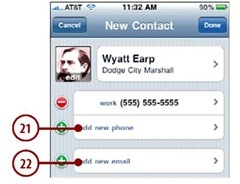
21. To add another number,tap add new phone and repeat steps 17 through 20.
22. Tap add new email.The Add Email screen appears.
23. Enter the email address for the contact.
24. Tap the Label bar.
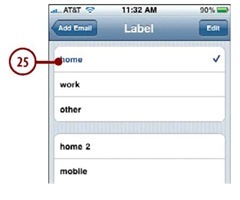
25. Tap the label you want to associate with the email address.You return to the Edit Email screen.
Edit Labels
If you tap the Edit button on the Label screen,you can delete custom labels or add them.
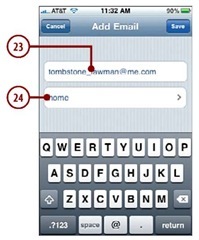
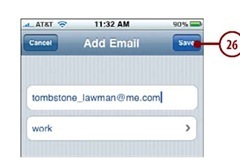
26. Tap Save.
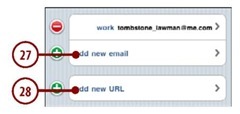
27. To add another email,tap add new email and repeat steps 23 through 26.
28. To associate a website with the contact, tap add new URL.The Edit URL screen appears.
29. Enter the URL.
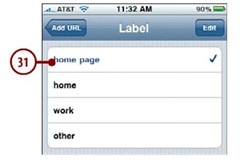
30. Tap the Label bar.The Label screen appears.
31. Tap the label you want to associate with the URL.You return to the Edit URL screen.
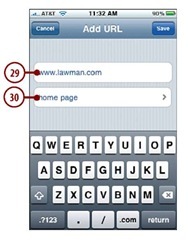
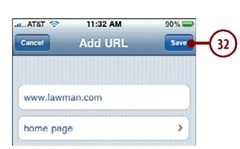
32. Tap Save.
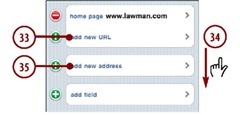
33. To add another URL, tap the add new URL button and repeat steps 25 through 28.
34. Scroll down the screen.
35. To add a new physical address to the contact,tap add new address. The Add Address screen appears.
36. If the address is not in the default country shown,such as the United States,tap the Country button.The Country screen appears.
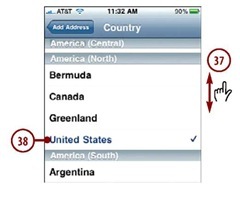
37. Scroll the screen to find the country for the address you are creating.
38. Tap the country for the address. You return to the Edit Address screen.The data for the address depends on the country you selected. For example, if the country uses state information, you see a State field. If it uses postal codes, you see the Postal Code field.
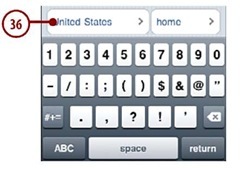
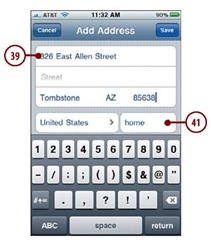
39. Tap the first element of the address,such as Street,and enter the information for that element.
40. Repeat step 39 until you’ve entered all the address’informa-tion.
41. Tap the Label.The Label screen appears.
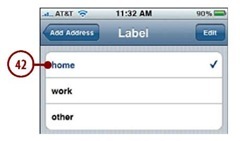
42. Tap the label you want to apply to the address.
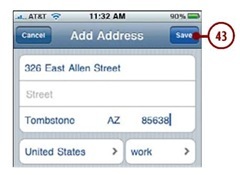
43. Tap Save.
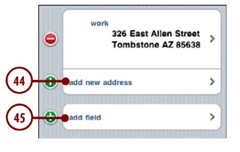
44. To add another address,tap add new address and repeat steps 36 through 43.
45. To add more fields to the contact, tap add field.The Add Field screen appears. On this screen,you see all possible data that you can add to a contact.
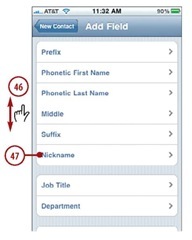
46. Scroll the screen to see the types of data you can add to contacts.
47. Tap the data you want to add.The related Add field appears. For example,if you selected Nickname,the Add Nickname field appears.
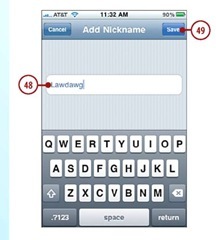
48. Use the Add screen to enter information for the field you selected. The tools on the Add screen depend on the kind of information you added.
49. Tap Save.
More on More Fields
When you add more fields to contact information,those fields appear in the appropriate context on the Info screen. For example, if you add a nickname, it is placed at the top of the screen with the other “name” information. If you add an address, it appears with the other address information.
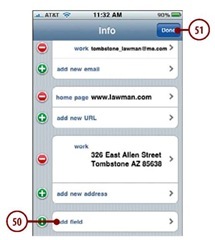
50. To add more fields to the contact, tap add field and repeat steps 46 through 49.
51. When you finish adding informa-tion,tap Done.The new contact is created and is ready for you to use, and you see the information you entered on the Info screen. It also is included in the next sync so it will be added to your contact information on your computer.
