As mentioned a moment ago, you have two options for setting up your email accounts on the iPhone:
1. Use iTunes to sync email account settings.
2. Set up your email accounts directly on the iPhone.
If you have a number of email accounts that you access from an email program on your computer (e.g., Microsoft Outlook, Entourage, and so on), then the easiest approach is to use iTunes to sync your accounts. See the "Sync Email Account Settings" section in topic 3: "Sync Your iPhone with iTunes" for help.
If you only have a few accounts, or you do not use an email program on your computer that iTunes can sync with, then you will need to set up your email accounts directly on the iPhone.
Entering Passwords for Email Accounts Synced from iTunes
In the "Sync Email Account Settings" section of topic 3, we showed you how to sync your email account settings to your iPhone. After this sync completes, you should be able to view all of the email accounts your iPhone by opening the Settings app. All you will need to do is enter the password for each account.
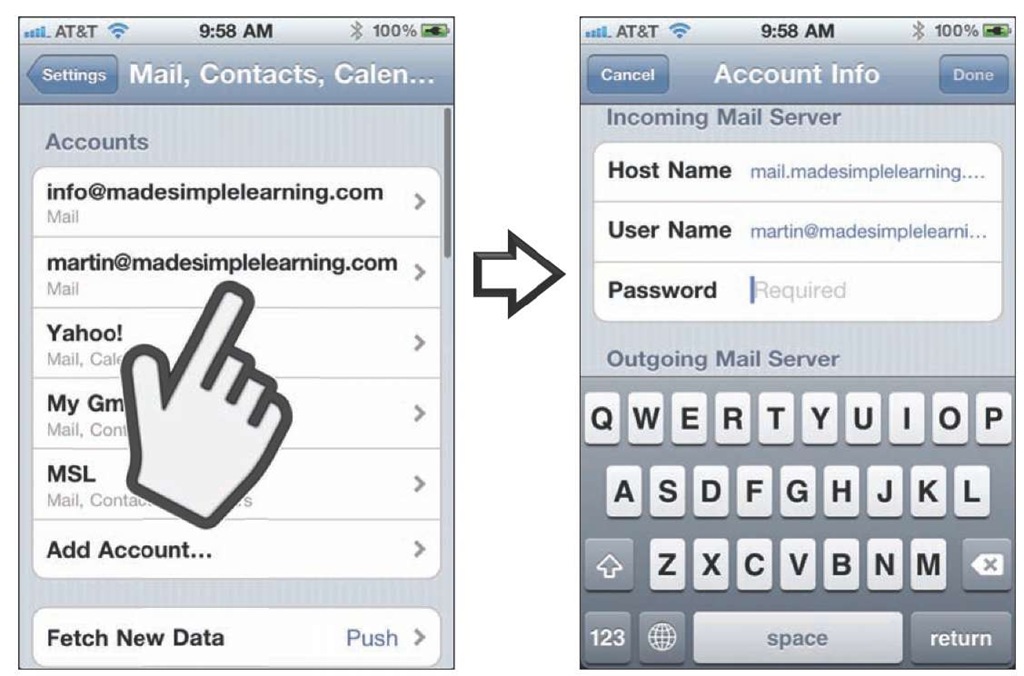
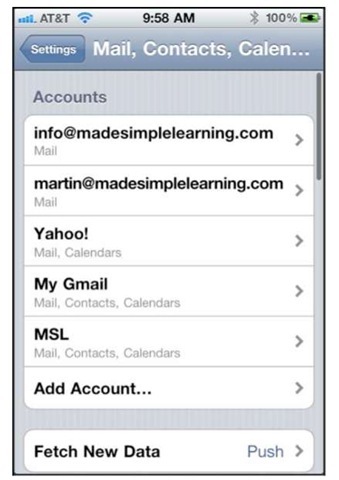
To enter your password for each synced email account, follow these steps (see Figure 12-1):
1. Tap the Settings icon.
2. Tap the Mail, Contacts, and Calendars option.
3. Under Accounts, you should see all your synced email accounts listed.
4. Tap any listed email account, type its password, and click Done.
5. Repeat for all listed email accounts.
Figure 18-1. Entering passwords for each email account synced from iTunes.
Adding a New Email Account on the iPhone
To add a new email account on your iPhone, follow these steps:
1. Tap the Settings icon.
2. Tap the Mail, Contacts, and Calendars option.
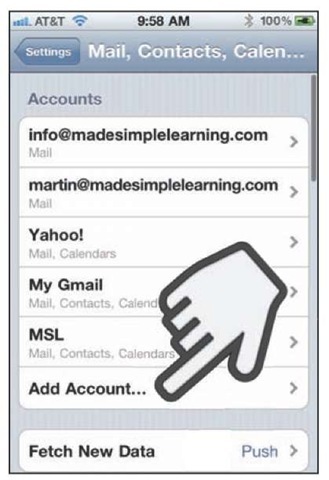
3. Tap Add Account below your email accounts.
If you have no accounts set up, you will only see the Add Account option.
TIP: To edit any email account, just touch that account.
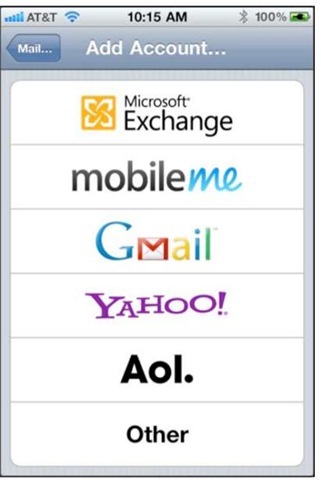
4. Choose which type of email account to add on this screen.
■ Choose Microsoft Exchange if you use a Microsoft Exchange email server.
■ You should also choose Microsoft Exchange if you use Google Calendar and Google Contacts to store your personal information, and you want to wirelessly sync them to your iPhone.
■ Choose MobileMe if you use this service.
NOTE: We will show you how to set up both Google/Microsoft Exchange and MobileMe in topic 4: "Other Sync Methods."
■ Choose Gmail if you use Google for only your email, but you do not for do not want to) wirelessly sync email with your Google Contacts.
■ Choose Yahoo! if you use Yahoo!
■ Choose AOL if you use AOL.
■ Choose Other if none of the above apply, and you want to sync a standard POP or IMAP email account. Then choose Add Mail Account from the next screen.
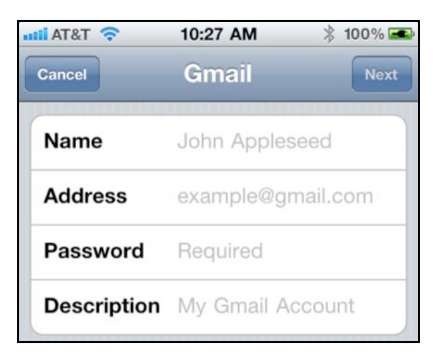
5. Type your name as you would like others to see it when they receive mail from you into the Name field.
6. Next, add the appropriate information into the Address, Password, and Description fields.
7. Tap the Next button in the upper right corner.
Specifying Incoming and Outgoing Servers
Sometimes, the iPhone will not be able to automatically set up your email account. In these cases, you will need to type in a few more settings manually to enable your email account.
TIP: You may be able to find the settings for your email provider by doing a web search for your email provider’s name and "email settings." For example, if you use Windows Live Hotmail (formerly known as Hotmail), then you might search for "POP or IMAP email settings for Hotmail." If you cannot find these settings, then contact your email provider for assistance.
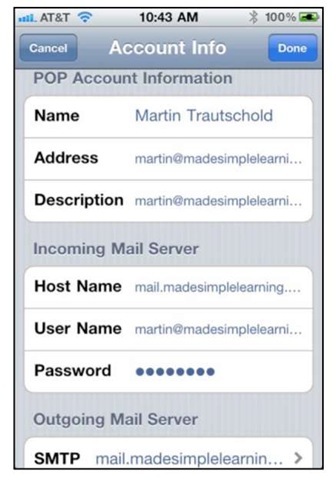
If the iPhone is unable to log in to your server with only your email address and password, then you see a screen similar to this one.
Under Incoming Mail Server, type the appropriate information into the Host Name, User Name, and Password fields. Usually, your incoming mail server is something like mail.name_of_your_isp.com.
To adjust the name of your outgoing server, tap Outgoing Mail Server. You can adjust the outgoing mail server on the following screen. These server names usually look like either smtp.name_of_your_isp.com or mail.name_of_your_isp.com.
You can try to leave the Server Name and Password fields blank. If that doesn’t work, you can always go back and change them.
You may be asked if you want to use SSL (secure socket layer), a type of outgoing mail security that may be required by your email provider. If you don’t know whether you need it or not, just check the mail settings with your email provider.
TIP: The authors recommend that you use SSL security whenever possible. If you do not use SSL, then your login credentials, messages, and any private information is sent in plain text (unencrypted), leaving it open to snoopers.
Verifying that Your Account Is Set Up
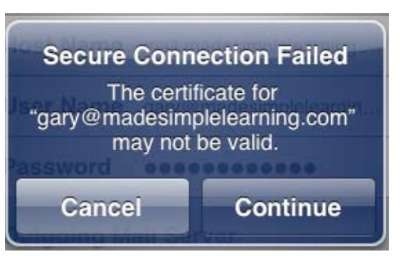
Once all the information is entered, the iPhone will attempt to configure your email account. You may get an error message; if that happens, you need to review the information you input.
If you are taken to the screen that shows all your email accounts, look for the new account name.
If you see it, your account was set up correctly.
Fixing the Cannot Get Mail Error
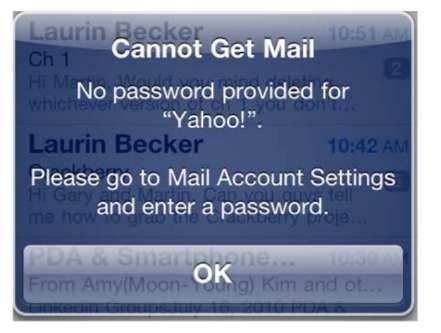
If you tap Mail icon and you receive an error that says "Cannot Get Mail – No password provided for (your account)," you will need to enter your password.
Review this topic’s "Enter Passwords for Email Accounts Synced from iTunes" section for help
