Saving Custom Brushes
The Brush Manager makes saving your own custom brushes simple. In this section, you will create a custom version of the Smooth brush. This brush will be saved in the default ZBrush brushes folder, where it will be loaded each time ZBrush starts.
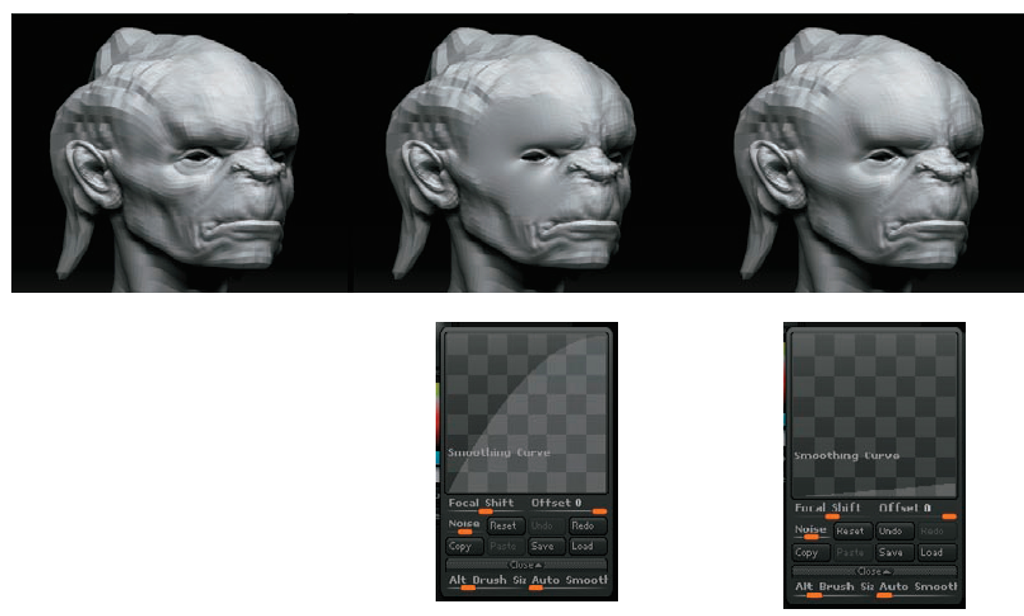
In Figure 2.12, notice how the Smooth brush can overpower the surface, removing much more form than you might intend. By adjusting the Smoothing Curve and Smooth brush settings, we’ll create a brush that does not have this effect. We can then save it as a custom brush for later use.
Figure 2.12 The Smooth brush with default settings can be destructive to surface forms.
Experiment with these brushes and make your own. After getting some experience with the ZBrush toolset and customizing some brushes, you can build a personal library of brushes. Follow these steps to create and save your own custom brush:
1. Select the Smooth brush from the Brush palette. Set BrushMod to 0 and click the Clone button. This creates a copy of the Smooth brush that we can alter rather than replacing the brush.
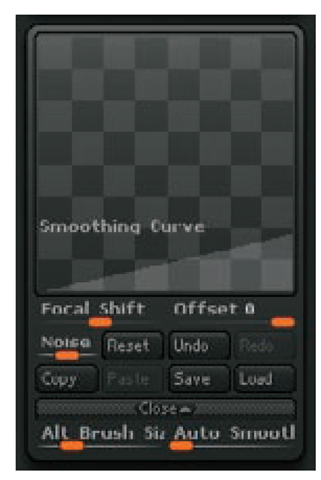
2. At the top of the Brush menu is the Curve submenu. Open this and while holding the Shift key alter the curve to look like Figure 2.13. When you press Shift, the Brush Curve will convert itself to the Smooth Curve.
This ensures the brush will be weaker at its center of influence than the default Smooth. The far-left point represents the strength of the brush at the outermost ring; the right point represents the strength at the center of the brush. Try this brush on a surface. Notice how the effect is much softer and less destructive.
3. To save this brush, click Save As and name the new brush softSmooth. If you save in Zbrush4/Zstartup/brushPresets, the brush will be available each time you start ZBrush. The Brush Manager will also save any alpha and stroke settings when you save the brush.
If you want this brush in the Lightbox instead, save it to Pixologic + ZBrush4 + ZBrushes. This causes ZBrush to load the brush into the program without cluttering the brush menu with it. You can easily access it in Lightbox whenever needed.
Figure 2.13 Modify the Smooth Curve to look like this to create our custom softSmooth brush.
The Clay Brushes
ZBrush 3 includes several brushes designed to take advantage of the ability to interactively sculpt millions of polygons. These brushes work on the highest subdivision levels of the ZTool; I call them the Clay brushes. They include Clay, Claytubes, Snakehook, and Rake, as well as several brushes that are variations, such as Mallet, Slash, and Gouge.
The Clay brushes are designed to take advantage of the capability to manipulate millions of polygons in real time. Unlike the Standard, Inflate, and Layer brushes, the Clay brushes function best when the mesh is at a higher subdivision level. These brushes add material in a loose organic stroke, which feels like actual clay. Figure 2.14 shows the difference in the same stroke on a low poly sphere and a higher subdivided one. The sphere on the left is 8,000 faces while the one on the right is 2 million. ZBrush will allow you to subdivide any mesh to a level that the current machine can handle based on how much physical RAM is installed.
Figure 2.14 Claytubes and rakes on both a low-res and a high-res mesh. Notice the increased fidelity of the brush effect on the higher-resolution mesh.
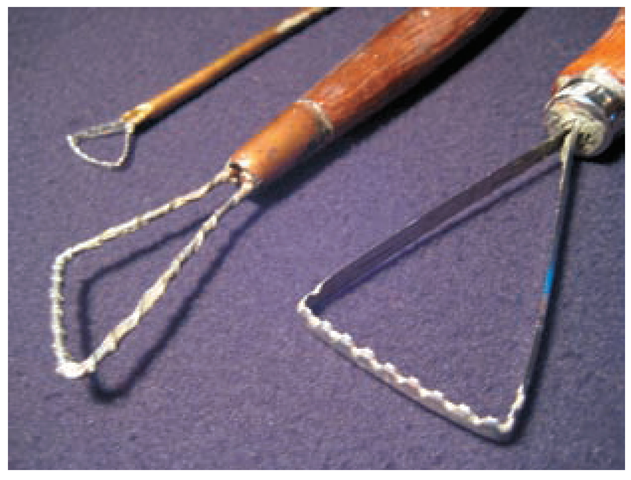
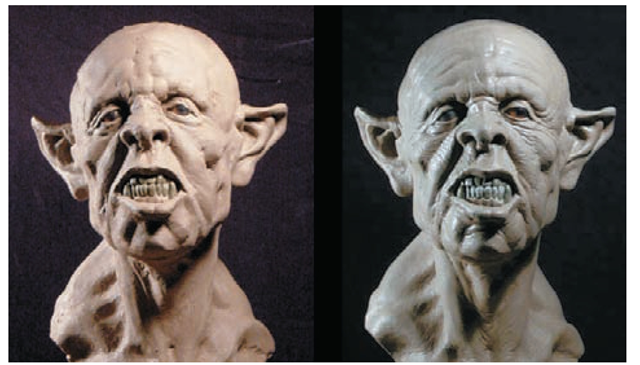
The Rake tools in ZBrush are based on a type of real-world sculpting tool. In clay sculpting, rakes are small, serrated blades that are used to scrape down clay at levels determined by how sharp and deep the teeth are (Figure 2.15). Rakes allow the sculptor to rough in forms in a loose manner, then refine them by using smaller and smaller rakes until the whole surface is smoothed. In Figure 2.16, I started the ogre bust with basic planes using rake strokes; as I work the surface, the rakes become smaller and the surface finer.
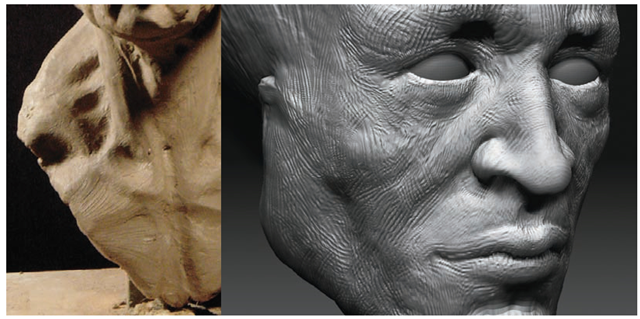
The procedure for working with rakes is to crosshatch across the form you are trying to refine, using smaller draw sizes with each pass. Figure 2.17 shows how this is done in water-based clay. With a combination of crosshatching and stroking along the direction of the form, you can attain a pleasing surface and easy transitions between forms.
Figure 2.15 Real-world rakes
Figure 2.16 The ogre on the left consists of the basic forms with prominent rake marks; the right image shows the ogre bust after the rakes have been refined and the surface detailed.
Figure 2.17 Close-up of rake strokes in water-based clay on the left and ZBrush on the right
Typically, forms are built up with any combination of the Claytubes, Standard, and Inflate brushes and then raked down into more specific forms with the Rake tool (Figure 2.18). This may be a difficult concept to fully grasp without seeing it in action. To see rakes in use, watch the video files included on the DVD for this topic.
Figure 2.18 An example of Rake and Claybrush strokes at different levels of refinement
What Is a Rake? Featured Artist: Cesar Dacol
A rake is a tool used by sculptors to remove excessive material, such as clay, from a sculpture. By employing the rake, you are able to shape and define the forms of our creation.
In sculpture, there two methods of creation. One is additive in the form of clays. The second is subtractive, as in marbles. Each method utilizes the rake in its sculptural process. With marble, you use various chisels with ever-refining teeth to form, shape, and polish the piece. You use clay rakes in a similar manner to define the silhouette and curvature of your forms, refining them to a smooth finish (if that is the desired effect).
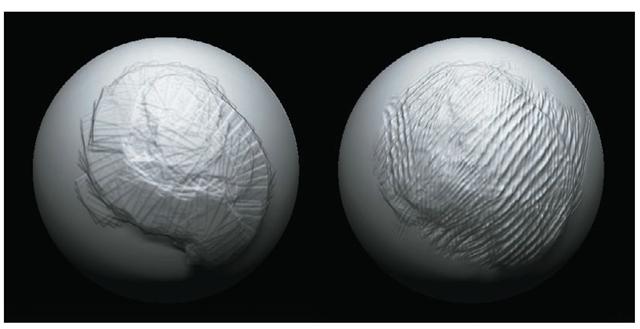
Here we have a sphere in which I have dragged two opposing strokes across the surface. It is where the two strokes meet that the most material is being removed:
By pulling the brush in the direction of the form we want to express and countering the stroke in the opposite direction, we’ll slowly shape the contour. As we repeat this technique over and over, we create the desired form or shape.
We continue this process with smaller and smaller diameters or brushes. The finer the teeth and density of our mesh, the closer the surface will resemble flesh.
In the following image, we have a sphere with a wavy line down the center. Notice how the bounce of light is enhanced by the directionality of the rake groves. This effect creates a tidy path for light to travel down and within.
This idea of strokes and patterns manipulating light patterns is not a new one and in fact has been utilized by oil painters on their canvases for centuries. Strokes are an essential part of sculpture and drawing, and you should pay attention to them. Whether we intend it or not, we are sending a message with the quality of our strokes.
Here you see the same form with two different stroke patterns. Notice how the light is perceived differently. Also notice how your eye follows the direction of the strokes.
Directionality is obviously the goal here. Observe your face in the mirror. Notice how there is a natural tension to the surface of your skin as it is stretched over fat, muscles, and bones. There is a directionality to your pores, which in turn are affected by gravity and such.
If you are aware of these rules, you can employ them in your sculpture and have light travel over your forms.
Of course, if you use this method, avoid smoothing your model completely or removing all the Rake tool markings. Such markings lend an energy to the sculpture.
By utilizing finer rakes or smaller diameters, you can define the forms more precisely, eventually reaching a point where you’re defining the most minute surface patterns of the skin. Rakes were not the only tool and brush utilized to create our final image, but they were the foundation.
The Polish, Planar, and Trim Brushes
ZBrush now comes with a variety of tools for creating hard-surface models.
These brushes are new developments for ZBrush that began in version 3.5 and have been in constant development through to version 4.
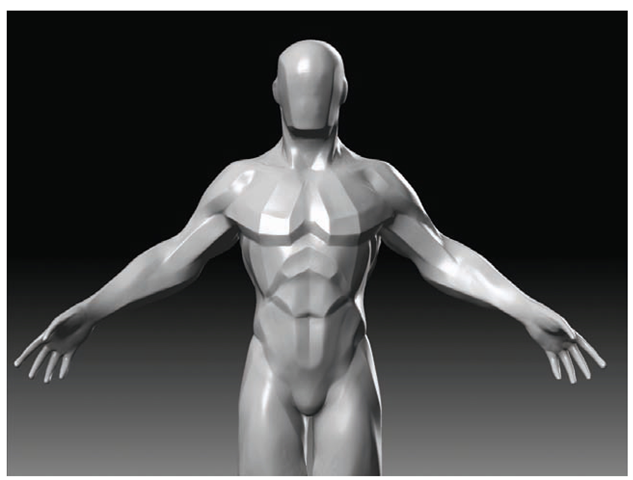
The Polish, Planar, and Trim brushes are exceptional for creating complex man-made shapes like armor and weapons. The brushes can also be useful for doing what is called planar analysis. Planar analysis is where a complex organic shape is broken into its most basic planes to help analyze and understand the surface and how to sculpt or draw it. It’s like taking away all the curves to help you see the underlying form and structure. One important part of making sculptures that feel and look natural is to retain the basic structural form of each part of the figure. This is best accomplished by understanding how to reduce objects into their basic shapes. Figure 2.19 shows a human figure with one kind of planar analysis applied.
Figure 2.19 This human figure is reduced to basic planes to help you understand the forms.
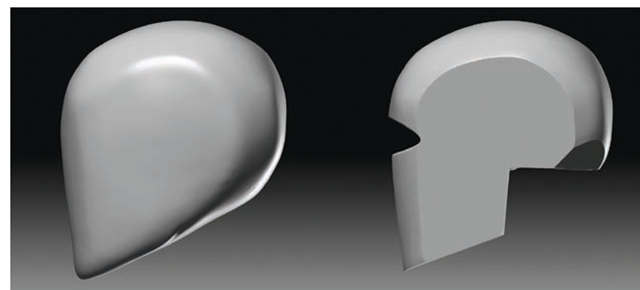
Figure 2.20 shows the basic head form sculpted with ZBrush standard sculpting tools as well as the same form sharpened and planed with the Polish, Trim, and Clip brushes.
While we work on the head in this section, I will point out some of the kinds of basic planes. A valuable exercise is to re-create a basic planed version of a head or even a full human body. This helps you grasp the most fundamental form of the shapes you are trying to create. See my topic ZBrush Digital Sculpting Human Anatomy (Sybex, 2010) for a tutorial on sculpting a planed human body.
Figure 2.20 Head planar analysis

![tmpa699-76_thumb[2][2] tmpa699-76_thumb[2][2]](http://what-when-how.com/wp-content/uploads/2012/06/tmpa69976_thumb22_thumb.png)
![tmpa699-77_thumb[2][2] tmpa699-77_thumb[2][2]](http://what-when-how.com/wp-content/uploads/2012/06/tmpa69977_thumb22_thumb.png)
![tmpa699-78_thumb[2][2] tmpa699-78_thumb[2][2]](http://what-when-how.com/wp-content/uploads/2012/06/tmpa69978_thumb22_thumb.png)
![tmpa699-79_thumb[2][2] tmpa699-79_thumb[2][2]](http://what-when-how.com/wp-content/uploads/2012/06/tmpa69979_thumb22_thumb.png)
