In this section we’ll explore the ZBrush sculpting tools by creating a lion head door knocker from a 3D Plane tool. This tutorial will expose you to many of the ZBrush sculpting brushes, modifiers, and masking tools.
In ZBrush you can work with models, tools, or documents. For sculpting characters we’ll focus on tools and models. When creating final rendered images in ZBrush, we’ll make use of the Document settings.
Creating a 2.5D Pixol Illustration
ZBrush works with essentially three types of objects: models, ZTools, and documents. Models are geometry that either you create in ZBrush using primitives and ZSpheres, or obj models imported from third-party applications like 3ds Max or Maya. These models can then become tools when you begin to subdivide and sculpt or paint on the surface. ZTools are a ZBrush file type for storing 3D models with multiple levels of subdivision as well as texture information. Documents are essentially images. Documents are a hybrid between painting and rendering. You can place your ZTools in the document space, and light, shade, and render them as a 2.5D illustration.
2.5D illustration is a ZBrush term for an illustration tool that allows you to paint color, materials, and depth. The ZBrush canvas is “depth enabled,” which gives ZBrush its powerful image-creation capabilities.
The ZBrush workspace is called the document window. This is where you’ll sculpt and paint your characters. The document window has many powerful and unique aspects that are often overlooked when you are not using ZBrush as a purely illustration or concept design tool.
The artist can “drop” tools in the document window, interactively lighting and shading them in 2D. You can even continue to sculpt on your illustration. Although many of the document-based tools are not useful to a production environment outside of the art department, I feel it is important to cover them here as they form the basis of ZBrush’s toolset and influence how many of the tools and menus behave.
Documents can make use of layers as well as interactive lighting and rendering, but documents cannot be rotated and edited in 3D space; they are composed ofpixols. Pixols are special pixels that carry color information as well as depth and material data.
For the purposes of sculpting and painting characters, we typically do not use the document settings, but there are cases where these tools will come in handy. Some brushes, especially those we use in the Projection Master plug-in, are document based, so it is important to understand the distinction between documents and tools as well as know how to use them effectively together.
The purpose of this tutorial is to introduce you not only to sculpting in ZBrush but to the different methods of working in the program. While making this door knocker we’ll be using primitives, the standard sculpting tools, alphas, and brush strokes. First we’ll use ZBrush primitives to sculpt and assemble the door knocker.
Sculpting a Lion’s Head
You will begin by sculpting the lion head. For the lion bas-relief we’ll use a ZBrush primitive, the Plane3D tool.
I want to remind you that I am constantly moving the ZTool as I work, sculpting from all angles. You can see this in the video captures of the tutorial sessions provided on the DVD with this topic.
1. Under Tool, click the active tool icon and select Plane3D. Click and drag on the canvas with the left mouse button to draw the tool.
2. Before you can edit this, you need to enter Edit mode. Press T on your keyboard or click the Edit button at the top of the screen (Figure 1.18).
Figure 1.18 Edit mode can be accessed via this button at the top of your screen or by pressing the T key.
3. To change materials, open the Material menu. ZBrush has several default materials available to you. Typically I use the MatCap White Cavity shader over the default red wax. The translucency in red wax makes spotting surface form a little tricky. Click the Current Material box at the left of the screen or under the Material menu to open the Material Palette window. From this palette select the icon swatch for the material you prefer. For this tutorial I used the White Cavity shader. It is under MatCap Materials in the Material Browser.
If you neglect to enter Edit mode after drawing a model on the canvas, ZBrush will continue to add copies to the document window, dropping each one on the canvas as you go.
4. The plane is now in Edit mode, but this is a ZBrush primitive and not a polymesh. Polymeshes are polygonal 3D models that can be subdivided and sculpted inside ZBrush. Models imported into ZBrush are polymeshes by default, but meshes we create from primitives need to be converted with the Make PolyMesh3D button under the Tool menu. This converts the ZBrush primitive into a polymesh, which we can now use to sculpt on.
At this stage, let’s activate sculpting symmetry. This allows you to sculpt one side of the lion’s face while the other side automatically mirrors your changes. To turn on Symmetry, press the X key on the keyboard to activate X Symmetry. X Symmetry will mirror your sculpting actions across the center line of the figure. The Symmetry options are located on the Transform menu at the top of the screen. To access the options, select Transform + Activate Symmetry. You’ll see a red dot on the other side of your model that mirrors your brush strokes. It is generally a good idea to start a sculpture with Symmetry turned on. Always turn off Symmetry in the final stages to add another level of realism by breaking the perfect balance between the forms or adding little differences between the sides.
At this time you may also turn on Perspective Camera. By default ZBrush uses an orthographic camera, but if you want a view that is more natural, click Draw ^ Persp to activate the perspective view. The focal angle can be adjusted with the Focal Angle slider. The Floor button will activate a floor grid that displays in the document window. This can be useful for finding your orientation when working with modifiers that take an X, Y, or Z setting, such as those under the Tool ^ Deformation menu. You may also activate a grid for each axis that can be used when mirroring and merging geometry.
5. You may now sculpt on the surface of the plane. At the top of the screen select the Brush menu and tear it off with the circle icon so it docks to the side of the screen for easy access. Click the active tool icon and select the Standard brush. You want to make sure Stroke is set to Freehand and that Alpha is turned off. Set Draw Size to about % the plane size and leave Focal Shift at 0 and ZIntensity at 20. Your Brush,
Alpha, and Stroke settings can also be accessed via the left screen menu.
6. Click and draw on the model surface now, and you will see it begin to pull at the polygons. The effect is faceted because we are currently at the lowest subdivision level (Figure 1.19). You can add geometry by subdividing the model once with Tool ^ Geometry ^ Divide to add one subdivision level.
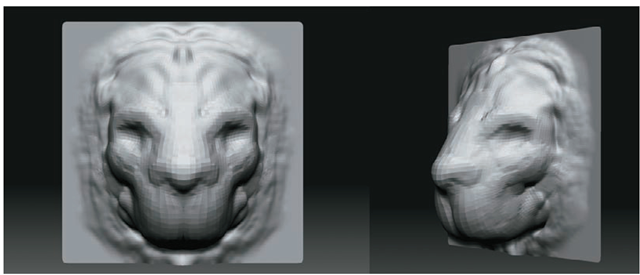
7. Begin to block in the basic form of the lion head (Figure 1.20). Remember to add as well as subtract with your brush and rotate often around the shape. Don’t get overwhelmed with making little details at this stage. Instead, establish the primary forms of the lion’s face and their positions in relation to each other.
Figure 1.19 When sculpting at lower subdivision levels, the strokes will appear faceted.
To add a subdivision level use Ctrl + D; to step up your subdivision levels, press D; to step down, press Shift+D.
This is easier to do by moving often and working the entire sculpture at once. If you spend too long in one view, the sculpture tends to flatten out. If you sculpt entirely from one view, it may look great until you move the model. A single view can be misleading. Looking at the sculpt in Figure 1.21, it is difficult to perceive the flattening, which is obvious when viewed from the side. This is why you want to be sure to rotate often while you work. Figure 1.22 shows how I corrected the flattening from the top view.
Don’t neglect looking at the sculpture from the top and bottom. Typically the viewer won’t see it from such an extreme view, but it helps you quickly identify whether the forms of the face are flattening out or turning nicely in space.
8. While working, establish the forms that are advancing in space, like the snout and brows, as well as those that recede, such as the eye sockets and mouth. You can cut in with your brush by clicking the ZSub button at the top menu bar or by simply holding down the Alt key while you sculpt.
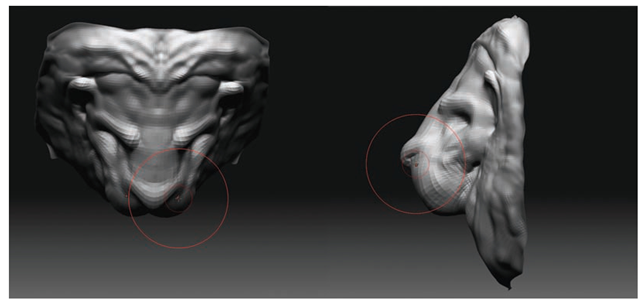
9. To quickly bring the faces of the snout forward and create depth in the head, in a three-quarter view use the Move brush (Figure 1.23). The Move brush will grab and pull vertices underneath the draw radius. Use the Intensity slider to increase the strength of the move. I also use the Move brush to pull the points of the square plane into silhouette with the outline of the lion’s mane.
Mouse Average, LazyMouse, and Trails
Under the Stroke menu you will find several options that affect how your brush is drawn across the surface of the sculpture. The Freehand stroke is the most widely used as it behaves like a paintbrush tool in Photoshop. Mouse Average is used to average the instances of each alpha as you stroke along the surface. This can reduce “stuttering” in the stroke or dotting when working at higher subdivision levels. When working on lower levels, keep this set to 1.
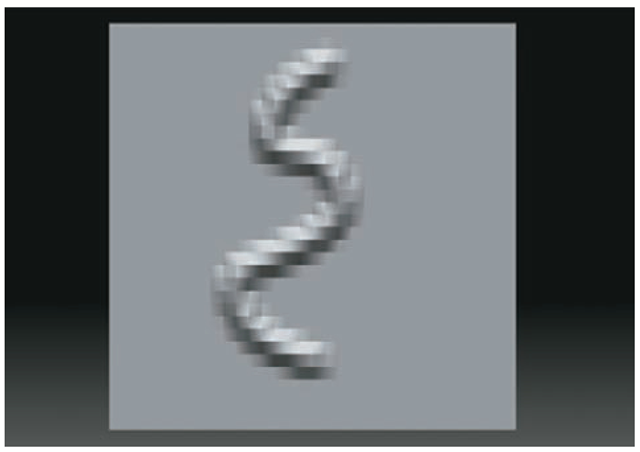
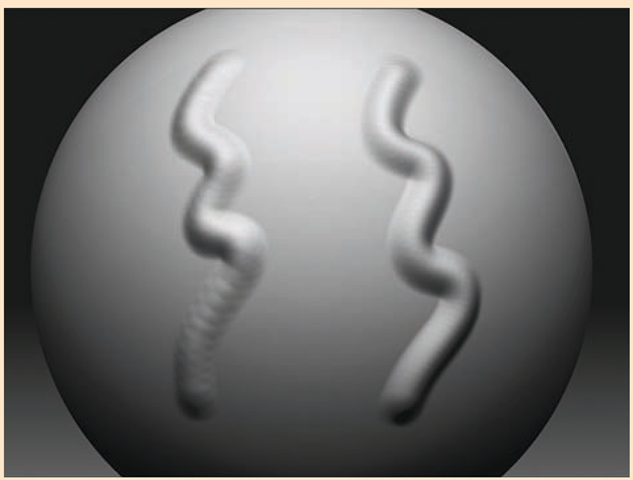
Also in this menu you will find LazyMouse. LazyMouse is another averaging utility that delays your pen stroke so it appears at the end of a red line extending from your brush center. This is very useful when you’re trying to sculpt long, sweeping curves that might otherwise be extremely difficult to achieve freehand. The image here illustrates the differences in these two stroke options; the staggered stroke on the left was created without LazyMouse, and the smoother stroke on the right was drawn with LazyMouse.
LazyMouse has several new options to help create different kinds of strokes. These are found in the LazyMouse menu. Press the Backtrack button to activate these other options. Backtrack allows you to conform your stroke to a plane, line, spline, or path. We will address these settings more later in this topic.
The Trails option is another method of smoothing the brush stroke. Located under the Brush + Modifiers menu, Trails creates multiple instances of your brush stroke, helping to smooth the resulting lines, especially when you are sketching quickly with a small brush size. Trails can be useful for creating some types of wrinkles at a very high subdivision level. It accomplishes this by eliminating the staggered dotting you will often get when using a small brush size at a high subdivision level. See the DVD for a video demonstrating LazyMouse versus trails.
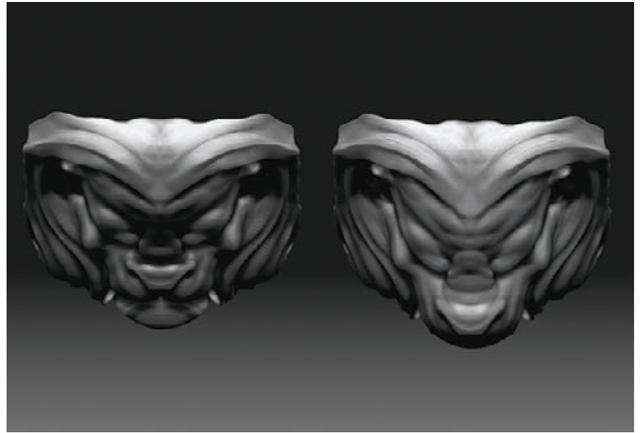
Figure 1.20 Shape roughed in from front and side
Figure 1.21 Objects may look fine from the front while lacking depth when viewed from other angles.
Figure 1.22 The flat face from top and corrected face from top
Figure 1.23 Pulling the snout forward from the top and side views
Everyone uses the sculpting tools differently. You find the combination that works for you through experimentation and emulation. Sketching character heads or faces on primitive spheres and planes makes for great practice.
You can quickly select brushes by using the built-in brush hotkeys. Press the B key to bring up the complete Brush menu. Next, press the first letter of the brush you want. For example, press M if you want Move. This hides all the brushes except the ones that begin with the letter M. Notice that each brush icon now has an orange letter. This represents the hotkey for that brush. Press the V key to select Move. With a little practice, this navigation system can become your favorite way to select brushes in a snap.
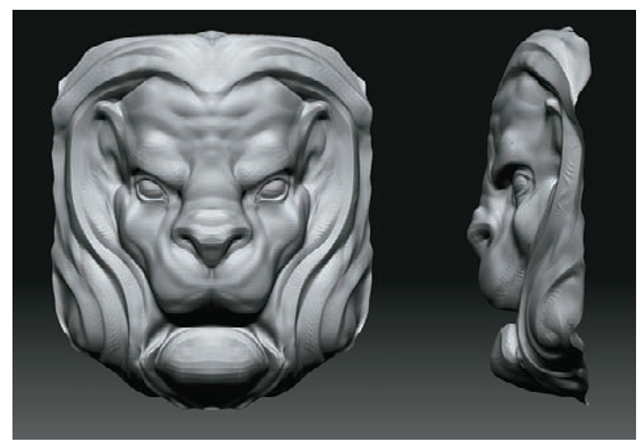
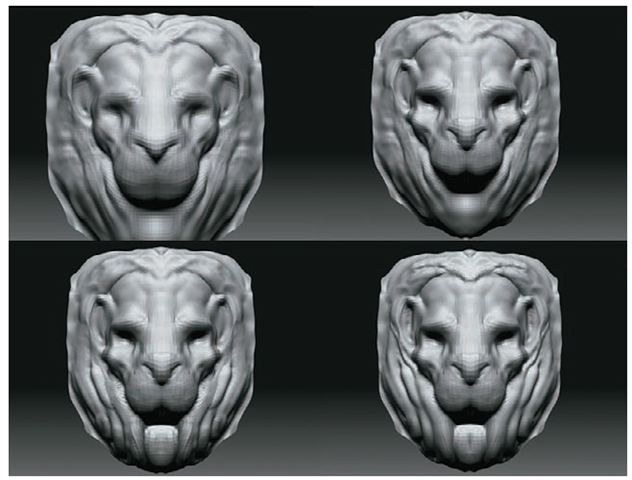
At this stage you can add another subdivision level to allow yourself more material to sculpt on. Continue to use the Standard, Inflate, and Clay brushes to define the head and mane. Notice that I am stroking in a general direction for the sculpted hair as I mass out its form (Figure 1.24).
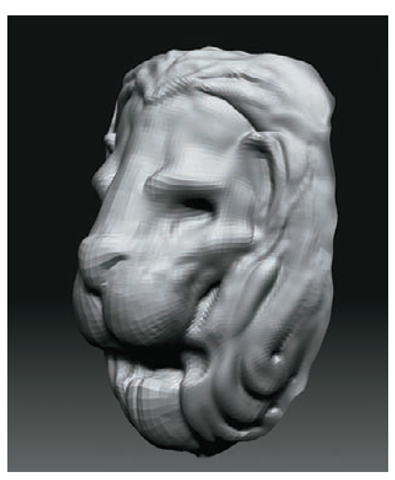
At this point I begin to carve away the recess where the ring will fit into the lion’s mouth (Figure 1.25).
Figure 1.24 Progress shots
Figure 1.25 Sculpting a recessed area for the ring to sit

