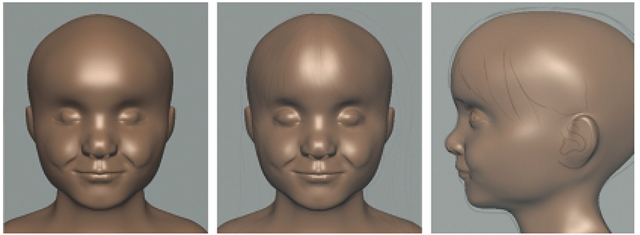
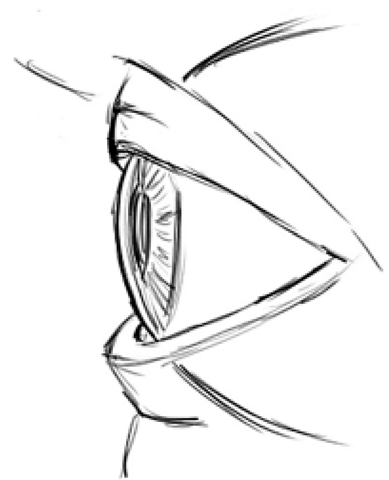
In this section, you will sculpt the eyes and surrounding features. Sculpting eyes can feel intimidating and indeed they are one of the most challenging features to sculpt on the face. But, if you study the reference materials, learn the basics of eye anatomy (Figure 3.39), and continue to practice with Mudbox, you will do just fine. The following are important things to know about eye anatomy and proportions, which will help you to sculpt the eyes more effectively.
• The eyeball is larger than you think about 2.5 cm in length. By 2 years of age, the eyes have reached their full size, so they appear disproportionately large in children.
• The eyes sit in sockets in the skull surrounded by fat and muscles.
• The eyes are not on a flat plane across the face but instead follow the round, 3D contour of the skull.
• The eyelids are draped over the eyeball, so the eyelids follow the round contour of the eyes.
• When viewed from the front, the outer corner of the eye is higher than the inner corner. Different expressions can lower the outer corner, but it will typically never be lower than the inner corner.
FIG 3.39 Anatomy of the Eye and the Masses of the Upper Face. Eyelids Have Thickness and Come over the Eye.
• When viewed from the bottom, the inner corner of the eye is farther back in the head than the outer corner. The inner corner should not be visible from a side view.
• Depending on where the eye looks, the highest portion of the upper lid will be over the pupil. This is caused by the bulge created by the cornea.
• When viewed from the front, eyes are usually one eye-width apart.
• When viewed from the side, the lower eyelid and the upper eyelid are on an angle and should not be sculpted vertically on the same plane.
• Eyes are in the middle of the head.
• In most cases, when viewed from the front, the center of the eye is in line with the corners of the mouth.
• If the eyes are too far apart, the nose will look too big.
• If the eyes are placed too low on the face, the nose will look short.
• If the eyes are placed too deep in the face, the nose will look too long.
Although you will be focusing on sculpting the eyes, you will also have to take the surrounding areas of the face into consideration. Sculpting a facial feature like the eyes is not an isolated process but is part of a larger process that depends on continually sculpting the surrounding features. There is no way to avoid this “jumping around" process in sculpting. It may seem easier to just focus on the eyes and ignore everything else, but the fact is that the surrounding features like the bridge of the nose, the forehead, and the cheeks affect how you sculpt the eyes. Remember that you are not just sculpting the parts but are trying to bring cohesion to the face.
Step back and take a wide view of the face. When sculpting the eyes, study the masses and forms in the upper part of the face just as you did with the lower part of the face. The masses form distinct planes. Becoming aware of these planes will help you sculpt a better likeness. The masses that make up the upper face are the front of the forehead, the two shapes above each of the eyes, the fatty upper part of the upper lid and the brow, the upper lid, the lower lid, the masses on each side of the nose, and the masses that run along the upper part of the cheeks (Figure 3.39).
Make sure that you have the reference photographs and other materials readily available. Double check the Front and Side camera reference sketches to make sure that everything still lines up. Remember that depending on the smile chosen, your lips may or may not line up in the side view. Pay close attention to the location of the eyes on the head as you study the photographs and sketches.
The eyes will be sculpted on their own layer, so create a new layer and name it Eyes, and for now, stay at subdivision level 4. You may wonder why you have not subdivided the model since you started sculpting the facial features. When working with the Basic Head mesh that comes with Mudbox, you should be able to sculpt features like eyes, nose, mouth, and so on, at subdivision level 4 with no problems. Subdividing the model beyond what is necessary wastes the valuable computer resources.
Sculpting the Eyeball
You will use mirroring when sculpting the eyes, so both eyes will be sculpted at the same time. This will create symmetrical eyes that are unnatural; but later on, you can introduce some asymmetry to the model. Look through the Front camera and trace the edges of the eyelids like you traced the location of the lips. This will help you to be confident about the placement of the eyes on the head (Figure 3.40).
Next, you will rough in the basic shape of the eyeball. What you are doing here is sculpting a semispherical shape for the eyeball so that you can sculpt the eyelids. Don’t become too concerned about making this initial shape perfect in any way. Use your favorite sculpting tool to pull out the eyeball. We suggest the Bulge or Foamy tool, set to a small size, but medium strength. Pull out the eyeball in several steps. Don’t try to do it all at once. Make sure to smooth as you sculpt.
You can determine the width of the eyeball by staying within the outline you traced earlier (Figure 3.41). Check your work in the Side camera to be sure that you do not pull the eyeball too far forward. Focus on the negative space between the eyeball and the bridge of the nose as seen from the side to determine the correct location of the front of the eye. You may also need to revise the upper cheek a bit so that it does not throw off sculpting of the eyelids and eye. Using the Grab tool, you can push and pull the eyeball to be sure of the proper placement.
FIG 3.40 Outline the Eyes to Ensure Correct Placement.
FIG 3.41 Use the Bulge and/or Foamy Tools to Sculpt the Eyeball.
Sculpting the Lower Eyelid
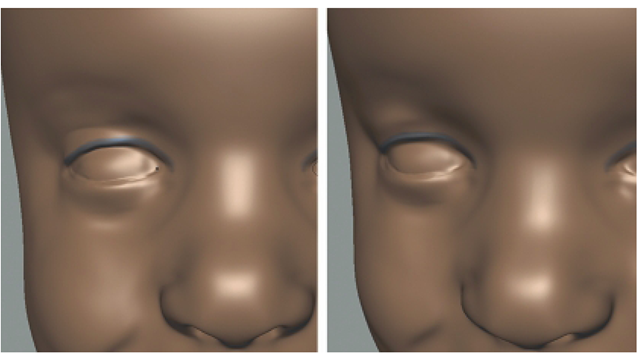
It’s important to keep in mind the eyelids drape over the eyeballs. To rough in the basic shape of the lower eyelid, you may use the Wax tool set to low setting like size 5 and strength 4 using Falloff preset 6 to lay in the main mass of the lower eyelid and use the Bulge tool set to very low values to define the upper border and then smooth (Figure 3.42). Remember to check the reference materials often; if you have to reposition the entire eye, use the Grab tool to properly align it with the reference sketches.
FIG 3.42 Rough In the Lower Eyelid with the Wax and Bulge Tools and Then Smooth.
FIG 3.43 Eyelids Have Thickness.
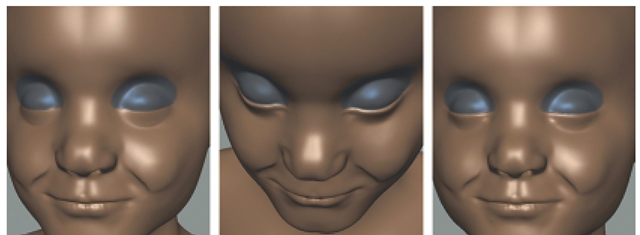
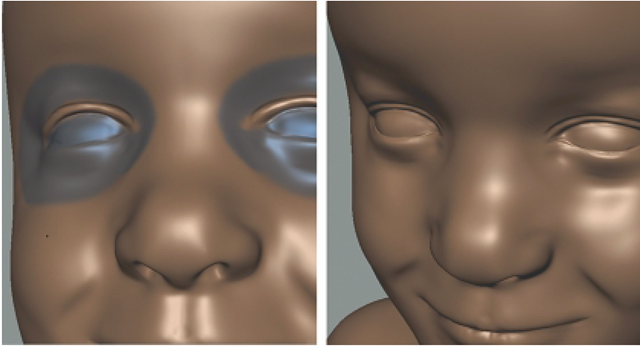
Eyelids have thickness, and they are much thicker than you probably think (Figure 3.43). To create the eyelid’s thickness, first freeze the eyeball and parts of the upper eye socket. Use the Wax tool to add mass to the edge of the eyelid, and with the Grab tool, pull up on the top part of the eyelid to form an edge. While looking down on the model, use the Flatten tool to flatten the inner part of the edge. Use the Pinch tool to cinch up the edge between the eyeball and the inner edge of the lower eyeball. Now, rotate the camera so you are looking up at the model, and use the Grab tool to make sure that the lower eyelid is round (Figure 3.44).
Now that you have the lower eyelid roughed in, step back again and see how your work compares with the rest of the face and to the reference materials.
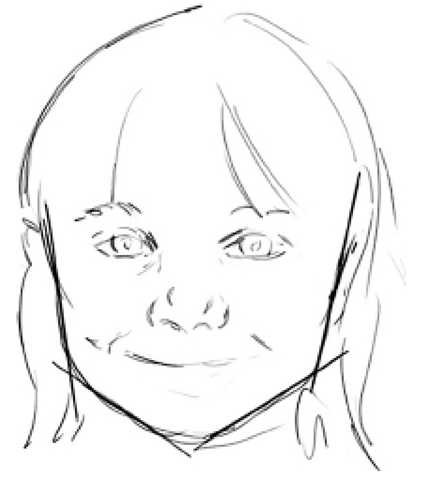
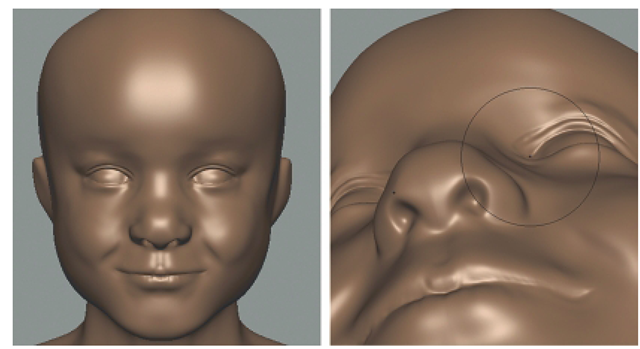
If something seems off, then there is probably a problem somewhere. Rotate around the model and carefully inspect it to see what the trouble may be and correct anything that you find. However, what may cause you concern may not have anything to do with the areas around the eyes, so look everywhere on the face to make sure that the features are in proportion. One important feature, which you may want to inspect, is the angle created on the side of the face and upper cheek, when looking at the face from the front. If this angle is off, it may make the eyes appear to be in the wrong place. To correct any problems, use the Grab tool to modify the side and angle of the cheeks and chin (Figure 3.45).
FIG 3.44 Use the Freeze Tool to Protect Parts of the Eye and Then Sculpt the Thickness of the Lower Eyelid. Use the Flatten Tool to Define the Eyelid Thickness. Then Rotate the Camera to View the Model from Underneath. Use the Grab Tool to Make Sure That the Eyelid is Round.
FIG 3.45 Take a Moment to Inspect the Model to Make Sure Its Proportions Are Correct. Inspect the Shape of the Face as Seen from the Front.
Sculpting the Upper Eyelid
The upper eyelids are partially tucked under the brow when the eyes are open, so it is only a thin strip of skin draped over the eye, especially in young children. The upper eyelid is sculpted in a similar way as the lower eyelid.
But before sculpting the upper eyelid, you may need to make room for it by moving the brow up a bit. This may not be needed in your model, but the point is to make sure that you have space above the eye to add the upper eyelid.
Study the reference materials to get a good idea of what the upper eyelid looks like. Look for the shapes it makes as it follows the contour of the eyeball. Use the Freeze and Invert Freeze while you are working on the upper eyelid. Then use the Wax, Bulge, and Smooth tools to add the upper eyelid as in Figure 3.46. Don’t be afraid to try it several times until you feel that it looks good. Then, refine the edge and thickness of the upper eyelid with the Wax, Grab, and Flatten tools as you did with the lower eyelid. Once the upper eyelid is sculpted, use the Pinch tool to sharpen the edge between the eyeball and the eyelid. Finally, add the fatty pad above the upper eyelid.
To further define the upper eyelid, it is important to add the fatty pad between the upper eyelid and brow. Slowly build this using the Wax tool (Figure 3.47). One feature that may be challenging is the crease between the upper fatty pad in the upper eyelid and lower part of the upper eyelid. Sculpting this feature is not only a matter of carving out a line but also carefully sculpting the path of the crease and positioning the upper eyelid to appear as it is tucked underneath the fatty pad. These structures help to define the eye’s overall appearance. You will have to use the Freeze tool to freeze most of the eye and carefully define this crease with tools like the Pinch tool and an inverted Bulge tool. To help steady your stroke as you sculpt, turn on the Steady Stroke option in the Properties window (Figure 3.48).
FIG 3.46 Rough In the Upper Eyelid Using Freeze and Invert Freeze.
FIG 3.47 Add the Fatty Pad between Upper Eyelid and Brow.
FIG 3.48 Sculpt the Crease between the Upper and Lower Parts of the Upper Eyelid.
Because the visible part of the upper eyelid is draped over the eyeball and tucked under the upper fat pad, it is not vertical but is angled back. To sculpt this, freeze all of the eye and eyelids and surrounding areas except the crease. Now, with the Grab tool, set to a large size but medium strength, pull the crease back into the head.
FIG 3.49 To Add More Contours to the Eye, Push the Inside and Outside Corners of the Eye Back.
The eye is almost complete. Rotate the camera so you are looking at the model from the bottom up and make sure that the eyelid is round and not flattened; while in this view, use the Grab tool to push the inside corner of the eye back, as well as the outside corner (Figure 3.49).


