Refining the Eye
At this point, the eye should look anatomically correct, be in proportion to the rest of the face, and resemble Amy’s eyes. However, don’t be alarmed if you have a bit of trouble seeing Amy in your model yet. The model does not have any eyelashes, eyebrows, or a hairline, and these are important features that give the face personality and unique characteristics. This is where using the reference sketches and comparing the model with the reference photographs will assure you that you are on the right track. In the next few steps, you will refine the eye and add details.
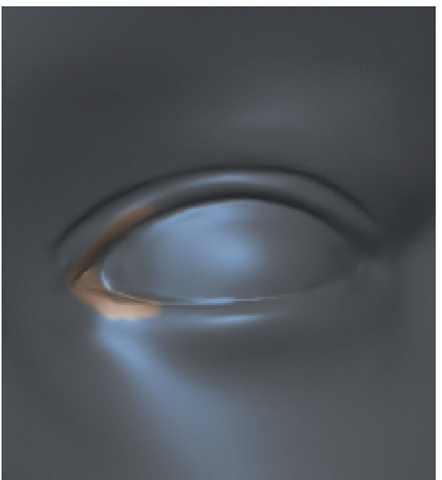
You can never check the proportions and anatomy enough, so first take a close look at the eye and compare it with the reference materials and make any changes that are necessary. Remember to include the surrounding areas of the face in your inspection. Once you are satisfied that your model is correct, you can move on. The first item you will add is the caruncle lacrimalis, otherwise known as the little fleshy bump in the inside corner of the eye. As with most young children, in Amy, the caruncle is hidden somewhat by the skin at the inner corner of the eye. Rotate the camera so that you can see into the inside corner of the eye and add a very small caruncle. The Bulge tool set to a very small size and strength should do the trick. The caruncle should not be overtly visible from the front (Figure 3.50).
FIG 3.50 Adding Details to the Eyes Like the Caruncle.
Add character to the eye by sculpting some of the small wrinkles and lines in the lower eyelids. Because Amy is very young, these are difficult to see, but the wrinkles are present. Study the references photographs, and then with the Knife tool or an inverted Bulge tool, which is set to a very small size, carefully sculpt the wrinkles. With these details, completely check the overall anatomy and proportions once again by comparing it with the reference sketches in the Front and Side cameras and the reference photographs.
Creating the "Sculpture" Look
This part of the tutorial is optional. In traditional sculpture, the irises are carved out of the clay. The depth that is carved out indicates the eye color. For instance, blue eyes are not as deep as brown eyes. If you carve the iris, it will make the model look more like a traditional sculpture, but carving out the iris is not something that you should do if you are exporting the model to another program for animation. However, you can experiment with the sculptured look by doing the following steps on a separate layer. In this way, the model will not be permanently altered if you decide that you don’t like the sculptured look.
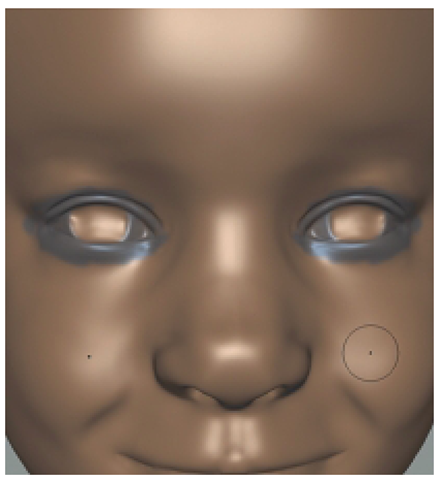
A couple of important items to note about the iris are that the top and bottom of the iris is usually covered by the eyelids, and the center position of the iris typically lines up with the corners of the mouth. Switch to the Front camera and use the front reference sketch to outline the iris. Now back in the Perspective camera, use the Freeze tool to freeze the eyelids and the other parts of the eye, and be sure to freeze the inner surfaces that create the thickness of the eyelids. Use an inverted Bulge tool set to a large size and medium strength and slowly push in the iris. Remember to smooth often (Figure 3.51).
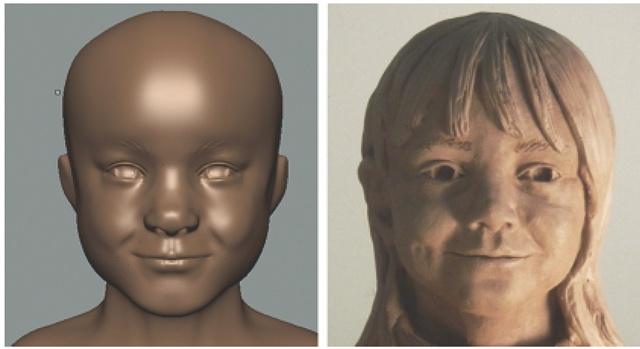
You can sculpt the eyebrows also to continue to give your model the sculptured look. Eyebrow hair grows in a distinctive pattern, so study the reference photographs to become familiar with Amy’s eyebrows. Then, with the Bulge tool set to small size and low strength, draw the hairs of the eyebrow. However, alternate between the Bulge tool and the inverted Bulge tool so that some hairs are raised and some are carved into the model. For many people, the highest point of the brow will usually align with the outside of the iris (Figure 3.52).
FIG 3.51 To Give the Model a Traditional Sculpture Look, You Can Carve Out the Irises.
FIG 3.52 Completed Eyes of Amy and Traditional Sculpture of Amy.
With the nose, mouth, and eyes sculpted, you should have a model that resembles Amy. Step back from the model and look at the whole face and compare it with the reference materials. Rotate the camera to get a good look at the model from different angles. Use the camera bookmarks to see how well your model resembles the reference photographs. Turn off mirroring and tweak each eye to make it match with Amy’s eyes. This will help to gain a likeness. In the next section, you will refine the back of the head and sculpt the ears.


