The Extend tool
Examples – Extend (Fig. 5.40)
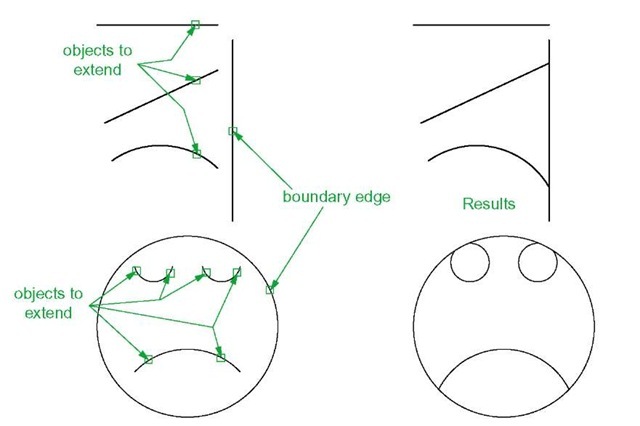
1. Construct plines and a circle as shown in the left-hand drawings of Fig. 5.40.
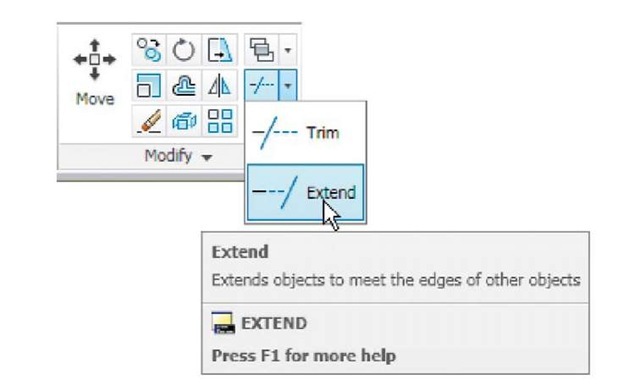
2. Call Extend - either click the Extend tool icon in the Home/Modify panel (Fig. 5.39), pick Extend from the Modify drop-down menu or enter ex or extend at the command line which then shows:
Repeat for each object to be extended. Then:
The results are shown in Fig. 5.40.
Fig. 5.39 The Extend tool icon from the Home/Modify panel
Fig. 5.40 Examples – Chamfer
Note
Observe the similarity of the Extend and No extend prompts with those of the Trim tool.
The Fillet and Chamfer tools
These two tools can be called from the Home/Modify panel. There are similarities in the prompt sequences for these two tools. The major differences are that only one (Radius) setting is required for a fillet, but two (Dist1 and Dist2) are required for a chamfer. The basic prompts for both are:
Fillet
Chamfer
Examples – Fillet (Fig. 5.42)
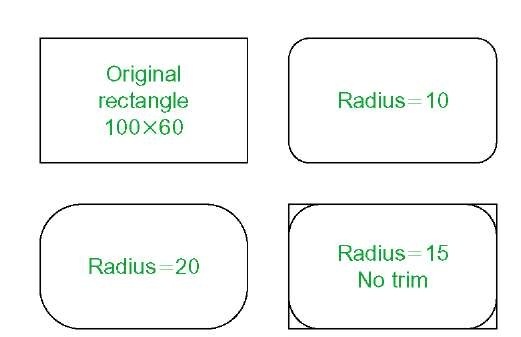
1. Construct three rectangles 100 by 60 using either the Line or the Polyline tool (Fig. 5.42).
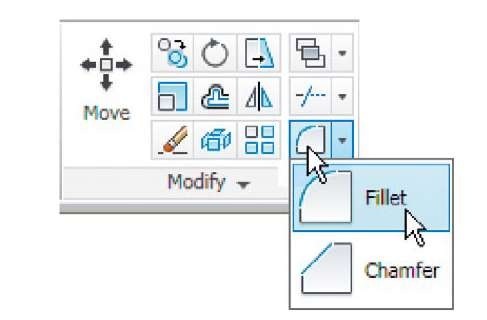
2. Call Fillet - click the arrow to the right of the tool icon in the Home/ Modify panel and select Fillet from the menu which appears (Fig. 5.41), pick Fillet from the Modify drop-down menu or enter f or fillet at the command line which then shows:
Three examples are given in Fig. 5.42.
Fig. 5.41 Select Fillet from the menu in the Home/Modify panel
Fig. 5.42 Examples – Fillet
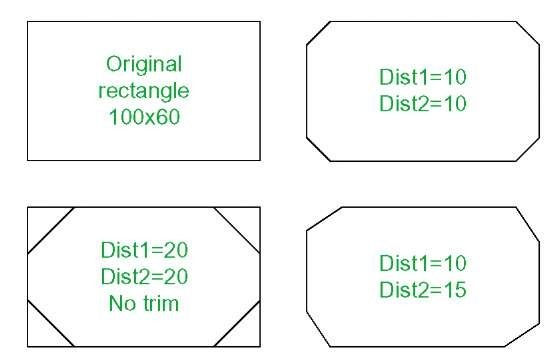
Examples – Chamfer (Fig. 5.44)
1. Construct three rectangles 100 by 60 using either the Line or the Polyline tool.
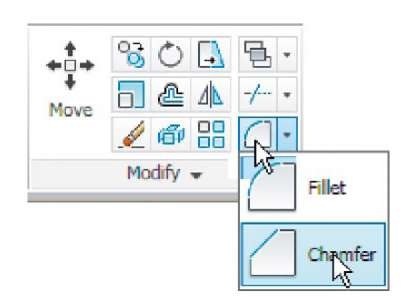
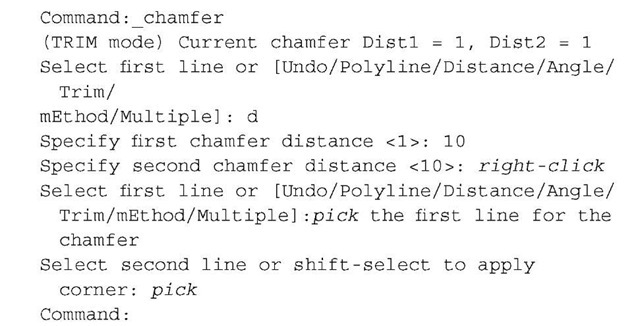
2. Call Chamfer - click the arrow to the right of the tool icon in the Home/Modify panel and select Chamfer from the menu which appears (Fig. 5.43), pick Chamfer from the Modify drop-down menu or enter cha or chamfer at the command line which then shows:
Fig. 5.43 Select Chamfer from the Home/Modify panel
The result is shown in Fig. 5.44. The other two rectangles are chamfered in a similar manner except that the No trim prompt is brought into operation with the bottom left-hand example.
Fig. 5.44 Examples – Chamfer
REVISION NOTES
1. The Modify tools are among the most frequently used tools in AutoCAD 2011.
2. The abbreviations for the Modify tools are: Copy – cp or co
Mirror – mi Offset – o Array – ar Move – m Rotate – ro Scale – sc Stretch – s Trim – tr Extend – ex Break – br Join – j
Chamfer – cha Fillet – f
3. There are two other tools in the 2D Draw control panel: Erase – some examples were given in topic 2 – and Explode – further details of this tools will be given in topic 9.
A note – selection windows and crossing windows
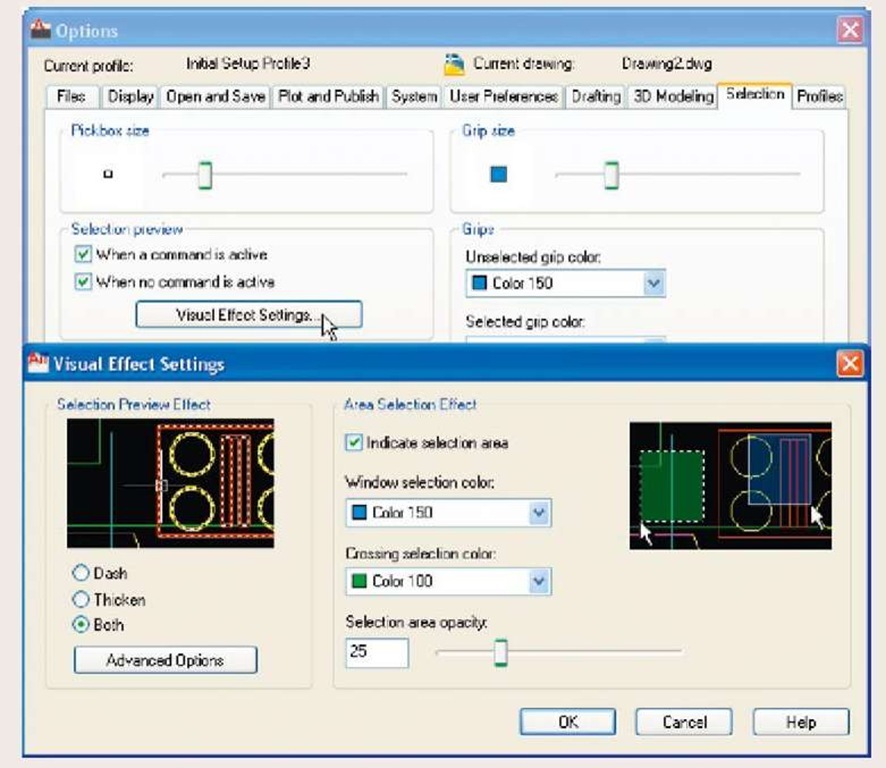
In the Options dialog settings can be made in the Selection sub-dialog for Visual Effects. A click on the Visual Effects Settings… button brings up another dialog. If the Area Selection Effect settings are set, on a normal window from top left to bottom right will colour in a chosen colour (default blue). A crossing window from bottom left to top right, will be coloured red. Note also that highlighting – selection Preview Effect allows objects to highlight if this feature is on. These settings are shown in Fig. 5.45.
Fig. 5.45 Visual Setting Effects Settings sub-dialog of the Options dialog
4. When using Mirror, if text is part of the area to be mirrored, the set variable Mirrtext will require setting – to either 1 or 0.
5. With Offset the Through prompt can be answered by clicking two points in the drawing area the distance of the desired offset distance.
6. Polar Arrays can be arrays around any angle set in the Angle of array field of the Array dialog.
7. When using Scale, it is advisable to practise the Reference prompt.
8. The Trim tool in either its Trim or its No trim modes is among the most useful tools in AutoCAD 2011.
9. When using Stretch circles are unaffected by the stretching.
10. There are some other tools in the Home/Modify panel not described in this topic. The reader is invited to experiment with these other tools. They are: Bring to Front, Send to Back, Bring above Objects, Send under Objects; Set by Layer; Change Space; Lengthen; Edit Spline, Edit Hatch; Reverse.


