Palettes
A palette has already been shown - the Command palette. Two palettes which may be frequently used are the DesignCenter palette and the Properties palette. These can be called to screen from icons in the View/Palettes panel.
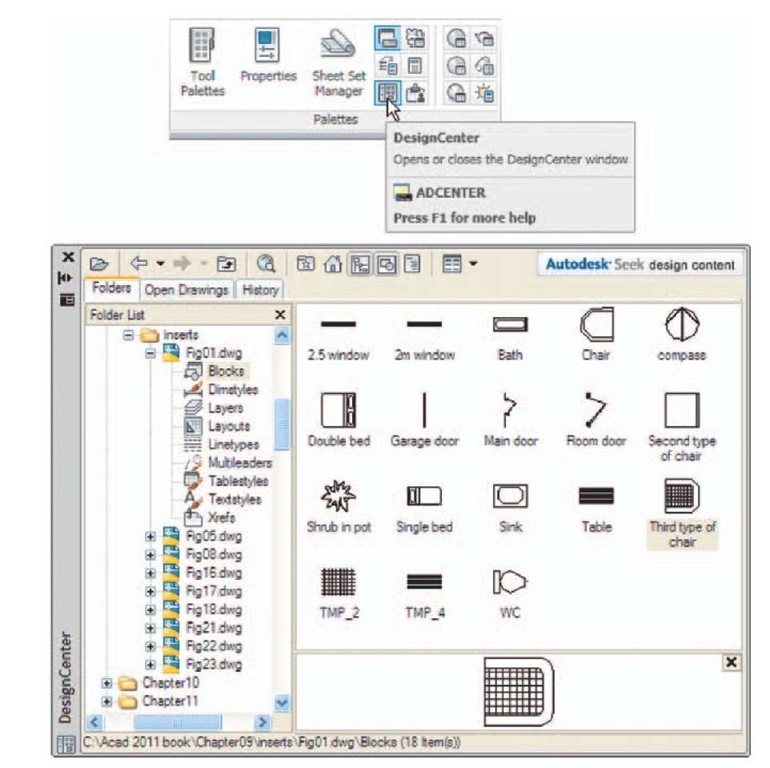
DesignCenter palette: Fig. 1.11 shows the DesignCenter palette with the Block drawings of building symbols from which the block Third type of chair block has been selected.
Fig. 1.11 A left-click on the View/DesignCenter icon brings the DesignCenter palette to screen
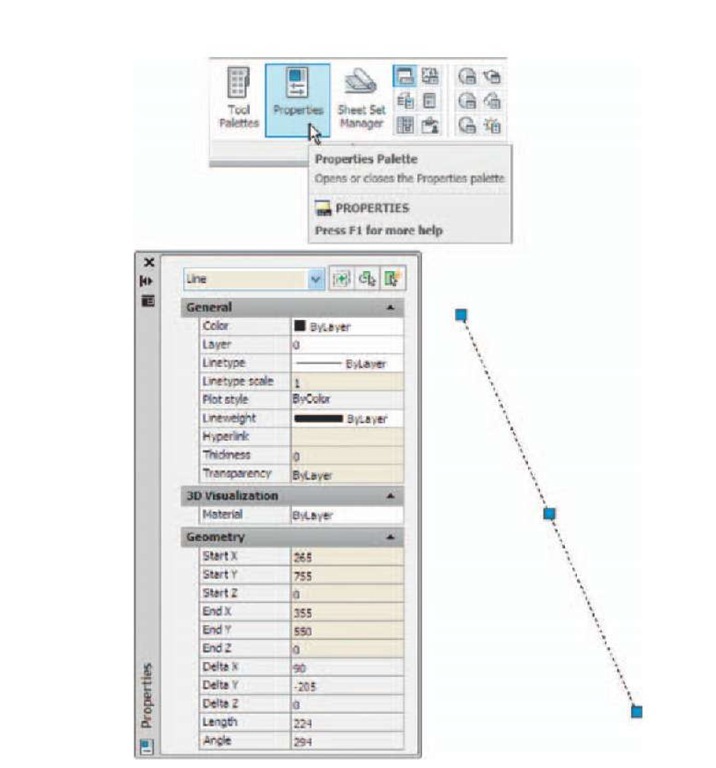
Properties palette: Fig. 1.12 shows the Properties palette, in which the general features of a selected line are shown. The line can be changed by entering new figures in parts of the palette.
Fig. 1.12 The Properties palette
Tool palettes
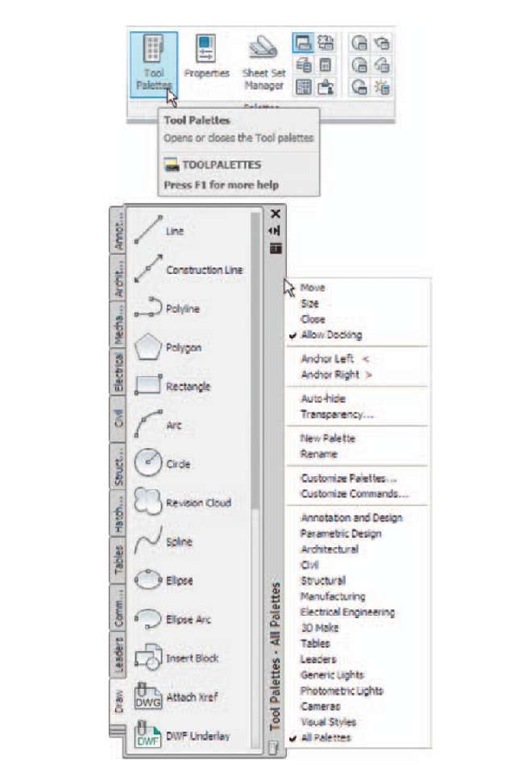
Click on Tool Palettes in the View/Palettes panel and the Tool Palettes -All Palettes palette appears (Fig. 1.13).
Click in the title bar of the palette and a popup menu appears. Click on a name in the menu and the selected palette appears. The palettes can be reduced in size by dragging at corners or edges, or hidden by clicking on the Auto-hide icon, or moved by dragging on the Move icon. The palette can also be docked against either side of the AutoCAD window.
Fig. 1.13 The Tool Palettes – All Palettes palette
Notes
Throughout this topic tools will often be shown as selected from the panels. It will be seen in topic 3 that tools can be ‘called’ in a variety of ways, but tools will frequently be shown selected from tool panels although other methods will also be shown on occasion.
Dialogs
Dialogs are an important feature of AutoCAD 2011. Settings can be made in many of the dialogs, files can be saved and opened, and changes can be made to variables.
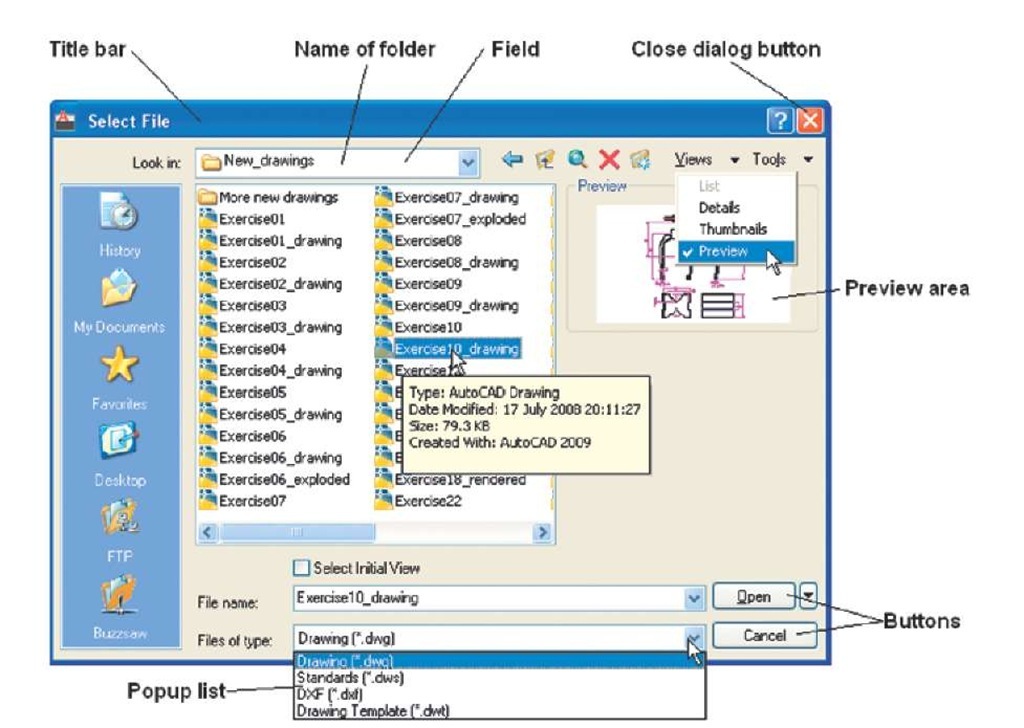
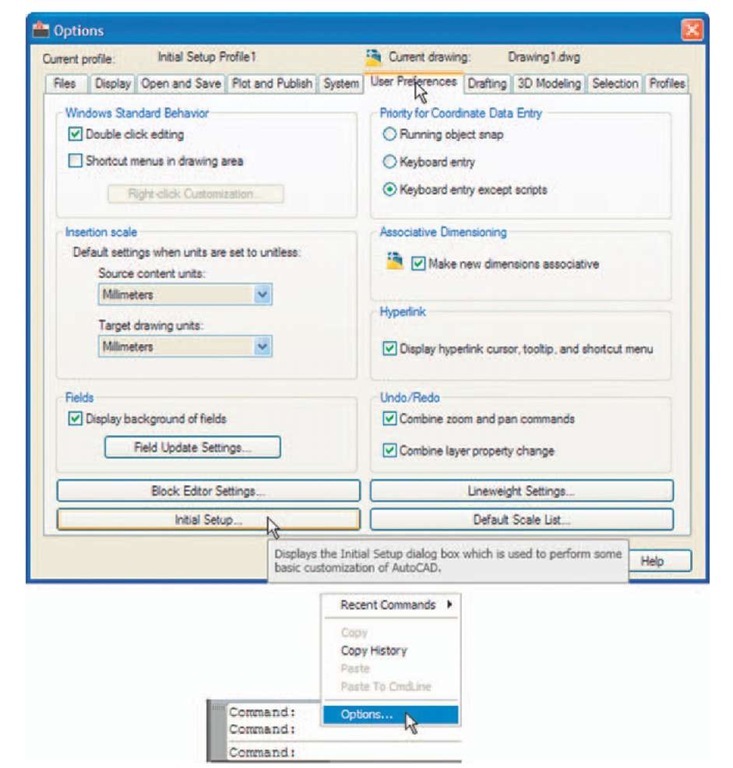
Examples of dialogs are shown in Figs 1.15 and 1.16. The first example is taken from the Select File dialog (Fig. 1.15), opened with a click on Open… in the Quick Access toolbar (Fig. 1.14). The second example shows part of the Options dialog (Fig. 1.16) in which many settings can be made to allow operators the choice of their methods of constructing drawings. The Options dialog can be opened with a click on Options. in the right-click dialog opened in the command palette.
Fig. 1.14 Opening the Select File dialog from the Open icon in the Quick Access toolbar
Fig. 1.15 The Select File dialog
Note the following parts in the dialog, many of which are common to other AutoCAD dialogs:
Title bar: Showing the name of the dialog. Close dialog button: Common to other dialogs.
Popup list: A left-click on the arrow to the right of the field brings down a popup list listing selections available in the dialog. Buttons: A click on the Open button brings the selected drawing on screen. A click on the Cancel button closes the dialog. Preview area: Available in some dialogs – shows a miniature of the selected drawing or other feature, partly shown in Fig. 1.15.
Fig. 1.16 Part of the Options dialog
Note the following in the Options dialog (Fig. 1.16):
Tabs: A click on any of the tabs in the dialog brings a sub-dialog on screen.
Check boxes: A tick appearing in a check box indicates the function described against the box is on. No tick and the function is off. A click in a check box toggles between the feature being off or on.
Radio buttons: A black dot in a radio button indicates the feature described is on. No dot and the feature is off.
Slider: A slider pointer can be dragged to change sizes of the feature controlled by the slider.
Buttons at the left-hand end of the status bar
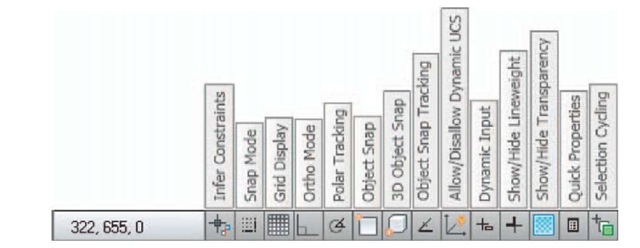
A number of buttons at the left-hand end of the status bar can be used for toggling (turning on/off) various functions when operating within AutoCAD 2011 (Fig. 1.17). A click on a button turns that function on, if it is off; a click on a button when it is off turns the function back on. Similar results can be obtained by using function keys of the computer keyboard (keys Fl to F10).
Fig. 1.17 The buttons at the left-hand end of the status bar
Snap Mode: Also toggled using the F9 key. When snap on, the cursor under mouse control can only be moved in jumps from one snap point to another .
Grid Display: Also toggled using the F7 key. When set on, a series of grid points appears in the drawing area.
Ortho Mode: Also toggled using the F8 key. When set on, lines, etc. can only be drawn vertically or horizontally.
Polar Tracking: Also toggled using the F10 key. When set on, a small tip appears showing the direction and length of lines, etc. in degrees and units.
Object Snap: Also toggled using the F3 key. When set on, an osnap icon appears at the cursor pick box.
Object Snap Tracking: Also toggled by the Fll key. When set on, lines, etc. can be drawn at exact coordinate points and precise angles.
Allow/Disallow Dynamic UCS: Also toggled by the F6 key. Used when constructing 3D solid models.
Dynamic Input: Also toggled by F12. When set on, the x,y coordinates and prompts show when the cursor hairs are moved.
Show/Hide Line weight: When set on, line weights show on screen. When set off, line weights only show in plotted/printed drawings.
Quick Properties: A right-click brings up a popup menu, from which a click on Settings… causes the Drafting Settings dialog to appear.
Note
When constructing drawings in AutoCAD 2011 it is advisable to toggle between Snap, Ortho, Osnap and the other functions in order to make constructing easier.
Buttons at the right-hand end of the status bar
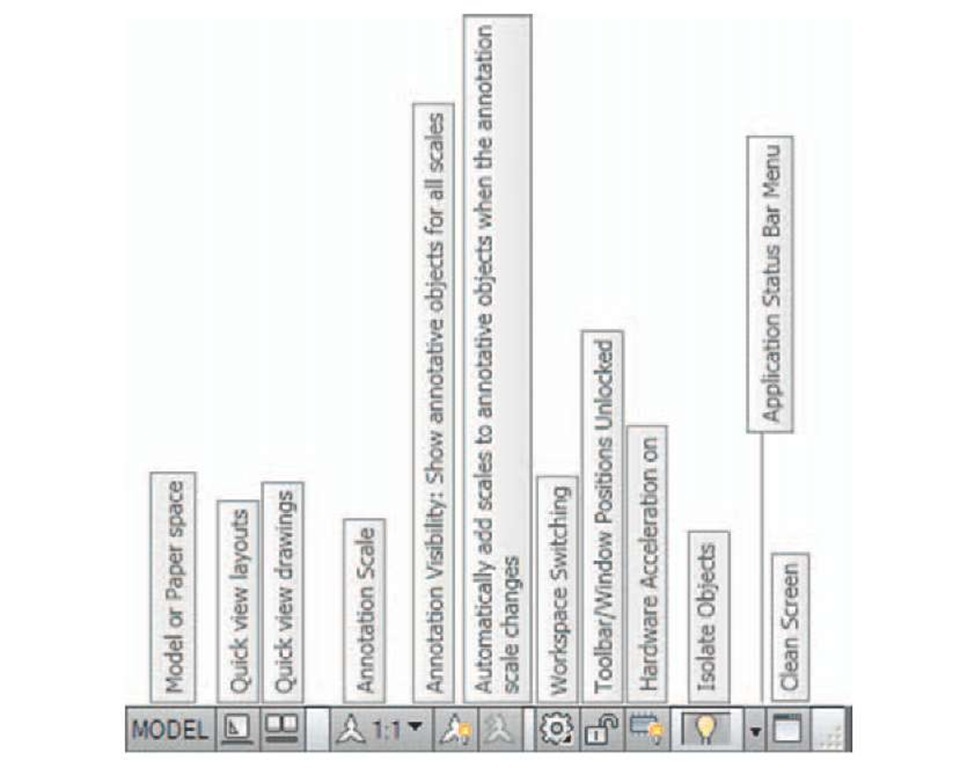
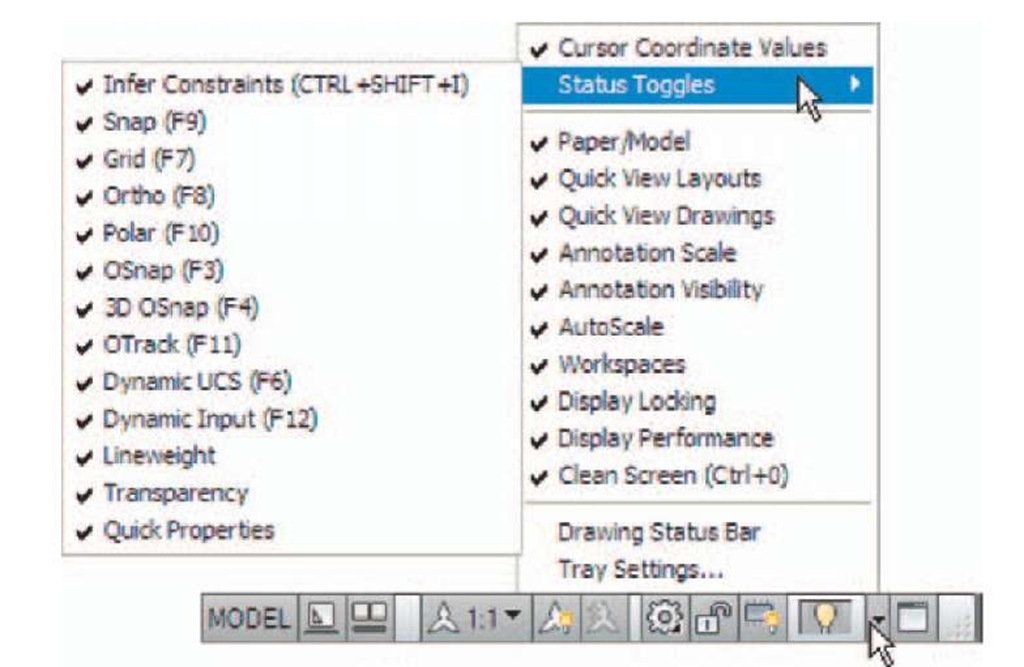
Another set of buttons at the right-hand end of the status bar are shown in Fig. 1.18. The uses of some of these will become apparent.A click on the downward-facing arrow near the right-hand end of this set of buttons brings up the Application Status Bar Menu (Fig. 1.19) from which the buttons in the status bar can be set on and/or off.
Fig. 1.18 The buttons at the right-hand end of the status bar
Fig. 1.19 The Application Status Bar menu
