Aims of This Topic
The aims of this topic are:
1. To introduce Object Linking and Embedding (OLE) and its uses.
2. To introduce the use of Encapsulated Postscript (EPS) files.
3. To introduce the use of Data Exchange Format (DXF) files.
4. To introduce raster files.
5. To introduce Xrefs.
Object Linking and Embedding
First example – Copying and Pasting (Fig. 10.3)
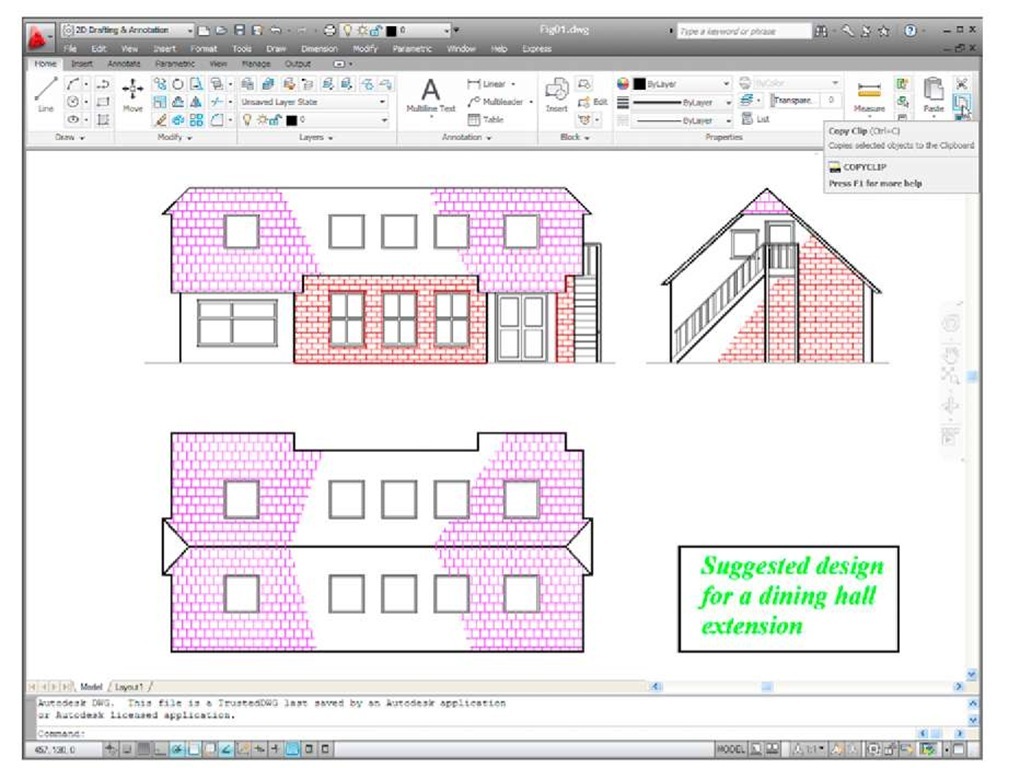
1. Open any drawing in the AutoCAD 2011 window (Fig. 10.1).
Fig. 10.1 A drawing in the AutoCAD 2011 with Copy Clip selected
2. Click Copy Clip from the Home/Clipboard panel. The command line shows:
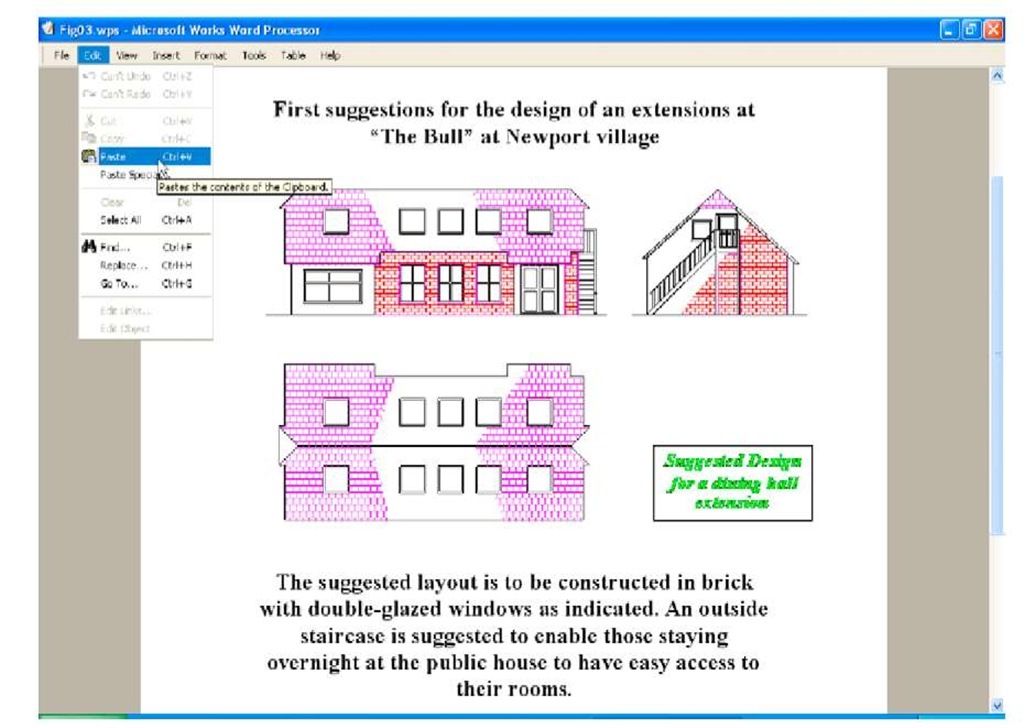
3. Open Microsoft Word and click on Paste in the Edit drop-down menu (Fig. 10.2). The drawing from the Clipboard appears in the Microsoft Word document. Add text as required.
Fig. 10.2 Example – Copying and Pasting
Note
Similar results can be obtained using the Copy, Copy Link or Copy with Base Point tools from the Edit drop-down menu.
Second example – EPS file (Fig. 10.5)
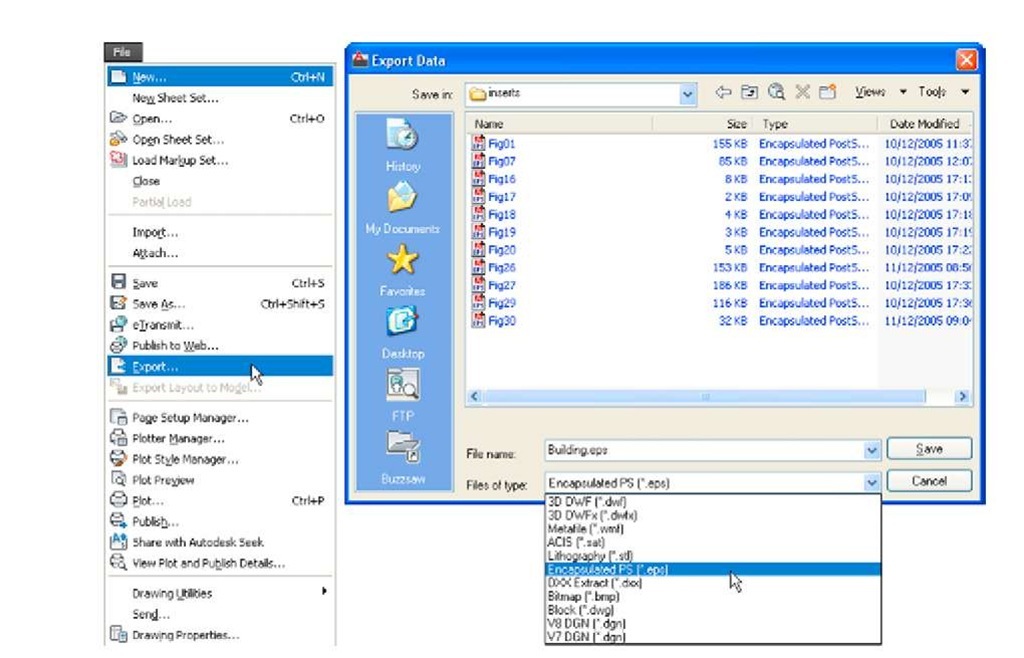
1. With the same drawing on screen click on Export… in the File dropdown menu (Fig. 10.3) or click Export/Other formats in the menu appearing with a click on the A icon at the top left-hand corner of the AutoCAD window. The Export Data dialog appears (Fig. 10.3). Pick Encapsulated PS (*.eps) from the Files of type popup list then enter a suitable file name (e.g. building.eps) in the File name field and click the Save button.
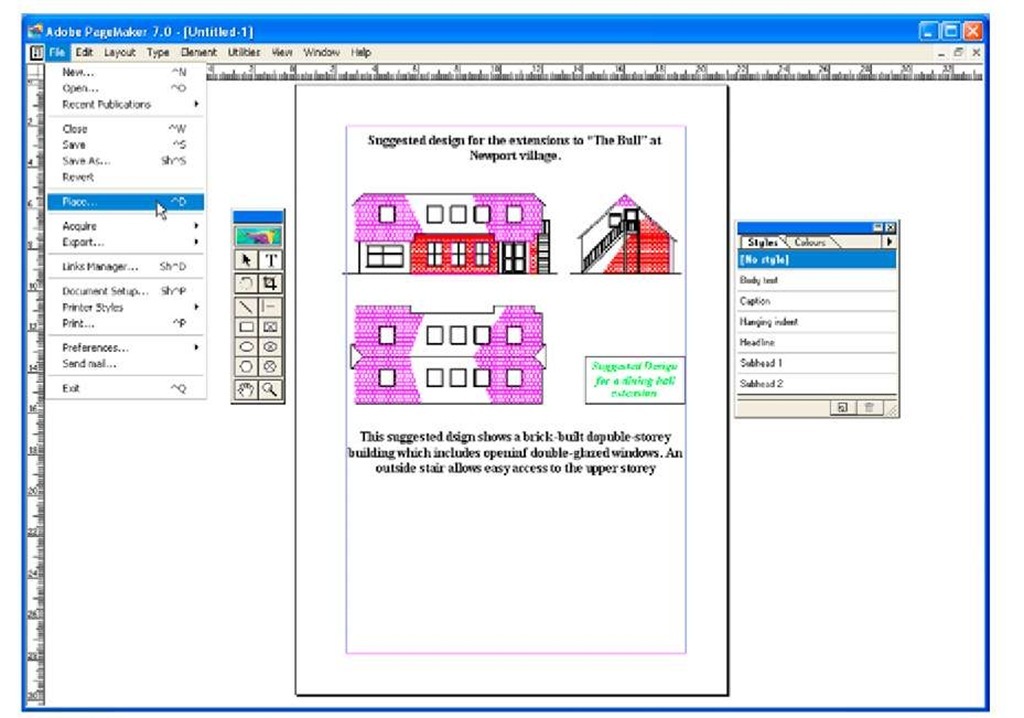
2. Open a desktop publishing application. That shown in Fig. 10.4.
3. From the File drop-down menu of PageMaker click Place. A dialog appears listing files which can be placed in a PageMaker document. Among the files named will be building.eps. Double-click that file name and an icon appears the placing of which determines the position of the *eps file drawing in the PageMaker document (Fig. 10.4).
Fig. 10.3 The Export tool icon from the File drop-down menu and the Export Data dialog
4. Add text as required.
5. Save the PageMaker document to a suitable file name.
6. Go back to the AutoCAD drawing and delete the title.
Fig. 10.4 An *eps file placed in position in a PageMaker document
7. Make a new *.eps file with the same file name (building.eps).
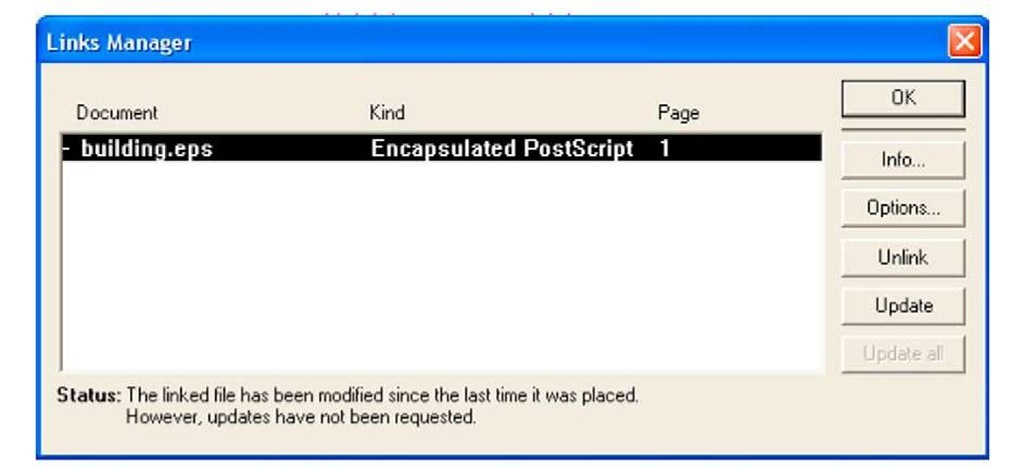
8. Go back into PageMaker and click Links Manager. in the File dropdown menu. The Links Manager dialog appears (Fig. 10.5). Against the name of the building.eps file name is a dash and a note at the bottom of the dialog explaining that changes have taken place in the drawing from which the *eps had been derived. Click the Update button and when the document reappears the drawing in PageMaker no longer includes the erased title.
Fig. 10.5 The Links Manager dialog of PageMaker
Notes
1. This is Object Linking and Embedding (OLE). Changes in the AutoCAD drawing saved as an *eps file are linked to the drawing embedded in another application document, so changes made in the AutoCAD drawing are reflected in the PageMaker document.
2. There is actually no need to use the Links Manager because if the file from PageMaker is saved with the old *eps file in place, when it is reopened the file will have changed to the redrawn AutoCAD drawing, without the erased title.
DXF (data exchange format) files
The *.DXF format was originated by Autodesk, but is now in general use in most CAD (Computer Aided Design) software.
A drawing saved to a *.dxf format file can be opened in most other CAD software applications. This file format is of great value when drawings are being exchanged between operators using different CAD applications.
Example – DXF file (Fig. 10.7)
1. Open a drawing in AutoCAD. This example is shown in Fig. 10.6.
Fig. 10.6 Example – DXF file. Drawing to be saved as a dxf file
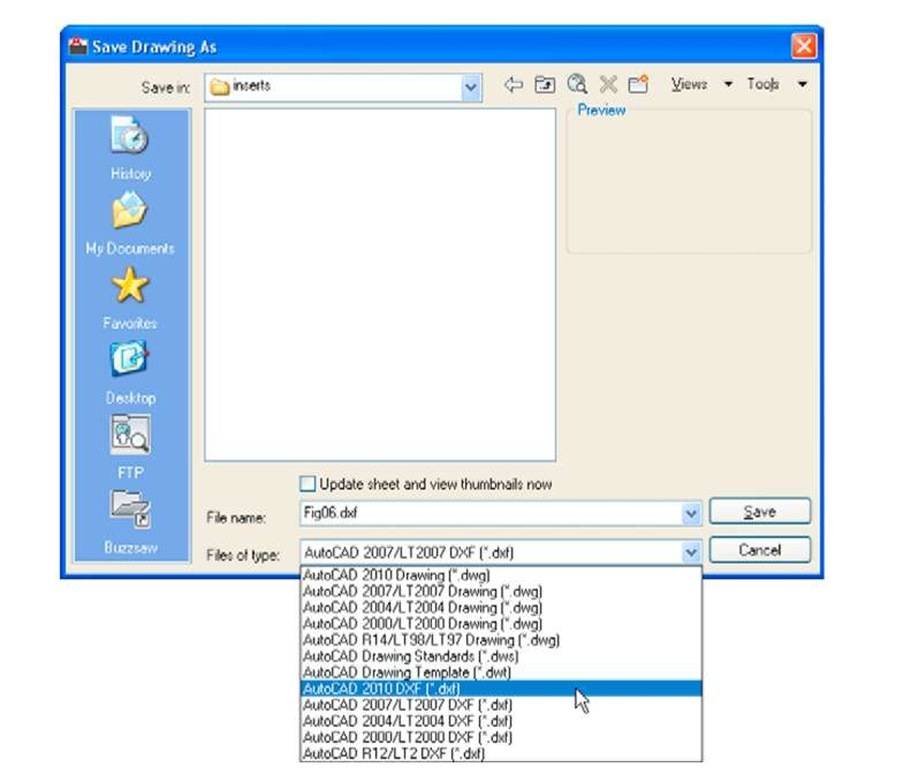
2. Click on Save As… in the Menu Browser dialog and in the Save Drawing As dialog which appears, click AutoCAD 2010 DXF [*.dxf] in the Files of type field popup list.
3. Enter a suitable file name. In this example this is Fig06.dxf. The extension .dxf is automatically included when the Save button of the dialog is clicked (Fig. 10.7).
4. The DXF file can now be opened in the majority of CAD applications and then saved to the drawing file format of the CAD in use.
Note
To open a DXF file in AutoCAD 2011, select Open. from the Menu Browser dialog and in the Select File dialog select DXF [*.dxf] from the popup list from the Files of type field.
Fig. 10.7 The Save Drawing As dialog set to save drawings in DXF format
