Creating artwork in Illustrator
When you’re designing graphics such as logos and corporate identities, it’s an absolute must that your design be scalable, because the graphic will be used in a wide range of applications, from web pages at screen resolution to high-resolution printed matter or even monumental signage. For designing graphics that need to be resolution independent, Adobe Illustrator is the world’s leading vector-based application. Today, other applications in the Creative Suite such as InDesign and Photoshop also let you create vector graphics using the Pen tool (amongst others); however, your best choice is still Illustrator, because it includes the most comprehensive set of drawing tools.
Bitmap versus vector graphics
Pixel- or raster-based applications such as Photoshop are unbeatable when it comes to producing photographic or continuous-tone images. However, these images are composed of a fixed number of pixels, resulting in a jagged—or pixelated—look when they are enlarged. The illustration below clearly shows the difference between a resolution-independent vector graphic (left) and a pixel-based graphic (right).
With Illustrator, you create vector graphics—artwork that is made up of points, lines, and curves that are expressed as mathematical vectors. Vector-based graphics are resolution independent—they can be scaled to any size without losing quality or crispness.
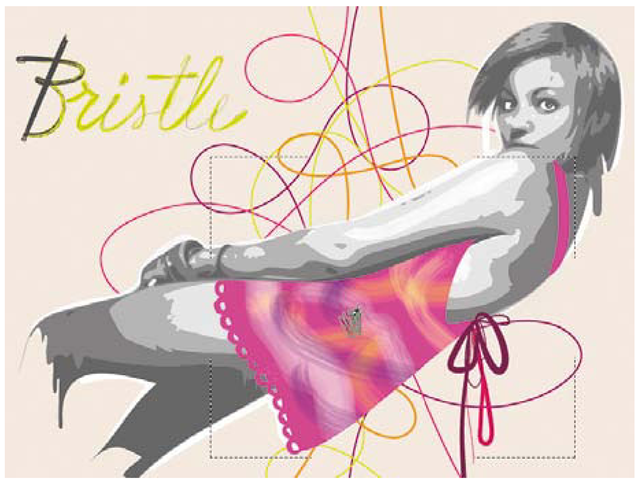
Creating a vector graphic with the Bristle Brush
You don’t need to use a painting program to create expressive brush strokes. In Illustrator CS5, the Bristle Brush gives you the creative possibilities of traditional media like watercolors, oils, and pastels, while also providing the speed, editability, and scalability you expect with vector graphics. If you have a Wacom tablet, you can control Bristle Brush strokes with stylus pressure, and with Wacom Intous tablets you can also control strokes using tilt angle, bearing, and barrel rotation.
1 In your LessonOl folder, double-click the file bristle_brush.ai.
2 In the Layers panel, make the Model layer visible by clicking to show the eye icon for that layer.
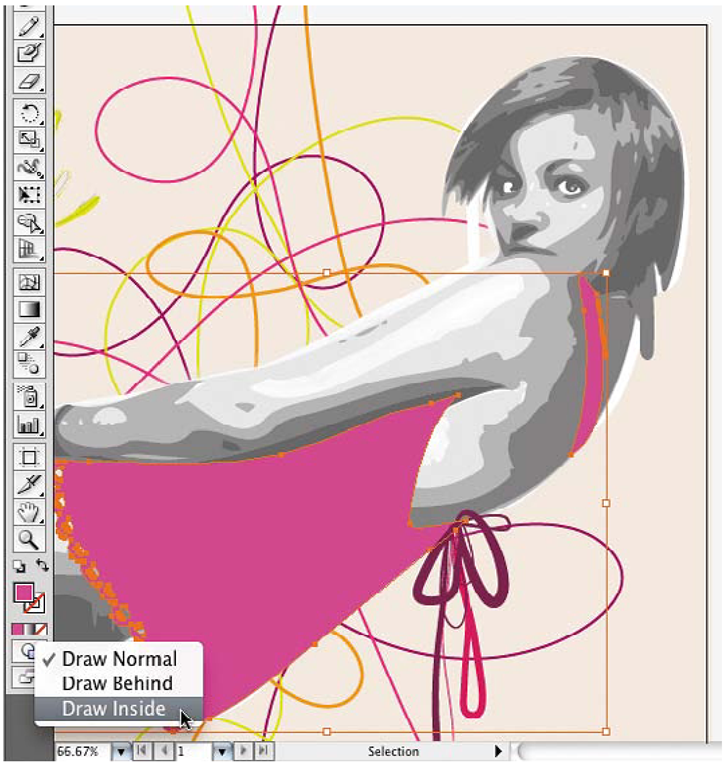
3 With the Selection tool, select the pink dress.
4 In the Tools panel, click the Drawing Modes icon and choose Draw Inside. This will let you draw freely and keep your artwork inside the dress.
5 Choose Select > Deselect, and then select the Brush tool.
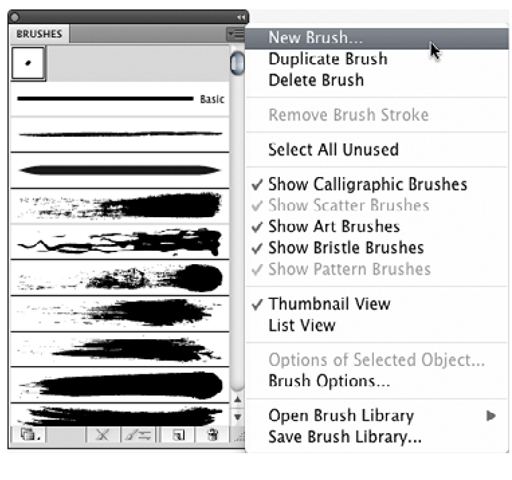
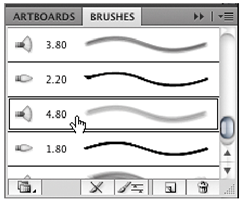
6 Choose Window > Brushes, and then choose New Brush from the Brushes panel menu. In the New Brush dialog box, select Bristle Brush and click OK.
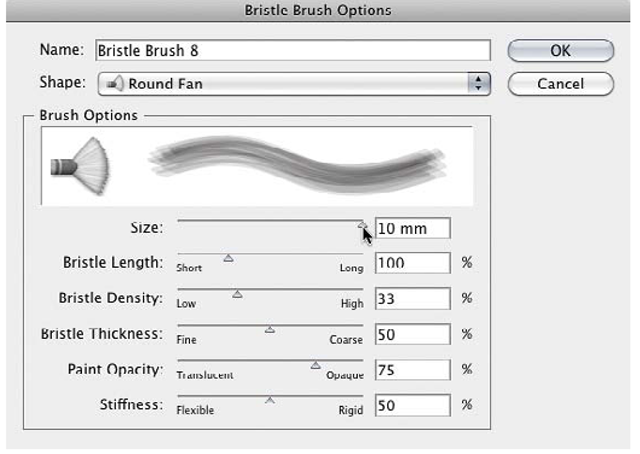
7 In the Bristle Brush Options dialog box, choose Round Fan from the Shape menu. Change the Size to 10mm; you don’t need to change anything else. Click OK to close the dialog box.
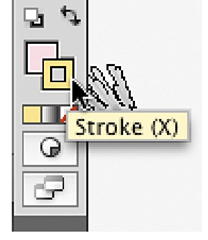
8 In the Tools panel, make sure Stroke color is active, and then in the Swatches panel, select a color that’s different than the dress.
9 Drag the brush inside the dress to paint with broad strokes. Try different colors.
10 With the Selection tool, select the tallest pink swirl behind the model.
11 In the Brushes panel, select the 4.80mm round fan brush. Notice how the swirl now appears as if it had been painted freehand. In this way, you can easily apply Bristle Brush strokes to a path you’ve already drawn.
12 Choose File > Save As, navigate to your LessonOl folder, name the file bristle_ brush_done.ai, and click Save. Then close the document.


