Lesson Overview
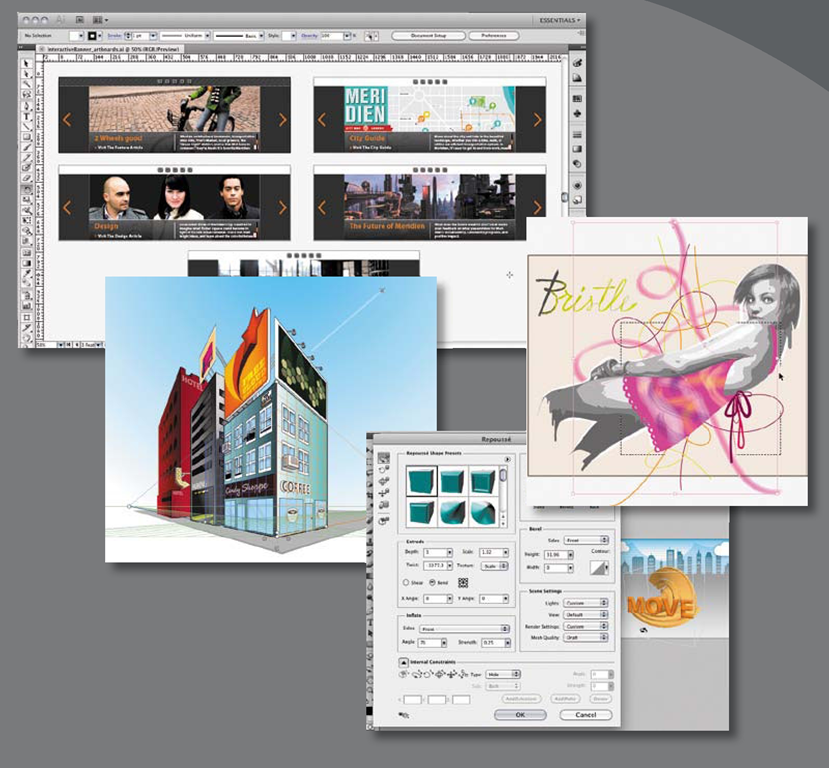
The way you set up your documents and create your assets will affect how easily and efficiently you can design your work. This lesson will introduce you to some important skills and concepts:
• Organizing your work in Adobe Bridge
• Drawing expressively with the Bristle Brush in Illustrator
• Refining a vector graphic in Illustrator with the Blob Brush tool
• Setting up multiple Illustrator artboards for design variations
• Drawing in perspective in Illustrator
• Removing a background in Photoshop Extended
• Removing unwanted objects in Photoshop Extended
• Creating a 3D object in Photoshop Extended
You’ll probably need between one and two hours to complete this lesson.
In this lesson, you’ll be working on exciting projects: painting with a pattern to add pizzazz to a graphic, creating design variations on their own artboards, and manipulating a 3D comp. You’ll be preparing assets that you’ll use in a printed and interactive brochure and Flash animation in lessons later in this topic.
Organizing your work with Bridge
In this lesson, you’ll set up some of the basic assets that you’ll use for the projects in this topic. Two projects are the basis for the lessons in this topic: Promotional materials for an imaginary film noir called Double Identity, and a fictional regional magazine called Local which has both print and interactive online components. You’ll be working in Adobe Bridge, Adobe Illustrator, Adobe Photoshop Extended, and Adobe Acrobat.
Adobe Bridge CS5 provides integrated, centralized access to your project files and enables you to quickly browse through your creative assets visually—regard-less of what format they’re in—making it easy for you to locate, organize, and view your files.
Adding folders to your Favorites
To help you access your files easily, Adobe Bridge adds your Pictures and Documents folders to the Favorites panel by default. You can add as many of your frequently used applications, folders, and documents as you like. In Bridge Preferences you can even specify which of the default favorites you want to keep in the Favorites panel.
After you’ve copied the Lessons folder from the Adobe Creative Suite 5 Classroom in a topic disc to your hard disk, it’s a good idea to add your Lessons folder to the Favorites panel in Bridge, so that the files you’ll use for the lessons in this topic will be only one click away. You could add your LessonOl folder right below that and keep it there while you work through this topic.
1 Start Adobe Bridge CS5. At the top of the Bridge window, make sure the Essentials workspace is selected.
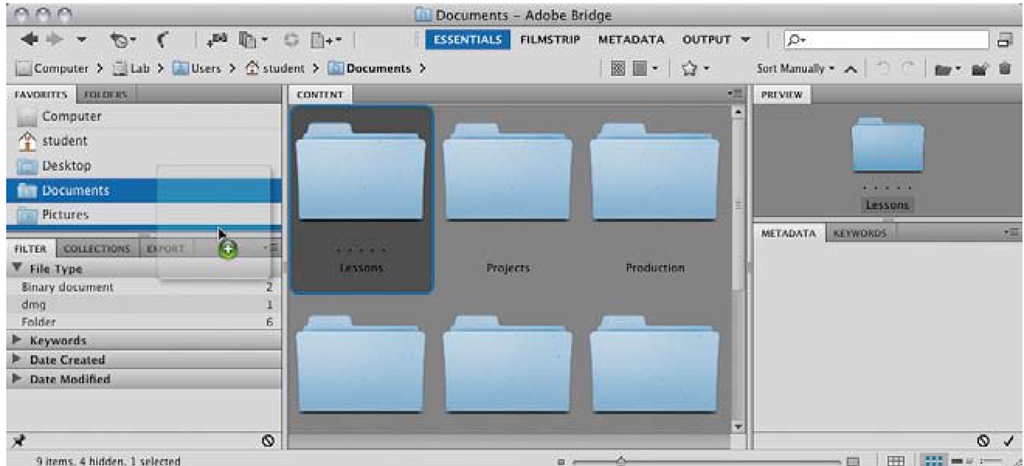
2 Navigate to your Lessons folder, and then select the LessonOl folder in the Content panel. Drag it into the Favorites panel in the left panel group and drop it under the Pictures folder.
Note: Before you start working on this lesson, make sure that you’ve installed the Creative Suite 5 Design Premium software on your computer, and that you have correctly copied the Lessons folder from the CD in the back of this topic onto your computer’s hard disk (see "Copying the Classroom in a topic files” on page 2).
► Tip: You can also quickly add a folder to your Favorites by right-clicking/Control-clicking the folder in the Content panel and choosing Add To Favorites from the context menu.
Now your Lessons files are easily accessible. While working through the lessons in this topic you’ll save so much time that it’ll be unimaginable to work any other way!
Adding metadata
All your documents contain some metadata, such as information about the device with which they were created. You can use Bridge to add your own metadata to a single file or to multiple files at the same time—without having to open the application specific to those files.
In this first exercise you’ll see how easy it is to add metadata to a file and learn som different ways to mark it, which will make it easier to find and sort.
1 In Bridge, navigate to your LessonOl folder to see the files inside. You’ll be working with these files later in this lesson.
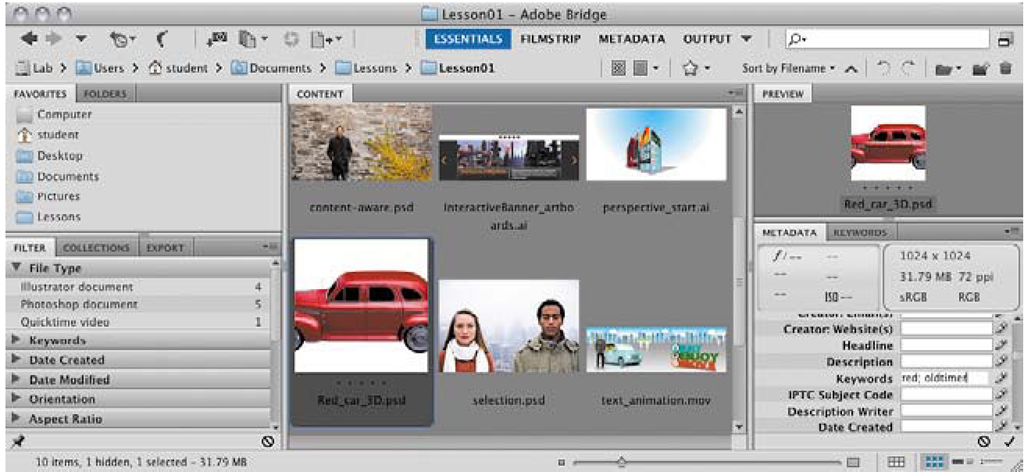
2 Select the file Red_car_3D.psd and note the Metadata panel in the right panel group.
3 In the Metadata panel, expand the IPTC Core panel, and type red, oldtimer in the Keywords text field.
Tip: If you can’t read all your filenames or the thumbnail images are not big enough, you can enlarge them by using the Zoom slider at the lower-right corner.
What you just did is enter two keywords, using a comma to separate them so that they are entered individually. You can also enter keywords using the Keywords panel that you may see grouped with the Metadata panel, but when you’re entering many types of metadata you may find it more convenient to enter them in the Metadata panel along with everything else.
4 Press Enter/Return to apply your entries.
When you search for this file in the future, the metadata you just added will help you to find this specific file. Bridge looks in the metadata fields when you search for a file in Bridge, and in addition, the search features built into Microsoft Windows and Mac OS X also look for keywords to improve their search results.
• Note: If you forget to press Enter/Return after typing keywords, a confirmation dialog will appear when you click outside the Metadata panel; click Apply to confirm your entries.
Marking your files with ratings and color labels
When you’re working with a large number of files and folders, assigning ratings and labels is a good way to mark a large number of files quickly, making it easier to sort and find them later.
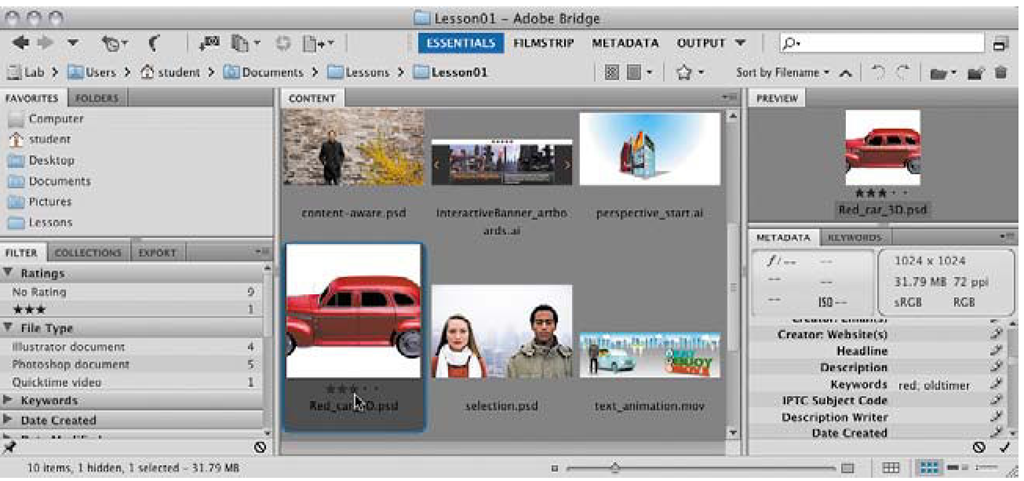
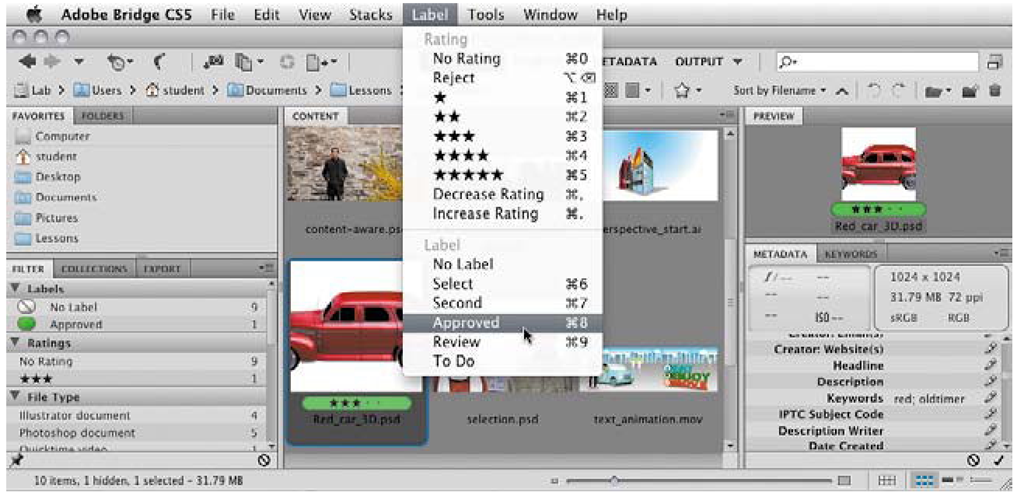
1 In the Content menu, note the five dots above the filename Red_car_3D.psd, indicating that this file has not yet been rated. Click on the third dot, which will apply a three-star rating—it’s that easy to rate a file.
Note: If you don’t see rating stars under a thumbnail, enlarge the thumbnail size by dragging to the right the slider at the bottom of the Bridge window, and make sure the View > Show Thumbnail Only command is deselected.
You can also mark a file visually by assigning a color label.
2 Choose Label > Approved. Your file is marked with a green color label, which you can also see in the right panel group.
This color labeling system is not only useful to help you quickly spot the images you’re looking for, but is also an effective way to sort your images by category, production status, or any other meanings you assign to the labels. This can be a useful organizational tool—especially when different people are working on the same project. You can use the Filter panel to quickly locate files with specific ratings or labels.
About Live Trace
A lot of great design ideas start out as a great pencil sketch on paper. To keep the precious spontaneity of such hand-drawn scribbles, it’s best to bring the graphics straight into Illustrator and trace them. Placing a scanned file into Illustrator and automatically tracing the artwork with the Live Trace command is the easiest way to do so. The illustrations below show studies for a logo.
Live Trace automatically turns placed images into detailed vector graphics that are easy to edit, resize, and manipulate without distortion. And, as Illustrator fans know already, Live Trace enables you to produce stunning looking illustrations by changing rasterized images into vector-based drawings. You’ll appreciate how quickly you can re-create a scanned drawing onscreen, maintaining its quality and authentic feel.
3 Right-click/Control-click the image of the car again, and this time choose Sort > By Label from the context menu. If you had multiple files with the same label, they would now be grouped in the Content panel. You can change the sort order by toggling View > Sort > Ascending Order.
Synchronizing color management
Using Bridge as your central hub enables you to synchronize the color management settings across all your Creative Suite applications. It’s highly recommended to use this feature so that the colors in your images will look the same regardless of which Creative Suite component application you’re working with.
There are a range of options for synchronizing color management. You can specify your own color settings in the Color Settings dialog box in the relevant Adobe application, and then apply it to all the other Adobe Creative Suite applications in Bridge, or you can choose one of the Bridge presets.
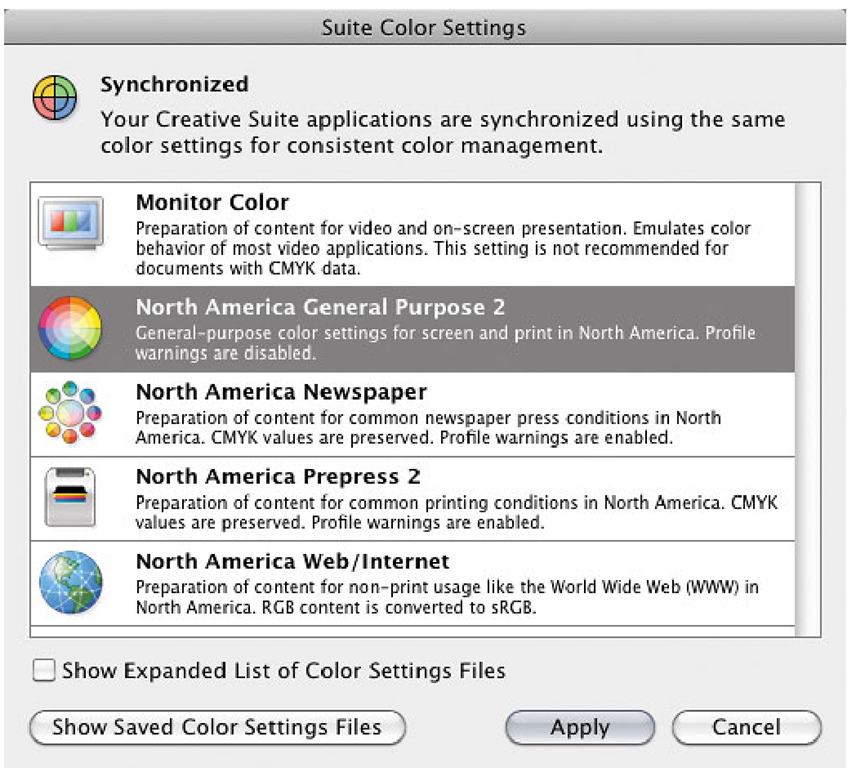
1 In Bridge, choose Edit > Creative Suite Color Settings.
Note: Suite Color Management is not enabled. Suite Color Management requires that a qualifying product has been launched at least once,” exit Bridge.
Start a Creative Suite component such as Photoshop, InDesign, or Illustrator, then start Bridge again and return to this step. A "qualifying product” is one that has been installed as part of Creative Suite.
2 The Suite Color Settings dialog box appears. A message at the top of the dialog box tells you whether or not the settings are already synchronized. If they are not, choose North America General Purpose 2 from the color settings menu, and then click Apply. If the Apply button isn’t active, select any setting, then select North America General Purpose 2 and click Apply.
The message at the top of the Suite Color Settings dialog box should now indicate that all your CS5 applications use the same color management settings.
