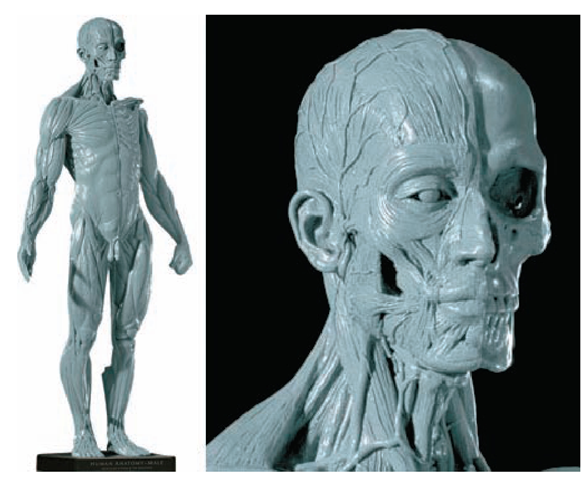
The approach used to sculpt the head and body in Figure 2.21 is called écorché. Écorché is derived from the French word for “skinned” and generally refers to a sculpture of a human or animal with the skin and subcutaneous fat removed so the muscle and skeletal systems are visible. As a method of anatomical study, écorché sculpture involves a constructive approach to building the figure by sculpting the bones and overlying muscles layer by layer, working up to the surface forms. This allows the artist to gain a deeper level of insight into how bone, muscle, and fat combine to create the human form. This tutorial is similar to the process I demonstrate for sculpting the human head in my topic ZBrush Digital Sculpting Human Anatomy. If you are interested in more in-depth demonstrations on sculpting the human form in ZBrush, consider checking out that topic.
ZBrush layers and clay sculpting tools allow you to use this same approach in a digital medium. Starting with the PolySphere tool, we’ll mass in the forms of the skull, add the major facial and epicranial muscles, and then add the skin and fatty tissue that fills out the transitions. This exercise is inspired by a video produced by digital sculptor Ryan Kingslien, available at www.zbrushcentral.com.
In this exercise I approach the head, neck, and ear separately for the sake of clarity in illustrating the steps. In reality I would sculpt all parts simultaneously, thus keeping a unified level of finish to the whole head as it progresses. See the accompanying DVD for a video of this sculpture from start to finish.
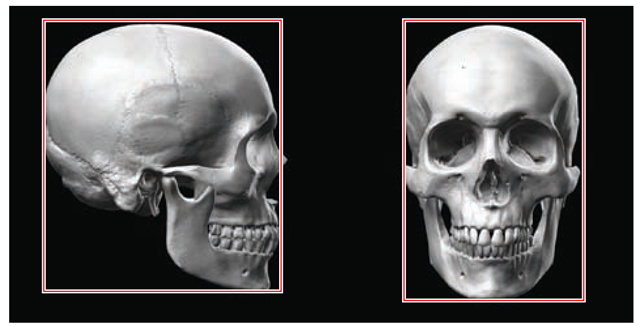
Before we begin sculpting, let’s take a moment to look at the human skull and note some particulars about its shape and the proportion of the masses to one another. The skull can be divided into the cranial mass and the facial mass; these are color-coded in Figure 2.22. The cranial mass is an ovoid shape that forms the protective covering around the brain. Hanging off the front of this ovoid shape is the wedge of the facial mass.
Figure 2.21 Examples of écorché sculpture by artist Andrew Cawrse.
Figure 2.22 The two head masses, cranial and facial
A Note on Anatomical Terminology
Although it is not necessary to know the names of all the bones, muscles, processes, fossa, and epicondyles of the body to be a good sculptor, I find that learning the names is helpful when developing a knowledge of anatomy. Knowing the name of a part gives you a kind of mental box to store the information in. Learning the names also helps you communicate specific information about your figure.
I have found it expedites the process of retaining information about anatomy when you have the names of the shapes you are trying to understand. For this reason, I am including some of this information in this topic (although this is by no means an in-depth look at the anatomy of the head and neck). If you are interested in more tutorials focused on sculpting human figures, see ZBrush Digital Sculpting Human Anatomy, where I present an approach to sculpting a heroic figure with a focus on learning the shapes of the major muscle and skeleton forms as well as anatomical terminology.
A common mistake is to make the face too big on the head by neglecting the cranial mass. We as humans are constantly focused on the faces of those around us, particularly the eyes. Because of this, our natural inclination is to enlarge these parts. By paying special attention to bony landmarks, proportions, angles, and measures between each part of the head, we can ensure the shapes maintain their proper relation to each other.
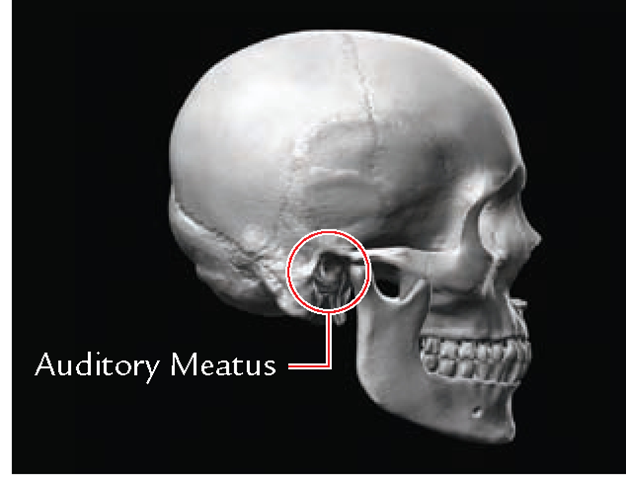
In the following sections I’ll provide a few guidelines for you to follow. In Figure 2.23 notice that the skull can fit in a box. The centerline of the y-axis of the skull passes through the auditory meatus, also known as the ear hole (Figure 2.24). This is a key landmark when sculpting the head because it represents an immobile point from which you can make all your comparative measurements. The lateral midline of the skull passes through the eye sockets and nasal bone (Figure 2.25). The measuring guides seen in this image are available in ZTool form on the accompanying DVD. The head is divided into thirds with two smaller lines between the nasal bone and chin.
• The first line from the top represents the hairline. This marks the start of the first third of the head.
• The second line represents the brow line.
Figure 2.23 The skull in profile. Notice that it is two thirds as wide as it is deep.
Figure 2.24 Auditory meatus represents a landmark that sits just behind the centerline of the skull in the side view.
• The third line represents the bottom of the nose.
• The last third of the head is divided into thirds itself. This is represented by the two smaller lines on the image. The first line marks the line between the lips, and the second denotes the midpoint between the lip and chin.
Saving Your Work
As you work through this topic, you will want to save your work often. You always want to save your work as ZTools rather than as models or documents because ZTools carry all your model, texture, and sculpting information. You can save projects under the File menu at the top of the screen. Now let’s get started sculpting!
Figure 2.25 The human skull with measuring guides in place.
There is one more option for saving your work. ZBrush now supports the ZBrush Project format. This is a single file that saves your document settings, light, material, texture, polypaint, model, timeline, and sculpting information. Any and all info regarding your work is saved in this file.


