Hands-on examples
Now let’s go through the process of making an animation of a 2D character who has a 3D arm. Our main concerns will be registration and line look. As discussed previously, the line look of the two elements will need to match. To do this, you must master the rendering process and render the 3D line look or use the 3D part as a template and draw over it in the software package of your choosing. Unfortunately, the latter choice does not decrease one’s line mileage.
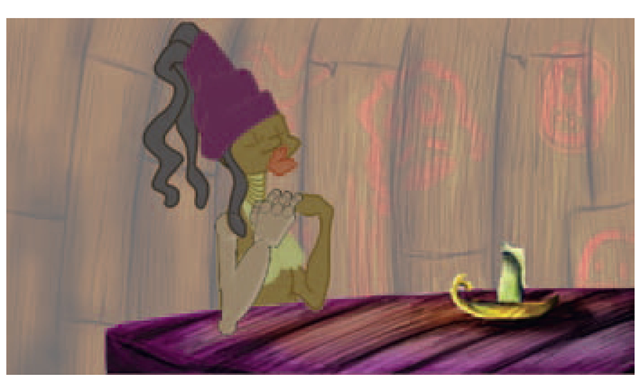
We will take sequence 1, scene 10, from the storyboard at the beginning of this section. This is a sequence from SCAD student Dianna Bedell’s senior project. The character was not designed to be 2D/3D. We will retrofit the Hoodoo priestess with a 3D arm.
FIGURE 4.6 Finished 2D character design.
FIGURE 4.7 3D arm by Danny Tiesling, 2009, SCAD.
FIGURE 4.8 3D arm added to a 2D character.
All images for this hands-on section can be found in the companion data for this topic at www.hybridanimation.com.
TIMING
When working out your animation timing, there are many software and analog options for you. I encourage my students to work in whatever method is fast and cheap. I don’t mean cheap as in how much it costs. Instead, I mean cheap as in how dear it is to you? If you have to work very hard to create just one image, you will be less inclined to part with it if it needs to be changed or discarded. However, if you utilize a method that easily allows you to change an image that is not as dear to you, you are more likely to tweak. You will also want something that allows you to adjust your timing easily and go back to previous versions just as easily. This will allow you to be bold and experiment with new timing. Who knows what happy accidents might turn up?
Hopefully, you have already begun working in 2D and in this you have already begun working on the 2D animation pipeline that best suits you. In this topic we’re going to push for digital animation methods. Feel free to modify to fit the pipeline that best supports your creative process. By now you should know where to go to share your favorite method with the rest of us: www. hybridanimation.com.
This topic will not help you on your animation and acting. You’ll have to bring that to the table yourself. To further push your animations, you can always refer to Action! Acting Lessons for CG Animators by John Kundet-Gibbs.
To begin work on your sketches, stay loose and work in your sketchbook and then scan those in. Or you can use your favorite software to draw in. Film Roman, the studio that brings us The Simpsons, has recently gone through a transition from paper to digital drawing. Film Roman’s animators use both methods depending on the scene and need. They use Toon Boom’s Sketchbook Pro to create their key sketches.
Once your main ideas are worked out, you will want to work on your timing, there are two pieces of software that I use: Flash or FlipBook. I have a few students who use Photoshop to do their timing. I find it gets in my way because I think in x-sheets and timelines.
Timing in Flash
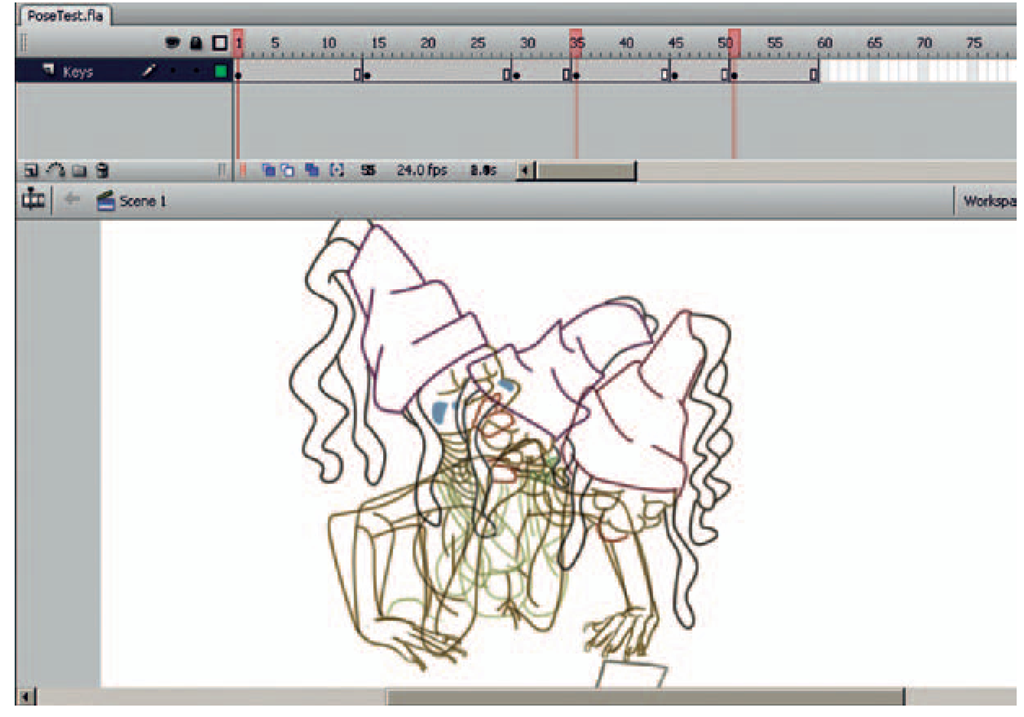
For this example, we have scanned in our images using a flatbed scanner. Figure 4.9 shows an animation that has been scanned in with keyframes placed into Flash’s timeline. Additional poses can be drawn easily in Flash. Keyframes can be moved. Held frames can be added or removed to adjust the timing. Playback is done easily as well.
FIGURE 4.9 Keyframes placed in Flash and timing adjusted.
Take Note
Remember to check your frame rate settings! We are working at 24 fps for this example.
Timing in Digicel flipBook
Another software program that you can use is DigiCel FlipBook. Here I’ll show an example of using DigiCel FlipBook and a multifeed scanner. (You will be spoiled rotten if you use one of these scanners.)
FIGURE 4.10 Frame rate settings in Flash and FlipBook.
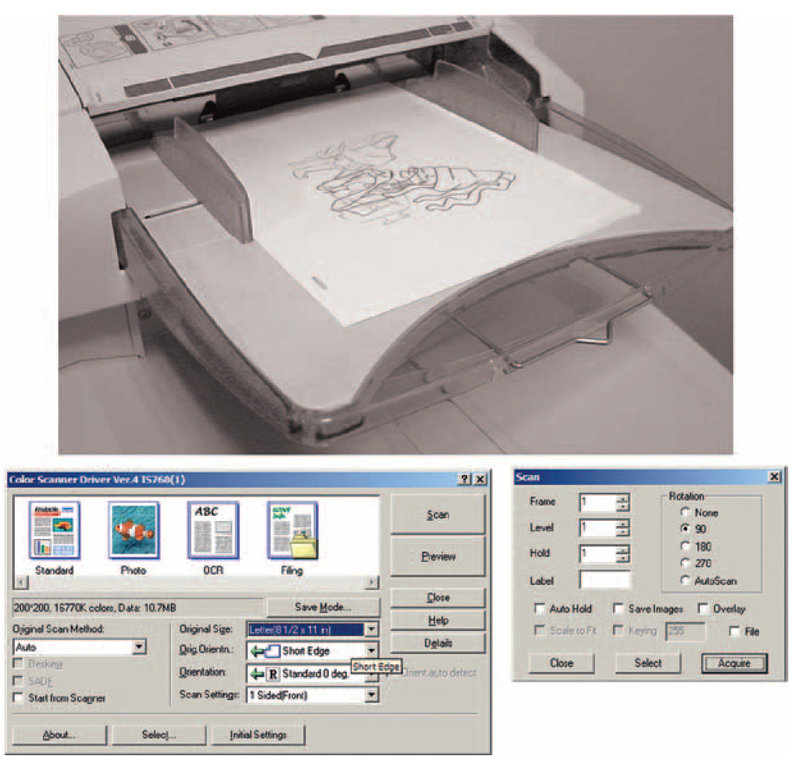
In DigiCel FlipBook, click File > Scan to scan in the pegged up images. An example of a typical setting for a multifeed scanner is shown in Figure 4.11.
FIGURE 4.11 Scanning in images using a multifeed scanner (show peg holes).
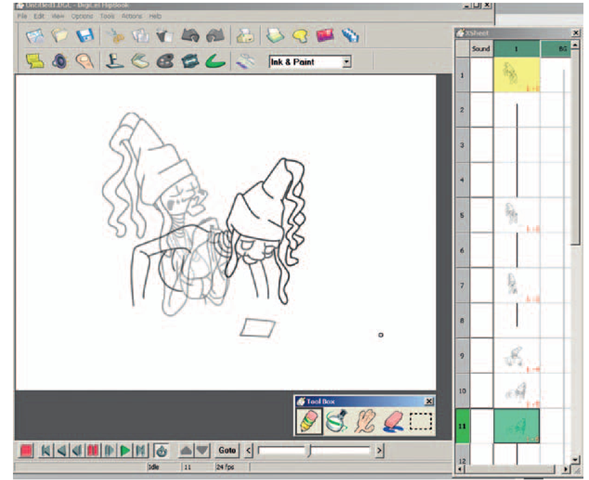
DigiCel shows the images on an x-sheet. Click and drag the images to the appropriate frame. You can also draw, using the pencil tool, additional poses.
FIGURE 4.12 Keyframes scanned into DigiCel FlipBook to adjust timing.
Now, maybe I was having a bad day, but the first time I tried to do a timing test and draw in FlipBook, I had issues. The only thing that keeps me from thinking that possibly I had forgotten to install my brain that morning is the fact that I gave the same exercise to my class. Out of 10 people in the class, half had the same issues that I had. For those of us who had issues, let me hold your hand and walk you through it. The obstacles to get through are what the colors in the x-sheet mean and the use of the ALT key instead of the CTRL key (on a PC).
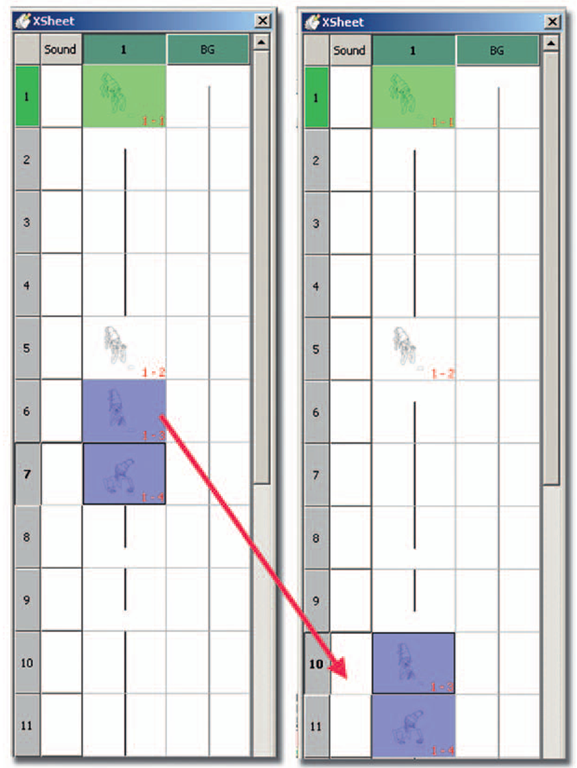
1. Moving keyframes. Once you have scanned your drawings into the x-sheet, you will want to drag them to the timing you think is correct. This really is simple. Select drawings in the x-sheet and they turn blue. You can use SHIFT to select multiple drawings. See Figure 4.13 to see two keyframes moved from frame 6 to frame 10.
2. Onion skinning. This one took me the longest. I swear it is silly. You thought I was smart. I get weird with some software; it must be an interface thing. How do we see our keyframes in onion skinning? Here’s the secret: When you double-click on drawings they highlight in yellow and that drawing will show up on the canvas. If you have stack enabled, you will see your drawings onion skinned. Don’t want to see a drawing? Then ALT + Click on the drawing in the x-sheet once. The drawing you are working on shows up in green.
FIGURE 4.13 Moving multiple keyframes in FlipBook.
3. Adding drawings. To add a breakdown in FlipBook, simply double-click on the frame in the x-sheet on which you want to draw. It turns green. Draw your breakdown. Beware: you can have a frame in the x-sheet selected for moving (it is blue),but it is not the frame you are drawing on (that is green). That was my major confusion with the software. Glad I have that cleared up.
FIGURE 4.14 Seeing keyframes in onion skin.
4. Drawing. The pencil is the default tool. The hotkey to switch between pencil and the eraser is e. To resize the pencil, right mouse click on the pencil icon to view the pencil attributes. You can see the attributes in Figure 4.15.
5. Playback and adjusting. Press the play arrow at the bottom of the canvas, and you will see your animation. To add more time to your animation, select a drawing in the x-sheet (remember, it is blue) and select Edit > Insert. It will insert a hold on the previous drawing.


