By : James W Zubrick
Email: j.zubrick@hvcc.edu
Unfortunately, glass apparatus needs to be held in place with more than just spit and bailing wire. In fact you would do well to use clamps. Life would be simple if there were just one type of fastener, but that’s not the case.
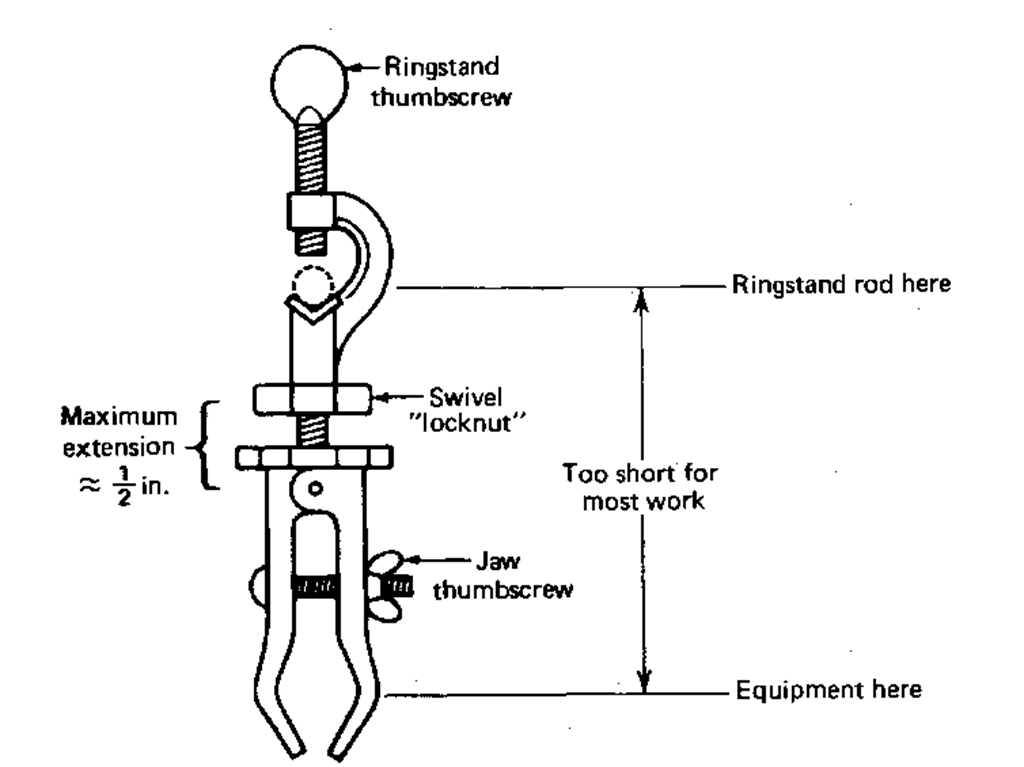
1. The simple buret clamp (Fig. 65). Though popular in other chem labs, the simple buret clamp just doesn’t cut it for organic lab. The clamp is too short, and adjusting angles with the “locknut” (by loosening the locknut, swiveling the clamp jaws to the correct angle and tightening the locknut against the back stop, away from the jaws) is not a great deal of fun. If you’re not careful, the jaws will slip right around and all the chemicals in your flask will fall out.
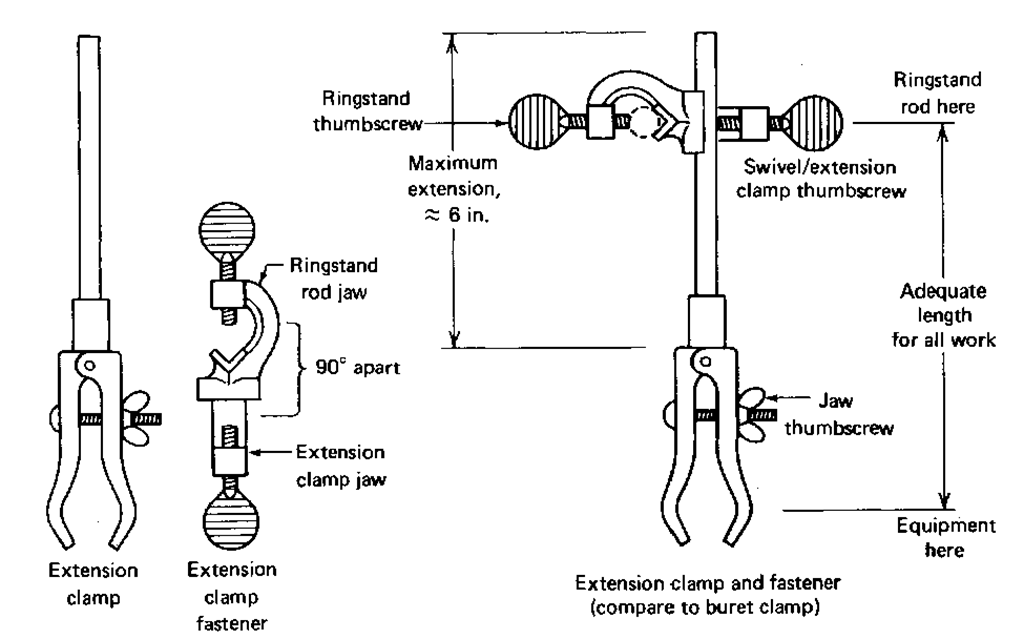
2. The simple extension clamp and clamp fastener (Fig. 66). This two-piece beast is the second best clamp going. It is much longer (approx. 12 in.), so you can easily get to complex setups. By loosening the clamp holder thumbscrew, the clamp can be pulled out, or pushed back, or rotated to any angle. By loosening the ringstand thumbscrew, the clamp, along with the clamp holder, can move up and down.
3. The three-fingered extension clamp (Fig. 67). Truly the Cadillac of clamps with a price to match. They usually try to confuse you with two thumbscrews to tighten, unlike the regular extension clamp. This gives a bit more flexibility, at the cost of a slightly more complicated way of setting up. You can make life simple by opening the two-prong bottom jaw to a 10 to 20° angle from the horizontal and treating that jaw as fixed. This will save a lot of wear and tear when you set equipment up, but you can always move the bottom jaw if you have to.
Fig. 65 The “barely adequate for organic lab” bureT clamp.
Fig. 66 The extension clamp and clamp fastener.
Fig. 67 The three-fingered clamp with clamp fastener.
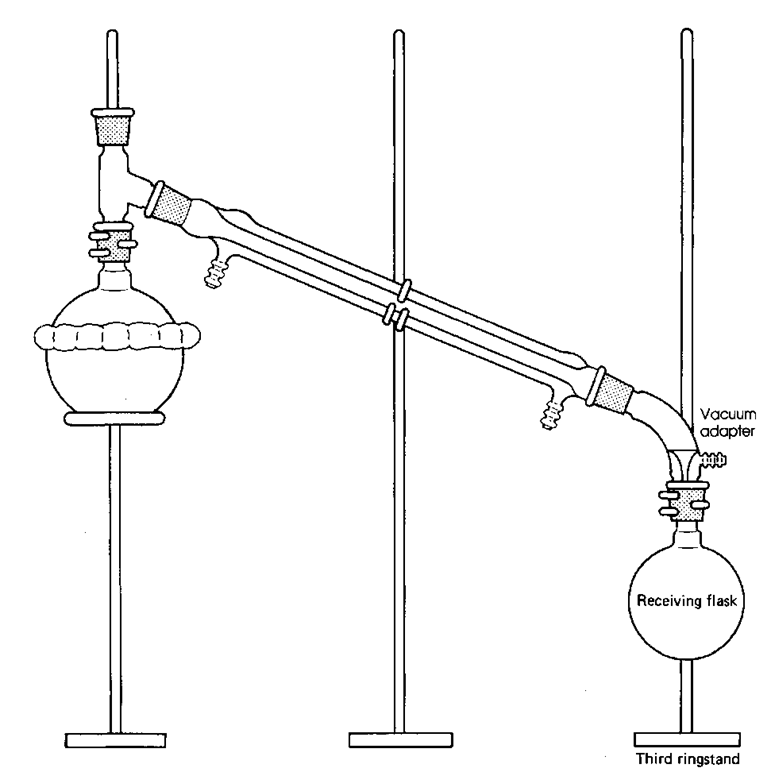
CLAMPING A DISTILLATION SETUP
You’ll have to clamp many things in your life as a chemist, and one of the more frustrating setups to clamp is the simple distillation (see Chapter 15, “Distillation”). If you can set this up, you probably will be able to clamp other common setups without much trouble. Here’s how to go about setting up the simple distillation.
1. OK, get a ringstand and an extention clamp and clamp fastener and put them all together. What heat source? A Bunsen burner, and you’ll need more room than with a heating mantle (see Chapter 13, “Sources of Heat”). In any case, you don’t know where the receiving flask will show up; and then you might have to readjust the entire setup. Yes, you should have read the experiment before so you’d know about the heating mantles.
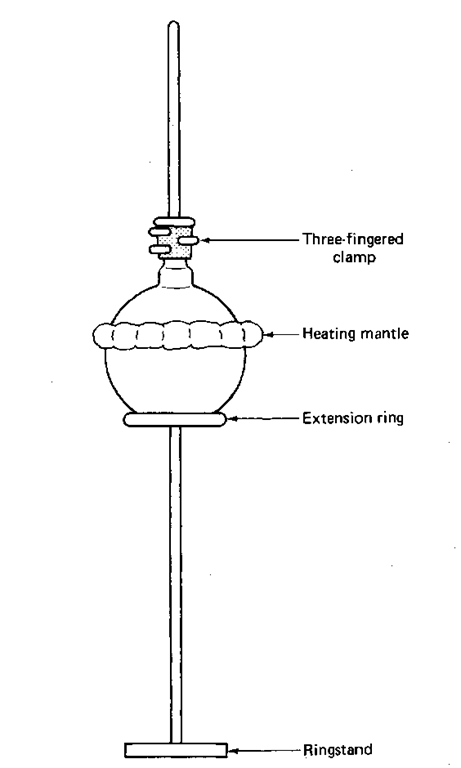
2. Clamp the flask (around the neck) a few inches up the ringstand (Fig. 68). We are using heating mantles and you’ll need the room underneath to drop the mantle in case it gets too hot. That’s why the flask is clamped at the neck. Yes. That’s where the flask is ALWAYS clamped, no matter what heat source, so it doesn’t fall when the mantle comes down. What holds the mantle? Extension ring and clamp fastener.
3. Remember, whether you set these up from left to right, or right to left— distilling flask first!
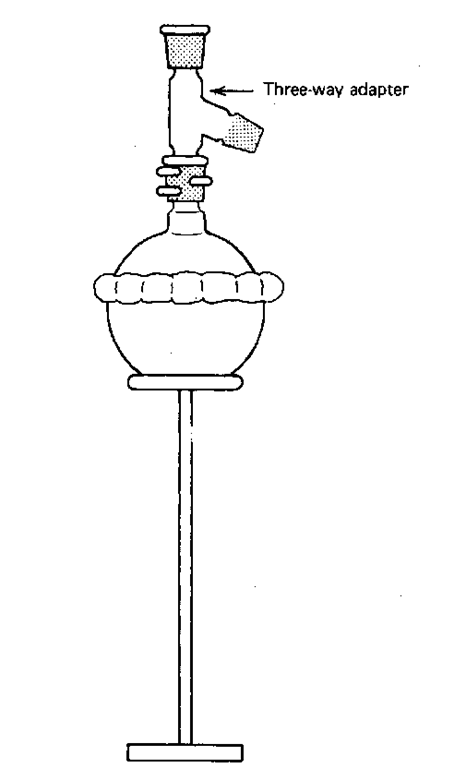
4. Add the 3-way adapter now (Fig. 69). Thermometer and thermometer adapter come later.
5. Now add the condenser. Get another ringstand, extension clamp, and clamp fastener. There. Estimate the angle and height the clamp will be at when the setup is clamped. Try setting the two-pronged jaw at about a 30° angle to the extension rod and call that the fixed jaw. Now turn the clamp so that the two-prong “fixed” jaw is at the bottom. Now, this two-pronged jaw of the clamp acts as a cradle for the condenser. Since tightening the top jaw won’t move the bottom jaw, there won’t be too many problems.
Fig. 68 Flask and heating mantle out on a ringstand.
Fig. 69 Clamps and flask and three-way adapter.
6. Place the two-prong clamp jaw in line with the condenser. Attach the condenser to the three-way adapter (Fig. 70). Hold everything! Sure. OK, loosen extension clamp holder thumbscrew, turn clamp to correct angle, and tighten. Now the height—up just a bit—Good! The lower “fixed” jaw cradles the consenser. Tighten the ringstand thumbscrew (Arrrgh!) Clamps tend to move up ever so slightly as you tighten the fastener on the ringstand.
7. Bottom jaw supports condenser—check. Joint at the three-way adapter/condenser OK? Good. Tighten wing nut and bring the single-prong jaw down onto condenser (Fig. 70). Not too tight.
Fig. 70 Clamping the condenser without arthritic joints.
8. Back from the stockroom again. Having put the vacuum adapter on the end of the condenser, expecting it to stay there by magic, you’ll be more careful with the new one.
9. Do the third ringstand—extension clamp — clamp fastener setup. It’s handy to think of the extension clamp and clamp fastener as a single unit. Clamp receiving flask in place. Put vacuum adapter in the flask now. Adjust. There! Got it.
10. All the clamps set up, all the joints tight—now where is that thermometer adapter?
Fig. 71 Correctly clamping the vacuum adapter.
