Step 1: Choose a Story Thread and a Pattern to Follow
You need to quickly make an emotional connection with an audience to motivate them, and you see the specific words that do that in Act I, where you write out the classical elements of a strong story beginning. The first five headlines you write in Act I of the story template will connect emotionally with an audience, define a problem they face, and explain how they can solve it. This forms the story thread that will carry attention through the entire presentation. You will reinforce the strength of the thread to carry new information through the working memory of your audience by applying a familiar pattern in the form of a verbal and visual motif, or recurring theme.
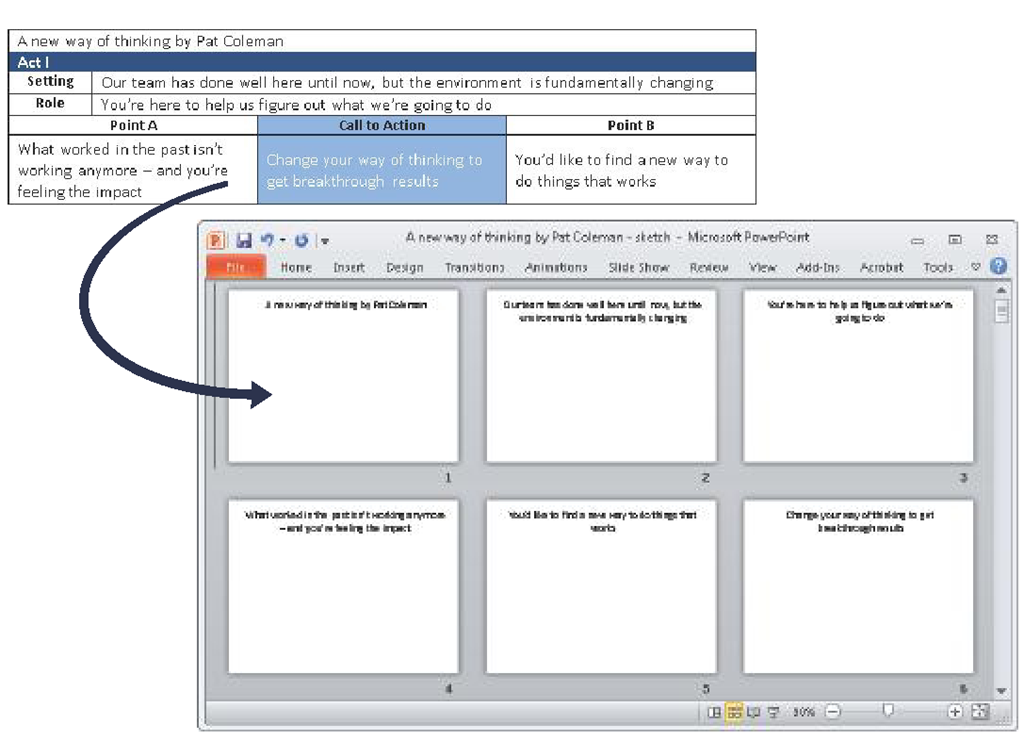
After you complete Act I and the rest of the story template, you’ll import these five headlines into PowerPoint, where each statement becomes the headline of a PowerPoint slide, as shown in Figure 3-7.
FIGURE 3-7 The five sentences you write in the story template become the headlines of your first five slides.
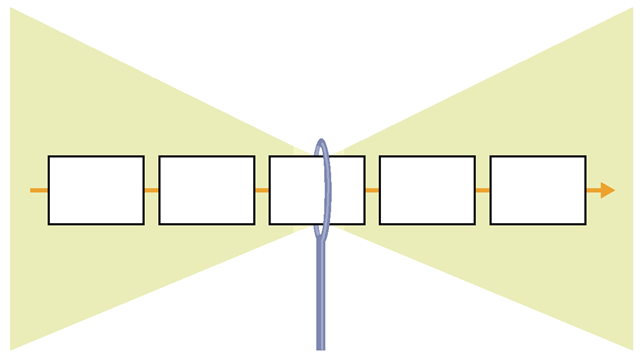
When you view the first five slides in Slide Sorter view, you see by reading the headlines of the slides the story thread that will carry your specific sequence of ideas through the eye of the needle of working memory of your audience, as shown in Figure 3-8; this sequence will also provide the framework for your visuals and narration.
FIGURE 3-8 Act I defines what you’ll show to working memory in the first five slides.
Step 2: Pull Through What’s Most Important First
You set in motion a number of powerful processes in Act I of the story template that continue to play out as you create the rest of the slides in your presentation. Just as in Act I, you’ll break up your ideas in Act II into digestible pieces by writing out complete-sentence headlines in the story template. Later, each sentence will become the headline of a slide, as shown in Figure 3-9.
FIGURE 3-9 The headlines you write in Act II of the story template become the headlines of the rest of your Act II slides.
The challenge of any presentation is not to show all the information you have but, instead, to select the appropriate information to present. The story template guides you through the important process of selecting only the ideas your audience needs to know and breaking them into digestible chunks that are easier for your audience to understand.
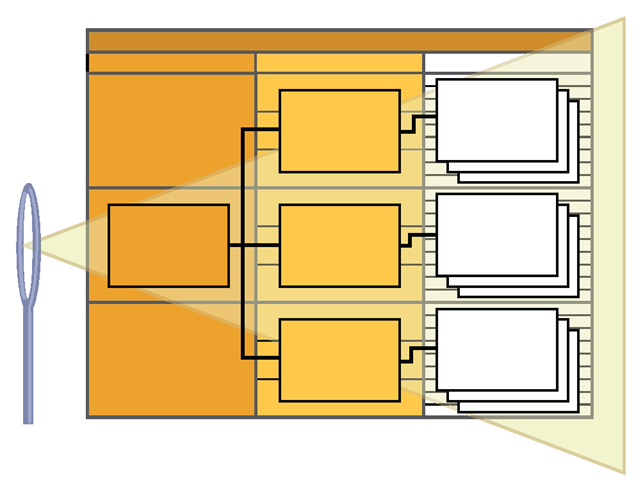
A logic-tree structure is built into Act II of the story template, as shown in Figure 3-10; this structure helps you put the most important information at the top level of attention, to increase memorability and application. A presentation should have three or four key points, and you literally can see them in Act II, where you clarify and identify these top-level points, create a logical and clear structure, and perhaps most important, leave out nonessential information.
FIGURE 3-10 A built-in logic-tree structure prioritizes your ideas from most important to least.
Completing Act II of the story template can be the hardest thing you do in BBP if you’re new to this way of thinking. But the investment in learning will sharpen your critical-thinking skills and ensure that the new information in your presentation appears in the order and sequence needed to prevent overloading the working memory of your audience, as shown in Figure 3-11.
FIGURE 3-11 Act II makes sure that you present the correct priority and sequence of slides to working memory.
Step 3: Guide the Visual and Verbal strands with Your storyboard
With the click of a mouse, you’ll transform your Word story template into a PowerPoint storyboard. You’ll work with your storyboard in Slide Sorter view to review your story structure and sequence, check your pacing and flow, and use visuals to tie together the various parts of your story. This planning ensures that you continually build on and improve your strong story foundation with a single unified set of visuals and words.
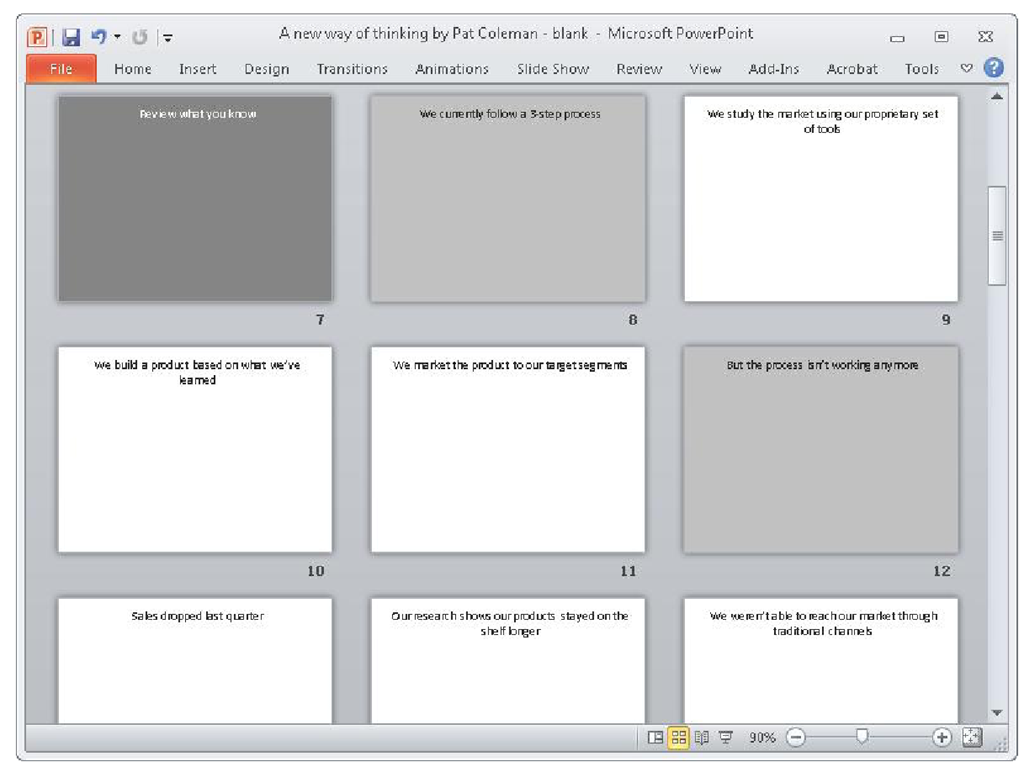
Next you will quickly apply layouts with slide backgrounds that indicate the three hierarchical levels of Act II slides, as shown in Figure 3-12, to set up preliminary visual cues that designate which slides are more important than others and how those slides fit into a sequence. After you do this, you’ll be able to easily see the three most important slides in your presentation—the dark gray ones. You’ll also be able to see your second-most important slides—the light gray ones—and your third-most important slides— the white ones—to easily locate and hide them if you need to quickly scale down the presentation to a shorter amount of time.
FIGURE 3-12 Next you’ll cue working memory by applying layouts with preliminary slide backgrounds to the three hierarchical levels of Act II slides.
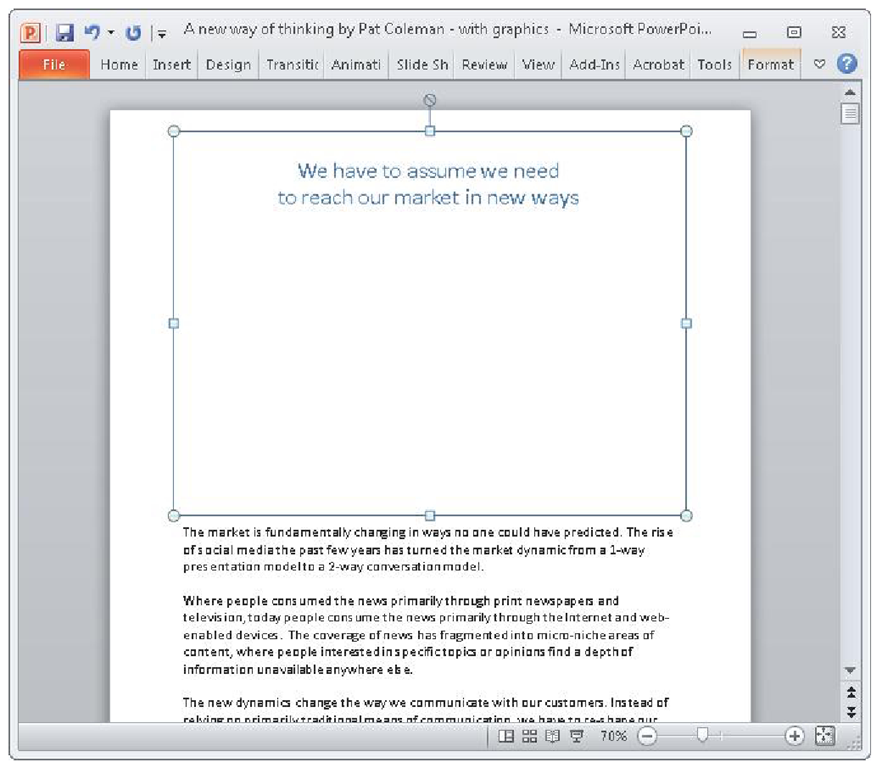
Next you’ll plan the narrated soundtrack of the presentation by writing out the verbal explanation for each headline in the off-screen text box in Notes Page view, as shown in Figure 3-13. If you don’t have time to write out your full narration, just take a few notes here.After capturing in the notes area a record of the rich verbal explanation that will accompany the slide, you then will choose the simplest possible visual to illustrate the headline of each slide.
FIGURE 3-13 First you write out what you’ll say for each headline in the off-screen notes area (bottom). After you have recorded the information that you’ll convey with your voice, you next add a simple graphic to the on-screen slide area (top).
