Extend
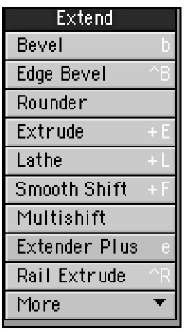
Extend is the first category of the Multiply tab, and it contains tools you’ll probably use often (Figure 1.30). The Extend tools "grow" your selection in different ways. The Extrude and Bevel tools, for example, provide different ways of "stretching" polygons into 3D shapes. The category also includes more complex tools, such as Rail Bevel (located in the More dropdown), which enable you to build a bevel from a curve placed in a background layer. When we discussed layers earlier, we mentioned that foreground and background layers are used for modeling as well as reference. Rail Bevel takes advantage of this.
Figure 1.30
The Extend category of tools within the Multiply menu tab offers tools to add to your objects or selections, such as bevel tools.
Duplicate
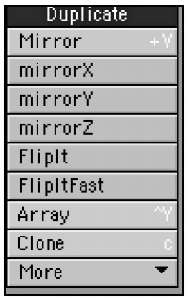
You might think that Duplicate tools (Figure 1.31) would be under the Modify tab, but think again! Creating a new object by mirroring, cloning, or otherwise copying another one is a form of multiplication. The Duplicate tools create variant copies of selections or objects, but these copies are not attached to your original object or selection, the way points and polygons created with the Extend tools are.
Subdivide
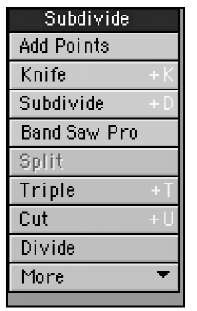
Ah, the Subdivide category. It’s a deep, dark secret set of tools that can enhance your object or selection in a variety of ways. The Subdivide tools (Figure 1.32) perform very cool operations to slice up your object or selection, add to it, or split it up in some way. Let’s say you built a cool character and soon realize that you can’t bend the character’s leg because it’s just one long "solid" object. To make the leg bend at the knee, you would use the Knife tool in this category to slice the leg and add a segment so it can bend. Another cool set of Subdivide tools is the QuickCut tools in the category’s More drop-down. These enable you to quickly slice up an object evenly, which helps you create additional detail for animation.
Figure 1.31
Duplicate tools add to your object or selection by mirroring, cloning, or otherwise copying it.
Figure 1.32
The Subdivide tools enable you to break up your model for added detail and animation control.
Figure 1.33 Using the Construct tab tools, you can add or subtract points and polygons to and from your models.
Construct Tab
When you have geometry that needs to be changed in terms of structure, you’ll work with the Construct tab. Its tools handle tasks such as Boolean operations (which you’ll perform later in the topic) and reducing or converting various types of geometry. When you’re building 3D models, it’s easy to confuse the tools in the Construct tab with those in the Detail tab. The main difference between them is one of scale; when you’re working with multiple objects or sizable portions of objects, Construct is the tab you want. Use the Detail tab for fine-tuning at the level of individual points, curves, and polygons. Figure 1.33 shows the Construct tab tools.
Figure 1.34
You can use tools in the Reduce category to decrease the number of points or polygons in an object or selection.
Reduce
The Reduce category contains tools that enable you take away geometry (points or polygons) from your model without changing its appearance (Figure 1.34). Why would you do this? You could be creating a model for a video game that requires a low number of polygons for speedy animation. Or perhaps you realize you’ve overbuilt a model and added more detail than you need. Why not just leave it detailed? Simple—the more detail you have in an object, the longer it takes LightWave to calculate and render. As mentioned at the beginning of this topic, you need to work efficiently from the ground up. Planning is key, and making models that are not too simple but not too complex is essential to 3D animation. The Reduce category enables you to reduce or remove points or polygons from models while keeping them intact with tools like Bandglue (found in the category’s More drop-down).
Figure 1.35
The Combine tools offers ways to cut holes in objects, merge and stencil objects, and bridge connections between them.
Combine
From time to time, it’s useful to merge objects, or to "subtract" the shape of one object from another to create a hole or cavity. These operations, called Boolean functions, are performed using Combine tools (Figure 1.35), and they are another example of how foreground and background layers are used for modeling purposes. Typical
Boolean operations involve placing an object you want to add or subtract in a background layer so that it overlaps the foreground object. LightWave v9 also features new Speed Booleans, clever tools that permit Boolean operations between objects within a single layer. The Combine tools also include Bridge, which lets you select points on two objects and "bridge" or connect them.
Patches
The tools in the Patches category (Figure 1.36) are useful for applying surfaces, or skins, to curves called splines. Splines are curves that can be put together in multiple ways to build objects. After you group enough curves together, you can patch them to create a surface. Think of an umbrella’s ribs as splines, and its cloth covering as a skin. Patching joins splines together and controls skin characteristics.
Figure 1.36 Use the tools the Patches category to build a skin over a group of curves.
Convert
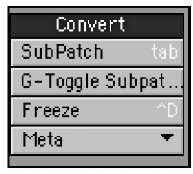
The Convert tools (Figure 1.37) turn curves into polygons, and polygons into curves— a function that’s more helpful than you might think. Let’s say you’ve built the ultimate 3D logo, using curves to surround the client’s name. All is cool until you’re ready to render it out. Curves do not render, but polygons do. So, head on over to the Convert tools and use Freeze to convert your curves into polygons. Other tools in here include the popular SubPatch command, which converts three- or four-point polygons into curves, to help create smooth organic objects. There’s also the G-Toggle Subpatch, which works primarily in Layout as a way to turn a model’s sub-patch subdivisions on and off. In Modeler, it works like the normal sub-patch mode, which you access by pressing the Tab key. You’ll use this feature extensively in various modeling sections of this topic.
Detail Tab
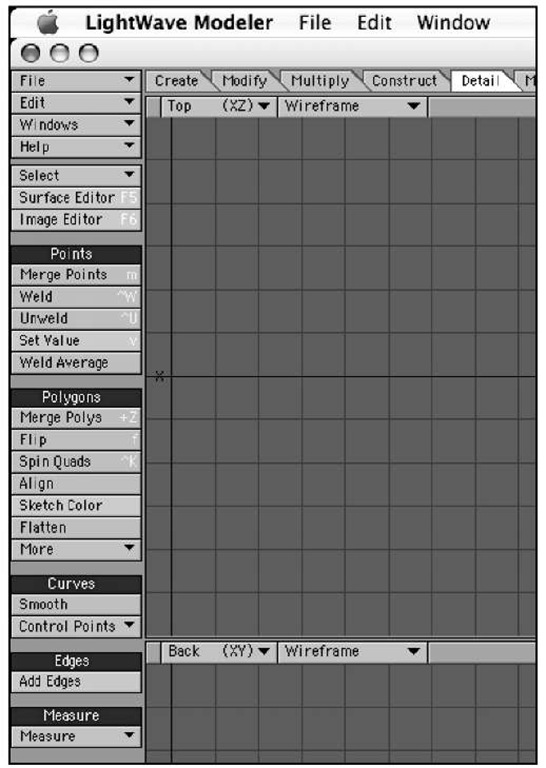
It’s all about the details, isn’t it? The Detail tab provides the tools that are useful for, and sometimes essential to, creating decent 3D models (Figure 1.38).
Figure 1.37 The Convert tool category within the Construct tab gives you the freedom to change—including the ability to change curves to polygons and vice versa.
Figure 1.38 The Detail tab provides quite a few tools that let you make specific changes to points and polygons within your models.
Tools in the Detail tab are typically used to tweak a model once it’s constructed, by fine-tuning one or more points or polygons. Their specific uses include adding and remove edges from models, adjusting the "grain" or "flow" of object surfaces, and cleaning up extra points that sometimes appear along the seams where objects are merged or mirrored. Check out the tool categories!
Figure 1.39
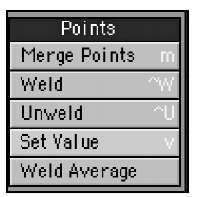
Tools in the Points category give you the power to control the detail of selected points within your models.
Points
Not to be confused with the Points tools in the Create tab, which are used to create points, the Detail tab’s Points tools are used to adjust point details within an existing model (Figure 1.39). For example, the Weld tool lets you reduce a cluster of points down to one, in the position of the last point you selected, and the Weld Average tool joins irregular groups of adjacent points into smooth seams. The category’s Set Value command also lets you precisely reposition groups of selected points.
Polygons
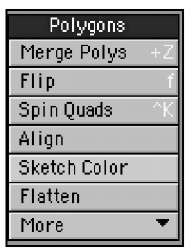
The Detail tab’s Polygon category contains smart tools you can use to add polygons to models in spots where you need finer detail, merge polygons where you don’t, and flip or perhaps just align them (Figure 1.40). Again, these are detail controls that help you fine-tune your models. So anytime you need to make detailed, specific polygon changes, this is the place to be.
Figure 1.40
Tools in the Detail tab’s Polygons category, such as Fix Poles (found in the category’s More dropdown), give you great control over those nasty polygons.
Curves
There are just a few tools in the Curves category (Figure 1.41), which enable you to quickly smooth out curves or control a curve’s start and end points. When spline modeling, for instance, you’ll probably use the Smooth function often to massage curves before skinning them, to make sure the resultant surface is clean and even.
Figure 1.41
Tools for creating details for curves can be found in the Curves category of the Detail tab.
Note
Curves and splines can be used interchangeably for many tasks, and the choice of which to use is often a matter of user preference. Note that neither curves nor splines can be rendered in Layout, so curves and splines used in model construction must be converted to polygons for final output. Splines and curves are used in Layout for motion control, modeling, and deformation.
Edges
Tools in the Edges category (Figure 1.42) help you control fine polygon detail within your model or selection. The Add Edges tool, for example, lets you divide a polygon precisely by creating a new edge within it. Click a point on one edge of a selected polygon, then a point on another edge, and a new edge segment is added, connecting the clicked points. Don’t confuse this command category with the Edges button at the bottom of the Modeler interface, which is used in Edges-selection mode.
Figure 1.42
Tools for creating detailed polygon edges can be found in the Edges category of the Detail tab.
Figure 1.43
When you need to measure an object, find its center point, or generate a bounding box representation, use the Measure tools.
Measure
The last tool category in the Detail tab is Measure (Figure 1.43). It contains several measurement tools you can use to click and drag within selections for precise measurement readouts in the lower left info panel. You can measure angles, object lengths, and perimeters. But wait, there’s more! You can use other Measure tools to locate the centers of objects, or create bounding-box representations, which can act as placeholders for complex objects within a model.
