Map Tab
The Map tab is home to all the tools you’ll need for working with vertex and weight maps in Modeler. Vertex maps control attributes of vertices, or points, in your models, and LightWave uses them to characterize the weights of different objects, control morphs, and more. You’ll learn about setting these later in the topic. In Figure 1.44, you can see that there are a lot of tools, but don’t worry, they’re not all used all the time, and they are easy to understand when you break them down into categories. When you begin working with vertex maps, you can edit and control them through the tools in the Map tab.
Figure 1.44 The Map tab group of tools is home to a lot of interesting commands, some of which are very powerful.
General
Multiple vertex maps may be applied to any given model, and the Map tab’s General tool category (Figure 1.45) is useful for setting or adjusting map values for any point or set of points. You can also use its Airbrush tool to create new vertex maps.
Figure 1.45
The General category of the Map tab offers basic tools for setting and editing values within vertex maps.
Weight
Weights are a big deal in LightWave, and not just because you gain weight sitting in front of the computer while adding weights to your 3D models. You work with weights throughout the modeling process to control the flow of curves, and you can also use them in Layout later during animations. You’ll use the tools in the Weight category to create new weight maps, to apply weights to bones for character animation, and to generate weights from certain UV maps, which are described later in the Texture tool category. Figure 1.46 shows the Weight tool category.
Figure 1.46
To control weights in LightWave Modeler, head on over to the Map tab’s Weight tools.
Color
Now don’t confuse this category with the surface color of your object. Again, be aware of what you are doing and which panel and button you’re working with. You’re in the Map tab, which governs points, not the Surface Editor, which controls, well, surfaces. The Color tools within each have distinctly different applications. You use the Map tab color tools to create color vertex maps, which you can then use for specific surface control later in Layout. These tools also include Vertex Paint, which lets you paint color onto your model’s vertices. Vertex colors blend with any polygonal surface textures you apply separately, and they are great for skin, landscapes, or just about anything. Figure 1.47 highlights the tools.
Figure 1.47
The Color category gives you access to tools that can help you manipulate the color of an object’s vertices, or points.
Texture
Tools in the Texture category are used for creating and working with UV maps, which you can think of as the unwrapped skins of 3D models, flattened out on a grid with coordinate axes U and V. You can "paint" colors and textures onto a UV map in a third-party programs like Adobe Photoshop, then rewrap the model with it. UVs are often used in video games because one image can be used to surface an entire object. Have you ever put together a model of a car when you were a kid? Do you remember that huge sheet of stickers that you would apply to the model after building it? In a way, a UV map is like that big sheet of stickers. It’s your entire model’s texture maps, laid out. However, the map contains data unique to the specific model and it effectively will apply itself around the model the way you specify. Later in this topic, you’ll learn about working with UVs and create them yourself. When you do, you’ll be guided to this Texture category of the Map tab. Here, you can edit the UVs, create them, set UV values, and more. Figure 1.48 shows the category of tools.
Figure 1.48
The Map tab’s Texture tools don’t affect the actual surface textures of your models; instead, they control UV maps, which "wrap around" your model and anchor at the points on its surface.
Morph
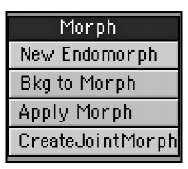
LightWave morphs are much misunderstood. People often think they change one object into another at the push of a button. In fact, a morph (technically called an endomorph) is an operation that changes the position of one or more points in an object. Moving points changes an object’s shape without adding new polygons or geometry. You’ll use morphs later in the topic to make a character move. LightWave uses vertex maps to store the point-position information used in morphs, and the Map tab’s Morph tools (Figure 1.49) control those maps. Also note the M button down at the bottom right of the Modeler interface, which is where you can access any morphs that might be applied to your model.
Figure 1.49
The Morph tools within the Map tab let you change objects’ shapes by repositioning points on their surfaces.
Setup Tab
This tab is where you’ll find all the necessary tools to create Skelegons. What’s a Skelegon? No, it is not an evil cartoon character (that’s Skeletor), it’s a deformation tool. Skelegons are skeletal structures that you build along with your model to define how it bends and moves. Later, when you take the model into LightWave Layout, you convert the Skelegons to bones, and use them to deform and animate your object.
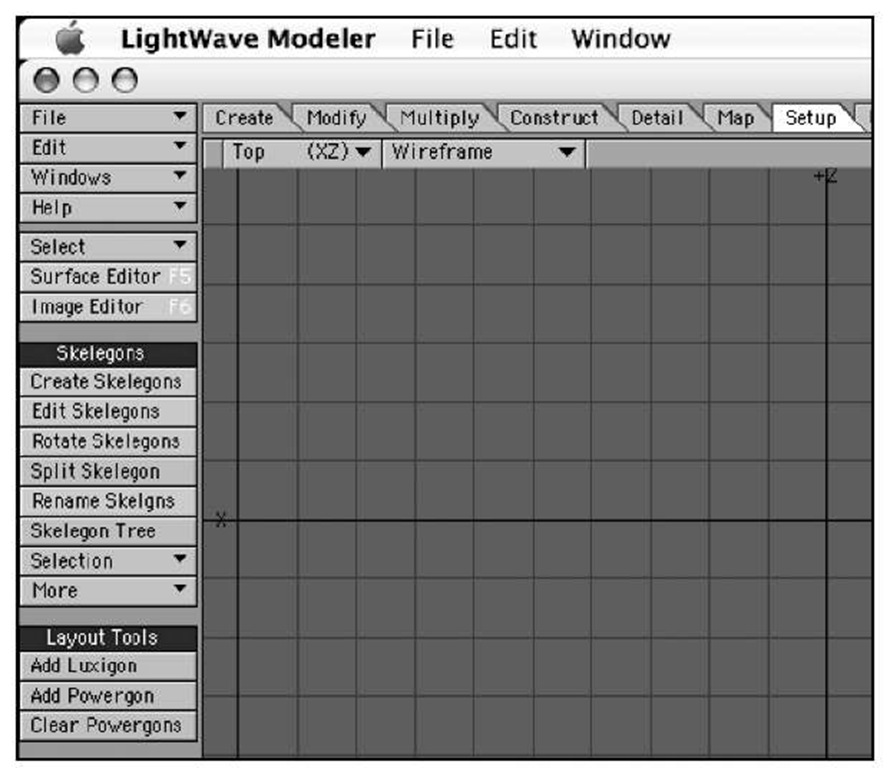
The Setup tab also includes tools for creating Luxigons and Powergons. Luxigons are polygons you turn into lights. Powergons are even more powerful. These are polygons to which you attach tiny command scripts, which will be executed when the model is moved into LightWave Layout for animation and rendering. You might use a Powergon to instantly add lights to a polygon for placement, like the headlights on a car. You can also define the properties for the light as well. Figure 1.50 shows the tab and its tools.
Figure 1.50 The Setup tab contains the tools you need for working with Skelegons as well as Luxigons and Powergons.
Skelegons
Naturally enough, the Skelegons category (Figure 1.51) is the area where you’ll find all the Skelegon tools. Here, you can create Skelegons, edit them, rotate them, and so on.
Layout Tools
Layout tools are the tools that you set up in Modeler whose direct effect comes to light (pun intended) in LightWave Layout. Since Layout is the portion of LightWave in which you render and see your final image, the Luxigons and Powergons tools won’t show their effects right away. Luxigons and Powergons are tools that allow you to create multiple lights and lights from polygons, for things like stage lighting, large architectural interiors, or even disco balls. John Travolta, watch out!
Figure 1.51
The Skelegons category houses all the tools you need to create and edit Skelegons, which you’ll convert to bones in the LightWave Layout application.
Because the end result of creating Luxigons and Powergons in Modeler happens in Layout, commands for creating them are found in the Layout Tools category (Figure 1.52).
Utilities Tab
The Utilities tab contains tools for extending Modeler’s features and giving you greater control over them (Figure 1.53). These tools are used to install and access third-party plug-ins. This tab is also home within Modeler to LightWave’s custom scripting language, LScript. If you’ve added a third-party plug-in but don’t know where it went, just look at the Additional drop-down list within this tab.
Figure 1.52
When creating Luxigons or Powergons, you access the tools from the Setup tab.
Figure 1.53 The Utilities tab is home to various commands, LScript tools,and plug-in controls.
Commands
You use tools in the tools in the Commands category (Figure 1.54) to create and edit instructions, or commands, for LightWave Modeler. Say you want to always perform the same string of events on an object. You can create a custom command to do so with the Edit Command tool. Or perhaps upon startup, you like to have a Luxigon created from a ball. You can do this and much more with the Edit Startup tool.
Figure 1.54
The Commands tool category lets you create your own custom actions for Modeler.


