Printing a Web Page
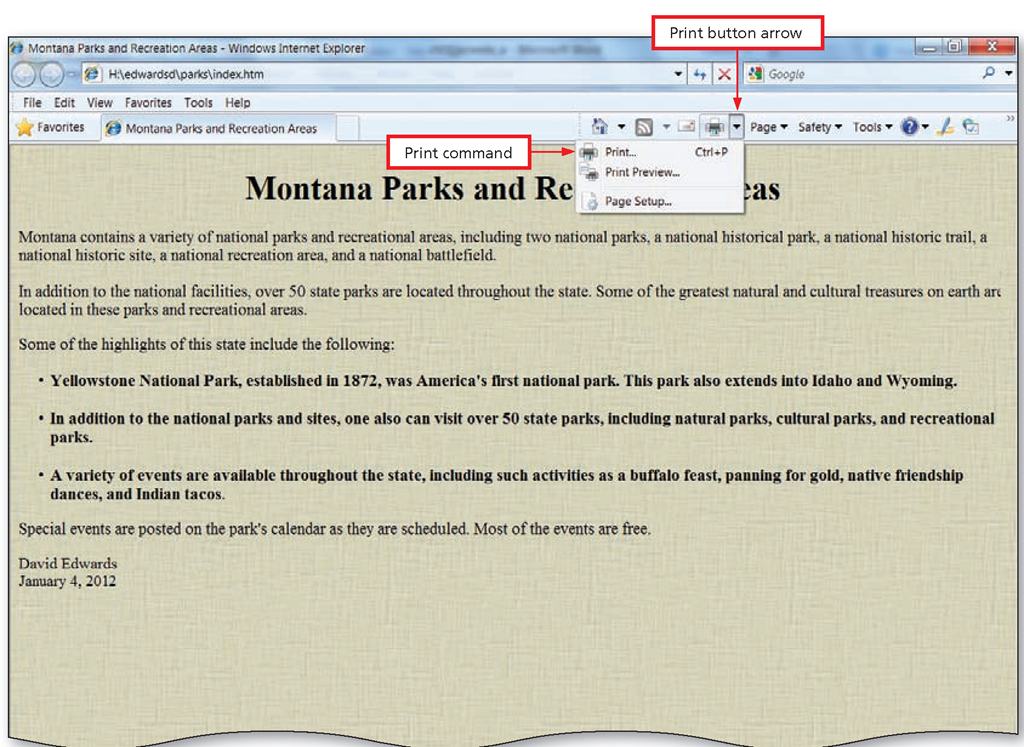
You may want to print a Web page for a variety of reasons. Dreamweaver provides an option to print code, but does not provide an option to print Design view. To print a Web page, you first must preview it in a browser. Printing a page from your browser is similar to printing a word-processing document.
|
Command |
Description |
|
Dreamweaver Help |
Displays the Dreamweaver online help system, which is connected to the Adobe Web site by default. You can search for help or download a PDF file containing the program’s documentation. |
|
Reference |
Opens the Reference panel, a searchable guide to HTML tags, Cascading Style Sheets, and JavaScript commands. |
|
Dreamweaver Support Center |
Opens the online Dreamweaver Help and Support Web page. This page is part of the Adobe Web site and offers links to tutorials and the Dreamweaver Help system, troubleshooting suggestions, videos showing how to perform typical tasks, and access to online forums. |
Disabling the Welcome Screen and Quitting Dreamweaver
After you create, save, preview, and print the Montana Parks and Recreation Areas Web page and review how to use Help.
To Disable the Welcome Screen, Close the Web Site, and Quit Dreamweaver
The following steps show how to disable the Welcome screen, close the Web page, quit Dreamweaver CS5, and return control to Windows.
Figure 1-68
1
• Click Edit on the Application bar and then click Preferences to display the Preferences dialog box.
• If necessary, click General in the Category column to display the General options.
• In the Document options section, click the Show Welcome Screen check box to deselect it (Figure 1-68).
2
• Click the OK button to accept the setting change.
• Click the Close button in the upper-right corner of the Dreamweaver window to close Dreamweaver.
Starting Dreamweaver and Opening a Web Page
Opening an existing Web page in Dreamweaver is much the same as opening an existing document in most other software applications: that is, you use the File menu and Open command. In addition to this common method to open a Web page, Dreamweaver provides other options. The Dreamweaver File menu also contains the Open Recent command. Pointing to this command displays the Open Recent submenu, which contains a list of the 10 most recently opened files. Additionally, if you want to display the page on which you currently are working when you next open Dreamweaver, you can select the Reopen Documents on Startup command from the Open Recent submenu.
If the page you want to open is part of a Dreamweaver Web site, you can open the file from the Files panel. To open a Web page from the Files panel, you first must select the appropriate Web site. The Sites pop-up menu button in the Files panel lists sites you have defined. When you open the site, a list of the pages and subfolders within the site is displayed. To open the page you want, double-click the file name. After opening the page, you can modify text, images, tables, and any other elements.
Because you disabled the Welcome screen, the next time you open Dreamweaver, the Welcome screen will not be displayed. Instead, a blank window is displayed, requiring that you open an existing document or open a new document. Dreamweaver provides four options to open a new Document window:
• Click File on the Application bar, click New, and then select Blank Page
• Press CTRL+N and then select Blank Page
• Right-click the site’s root folder in the Files panel, and then click New File on the context menu
• Click the Files panel Options menu button, point to File on the pop-up menu, and then click the New File command
The first two options display the New Document dialog box. From this dialog box, you select the Blank Page category and the HTML page type and then click the Create button. When you create a new page by right-clicking the root folder in the Files panel or by using the Options menu button, a default untitled file is created in the Files panel.
Summary
You added an image background and used Dreamweaver’s Property inspector to format text. You also learned how to use an unordered list to organize information. You added line breaks and learned about special characters. Once your Web page was completed, you learned how to save the Web page and preview it in a browser. You also learned how to print using the browser. To enhance your knowledge of Dreamweaver further, you learned the basics about the Dreamweaver Help system. The following tasks are all the new Dreamweaver skills you learned in this topic, listed in the same order they were presented in the topic. For a list of keyboard commands for topics introduced in this topic, see the Quick Reference for Windows at the back of this topic.


