Checking the effective resolution of linked images
You can use the Links panel to verify that the linked images have a high enough resolution for your intended mode of output. The effective resolution of a placed image is defined by the resolution of the original image and the scale factor at which it is placed in InDesign. For example, an image with a 3OO ppi (pixels per inch) resolution only has an effective resolution of l5O ppi when it’s scaled to 2OO%.
For images to be viewed at screen resolution—published on a website or in a low resolution PDF document, for example—an effective resolution of 72 ppi is sufficient. For desktop printing, the effective resolution should be between 72 ppi and l5O ppi. For commercial printing your images should have an effective resolution between l5O ppi and 3OO ppi (or higher), depending on the requirements of your prepress service provider.
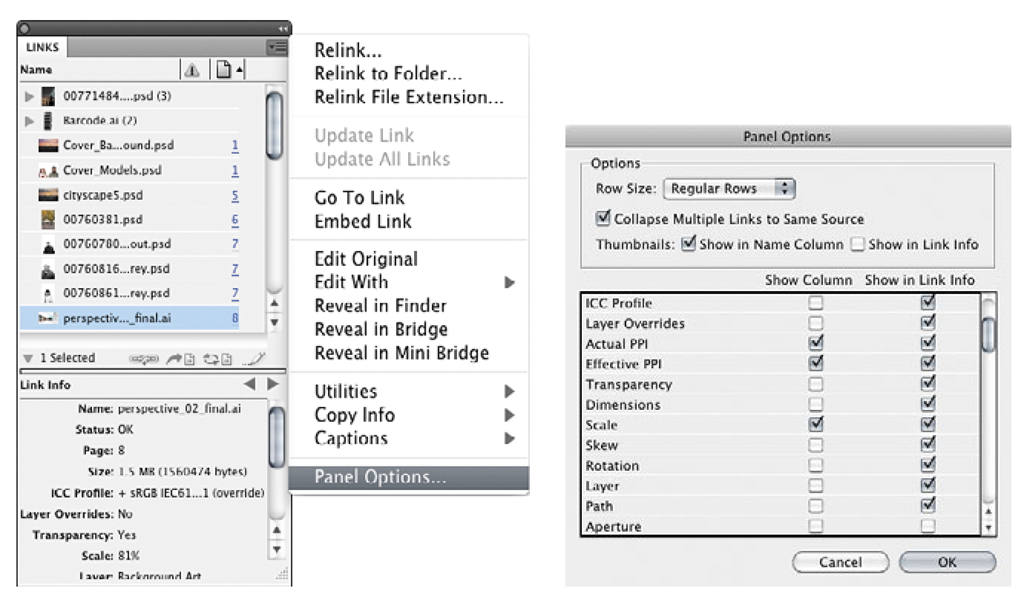
1 In InDesign, open the Links panel. Choose Panel Options from the panel options menu. In the Panel Options dialog box, select the Actual PPI, Effective PPI, and Scale options in the Show column. Click OK to close the Panel Options dialog box. If necessary, resize the Links panel so that you can see the additional columns.
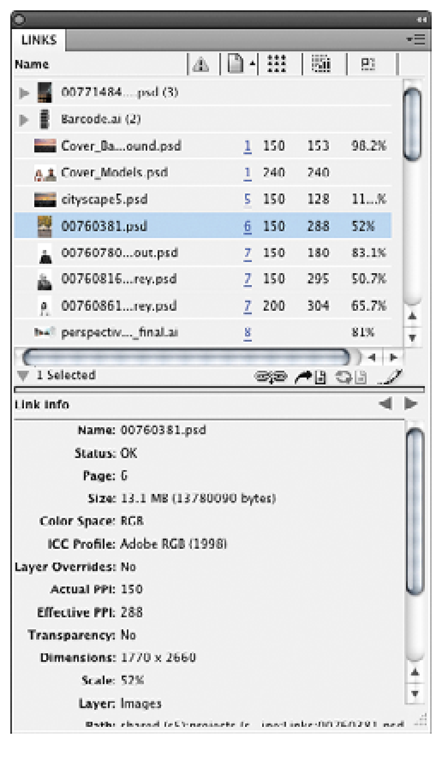
2 For each image placed in your document, check the actual resolution, the effective resolution, and the scale factor. For example, the cover image on page 1 has an actual resolution of 150 ppi but an effective resolution of 153 ppi because it was scaled by 98.2%. If a higher effective resolution is required for your print job, you could reduce the scale factor, which would show more of the image background, reduce the dimensions of the placed image—not really an option for the cover photo, which needs to cover the entire page—or select an image with a higher actual resolution—perhaps a close-up photo of the face rather than the wider shot that is used in this example.
3 Close the Links panel.
Performing a preflight check
Rather than painstakingly checking through a list of possible problem areas each time you want to print or export a document, you can rely on InDesign to do all the work for you.
1 Choose Window > Output > Preflight. When the On check box is selected in the Preflight panel, InDesign continuously checks for possible problems while you’re working on your document.
You can set up a preflight profile to specify which potential problems you want InDesign to look out for.
2 To define a preflight profile, choose Define Profiles from the Preflight panel options menu or from the Preflight menu located near the lower-left corner of the document window.
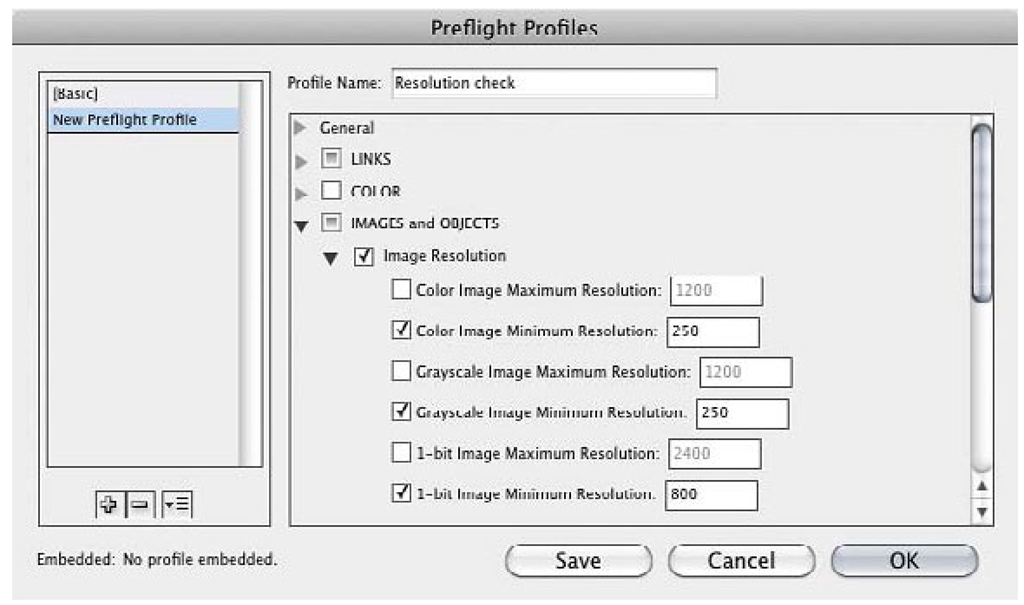
3 In the Preflight Profiles dialog box, click the Add button ( ÿa) below the list of profiles to create a new profile. Name the new profile Resolution Check. Activate the Image Resolution option inside the IMAGES and OBJECTS folder. Leave the Image Color Minimal Resolution set at 250 ppi, and then click OK.
4 From the Profile menu in the Preflight panel, choose Resolution Check. If necessary, click the disclosure triangles next to the Images and Objects heading and the Info heading to expand their lists. InDesign finds several placed images that don’t meet the set requirements. To review an error found by the Preflight check, click the page link in the Preflight panel. InDesign selects and jumps to the object causing the error. A description of the error and suggestions on how to fix the problem are provided in the Info section of the Preflight panel.
5 Switch back to the previous preflight profile by choosing [Basic] from the Profile menu in the Preflight panel, and then close the Preflight panel.
6 Save your document.
Exporting to PDF
Exporting your document as a PDF file enables you to preserve the look and feel of your InDesign document in a device independent format that can be viewed onscreen or printed on any printer. This can be particularly useful when you want to print a quick draft of your document on an inkjet printer at home or in your office. You can tweak the export settings, balancing quality and file size to create a PDF that is optimized to suit its intended purpose.
1 Choose File > Export. In the Export dialog box, navigate to the LessonO2 folder. From the Save As Type/Format menu, choose Adobe PDF Print; then, name the file Magazine_Print.pdf and click Save.
2 In the Export Adobe PDF dialog box, choose [High Quality Print] from the Adobe PDF Preset menu. Review—but don’t change—the settings for this export preset in the various panels of the dialog box, and then click Export.
3 Open the Lesson02 folder in Windows Explorer/the Finder. Right-click/Control-click the file Magazine_Print.pdf and choose Open With > Adobe Acrobat Pro.
4 Use the page navigation controls in Acrobat to review the pages of the magazine. Pay special attention to the position and quality of the images you placed, the text styles you’ve adjusted, and the areas containing transparency effects.
5 When you’re done reviewing, close the document in Acrobat and switch back to InDesign.


