Creating live captions
Keywords, captions, and other metadata are becoming increasingly critical to print and online publishing. One way you can use metadata to enhance your publishing workflow is to automatically generate captions next to photos on the layout.
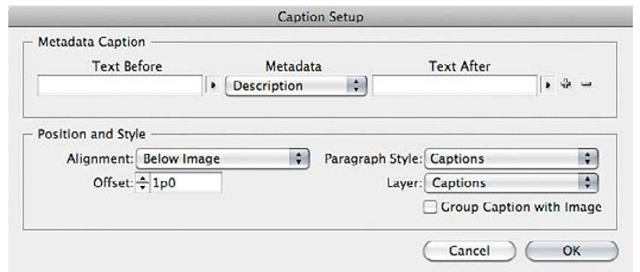
1 Choose Object > Captions > Caption Setup.
2 In the Caption Setup dialog box, set the first Metadata menu to Description.
The other items in the menu are all forms of metadata that can potentially be included in an image by entering it using an application such as Adobe Bridge, or as shot data added by a camera.
3 If you see a second Metadata Caption line, click the minus sign after the end of the line to remove it.
4 In the Position and Style section, set the Offset to 1p0, choose Captions from the Paragraph Style menu, and then choose Captions from the Layer menu. Click OK.
5 Use the Selection tool to select the image of the market on page l6. Zoom in to the bottom-left corner of the market image.
6 Choose Object > Captions > Generate Live Caption, and watch a caption appear to the specifications you set up in the Caption Setup dialog box.
Note: If the caption displays an error such as <No intersecting link>, make sure the caption text frame touches the graphics text frame.
This is a live caption because if the image description is changed (for example, using the Metadata panel in Adobe Bridge or Photoshop) when the image is updated in InDesign, the caption will update automatically.
Shortcuts for editing objects
Repetitive layout tasks such as aligning and distributing objects or customizing frame corners is easy and quick in InDesign CS5. You saw an example of this earlier when you used the Content Grabber to recompose an image inside a frame. You can take advantage of other layout tricks InDesign CS5.
1 Select the coffee cup image on page l6, and drag a corner of its frame to make the frame smaller. Notice that the image inside the frame resizes as well. This is a new optional setting in InDesign CS5.
2 With the image still selected, deselect the Auto Fit check box in the Control panel, and drag the corner of the image frame to enlarge it. This time the image doesn’t scale with the frame. Choose Edit > Undo Resize Item, select Auto Fit, and drag the corner to enlarge the frame back to its original size. Then deselect the image.
You control how Auto Fit works in the same Frame Fitting Options dialog box you worked with earlier.
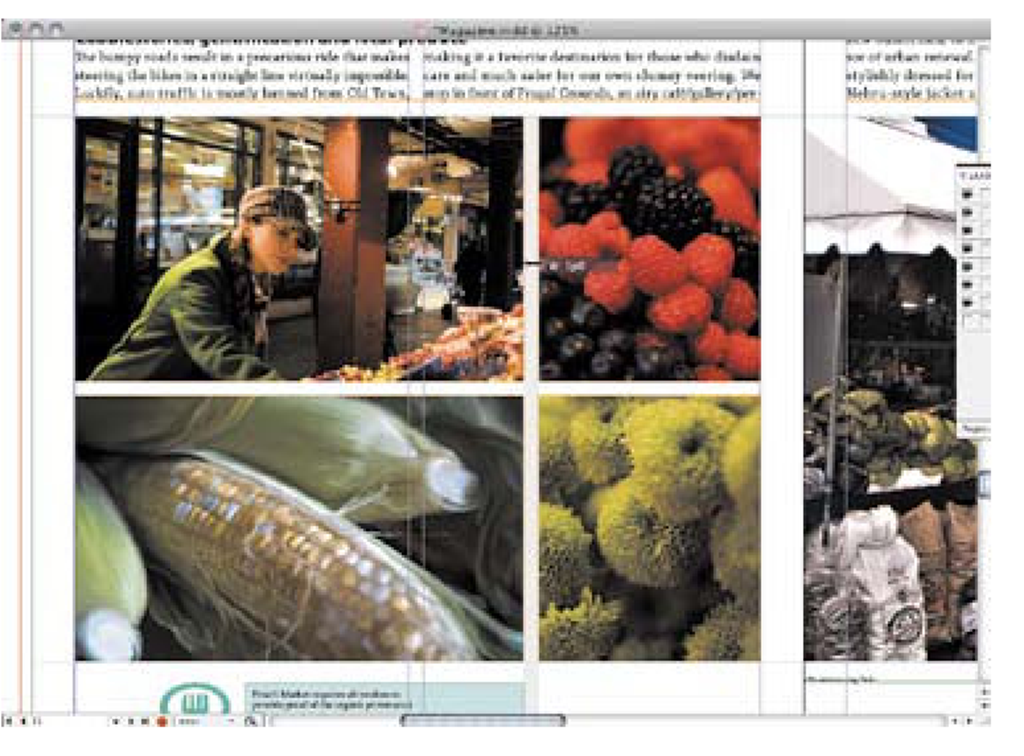
3 On page l5, hold down the Shift key as you click to select all of the four images you placed into a grid. Make sure Auto Fit is selected in the Control panel.
4 In the Layers panel, click in the eye column to hide the Background Art layer.
5 Select the Gap tool in the Tools panel, and then position it in the gap between any two of the four images. You may want to zoom in so that the gaps are larger.
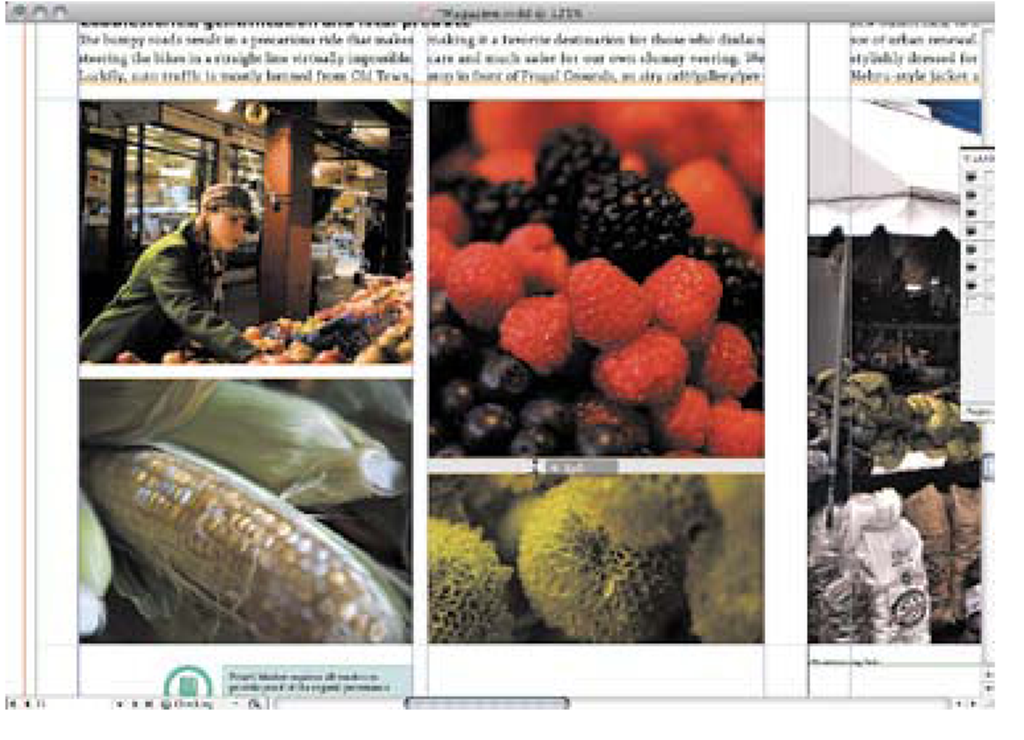
6 Drag the Gap tool to control the space between the frames.
7 Shift-drag the Gap tool to adjust only the gap nearest the cursor. Each modifier key changes how the Gap tool works, so experiment with holding down the Alt/ Option and Control/Command keys as you drag the Gap tool.
Now you’ll use the Gap tool temporarily, using a feature called spring-loaded cursors. It’s a quick way to use different tools with fewer trips to the Tools panel. Spring-loaded cursors take advantage of another time-saver: shortcut keys for tools. U is the shortcut key for the Gap tool.
8 Click the Selection tool in the Tools panel. This is the tool you’ll probably be using most of the time.
9 Position the Selection tool over a gap between images, and then press and hold the U key. Notice that the cursor changes to the Gap tool; continue to hold down the U key as you drag to adjust the gap between the images. Release the U key and notice that the cursor returns to the Selection tool.
Normally, pressing a shortcut key permanently switches tools. Spring-loading the cursor lets the new tool snap back to the old tool as soon as you release a shortcut key. Think of the difference this way: To use a shortcut key, briefly tap it; to use a shortcut key as a spring-loaded shortcut, hold it down until you’re done.
Tip: To learn the shortcut keys, hold the cursor over various tools in the Tools panel until their tool tips appear; shortcut keys are listed in the tool tips.
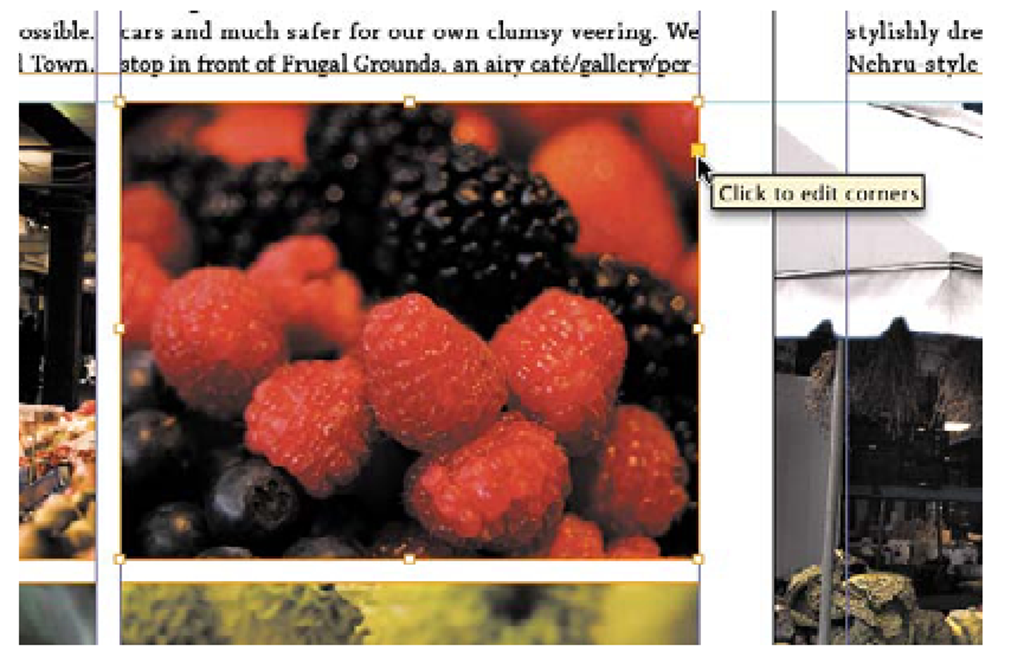
10 With the Selection tool, click the image of berries, and then click the yellow control near the top-right corner of the image. The frame handles at the corners turn into diamond handles. These diamond handles let you customize the shapes of the frame corners.
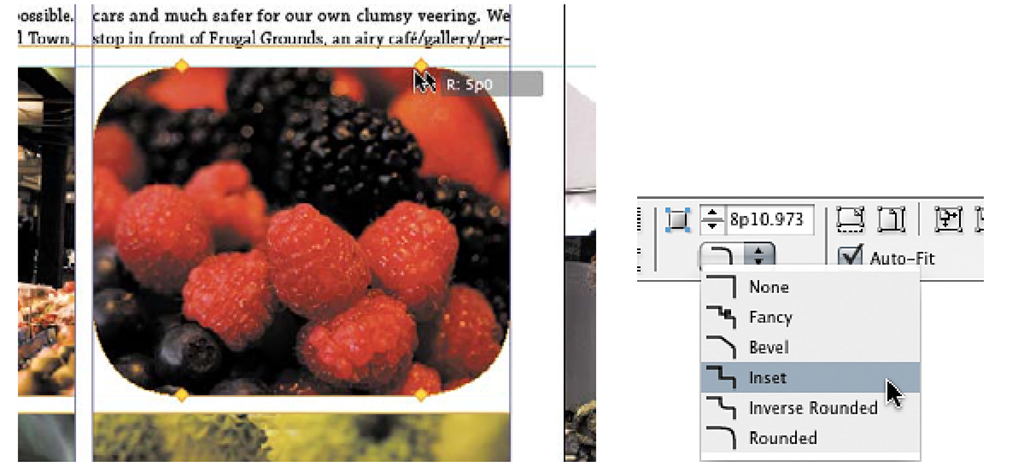
11 Drag any of the yellow diamond handles to adjust the corner radius of all corners. The corner radius value appears in the Corner Options section of the Control panel; choose a corner shape from the Corner Shape menu below the radius value. Shift-drag a diamond handle to adjust just one corner, or Alt/ Option-click a diamond handle to change the corner shape.
Note: If you don’t see the yellow handles, choose View > Extras > Show Live Corners. Also, make sure View > Screen Mode is set to Normal.
Tip: Alt/Option-click the Corner Options icon in the Control panel to open the Corner Options dialog box.
Note: If you don’t see the yellow handles, choose View > Extras > Show Live Corners.
Also, make sure View > Screen Mode is set to Normal.
Tip: Another way to change corner shapes is to Alt/Option-drag a corner handle.
12 In the Layers panel, click in the eye column for the Background Art layer to make that layer visible again.

![tmpbd7a-63_thumb[2][2][2][2] tmpbd7a-63_thumb[2][2][2][2]](http://what-when-how.com/wp-content/uploads/2012/06/tmpbd7a63_thumb2222_thumb.png)
