Databases Reference
In-Depth Information
FIGURE 4.7
Utilizing the VBA function within a Worksheet.
starting from the highest degreed polynomial are 1,0,4, which are placed in cells A21, B21, and
C21, respectively. After choosing the function “ADAUsingExcel.xls!AdvQuadEq” in the formula
wizard, the coefficients must be entered in the formula wizard along with the root number (which
may be omitted if the default root of 1 is to be calculated) as shown in Figure 4.6.
The results of utilizing this function to calculate the two roots of Equation 4.4 are shown in
Figure 4.7. The two roots of Equation 4.4 are shown in cells D21 and E21. In the next row (22),
Equation 4.4 is altered to have real roots by changing coefficient c to -4 (i.e.,
x
2
−
4
). Here the
two real roots of 2 and -2 are returned to cells D22 and E22, respectively.
One last point worth mentioning about custom functions is the lack of a description for
their use within the formula dialog box. In Figure 4.6, notice that the custom VBA function
“ADAUsingExcel.xls!AdvQuadEq” contains only the following instructions or descriptions for
use: “Choose the Help button for help on this function and its arguments.” Obviously, this is
not very helpful for someone wishing to utilize the function who is unfamiliar with its
parameters or use. A custom description for a VBA function can be added to the formula dialog
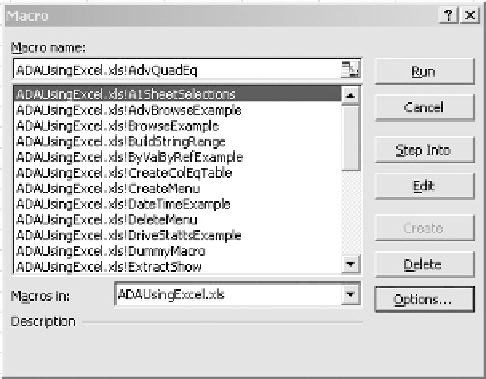
box. This is done by selecting Tools->Macro->Macros. Although functions are
not
listed in
the Macros dialog box, Excel is cognizant of their existence. In the macro name text box, the
full (function) macro name must be typed, which, in this instance, is “ADAUsingEx-
cel.xls!AdvQuadEq” (see Figure 4.8
)
.
If the function name has been typed with no errors (and should always be prefixed with
WorkbookName!), when the Options button is pressed in the Macros dialog box (GUI), the dialog
box shown in Figure 4.9 will appear.
FIGURE 4.8
The macro dialog box for accessing function options.