Graphics Reference
In-Depth Information
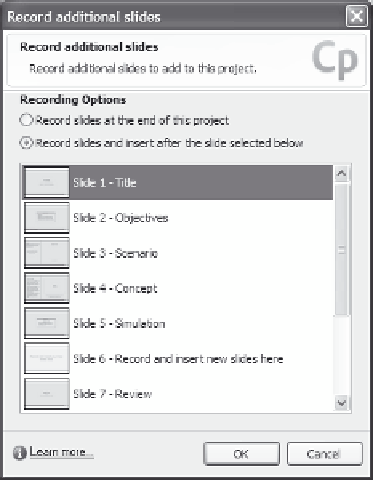
scroll through the slides in the template to see what is there, and
click on a slide to highlight it.
Figure 12-6. Specify where the new slides should go.
5.
Click the option to specify whether you want to add new slides to
the end of the slides in the project or into the middle of the movie
immediately after the highlighted slide.
6.
Click
OK
to close the Record additional slides window and display
your own screen with the recording window and recording area
outline.
7.
Adjust the recording area to the part of the screen you want to
record. You can move the area, or choose from the drop-down list
of open windows to automatically move a window into the record-
ing area. You cannot change the size of the recording area.
8.
The movie will be recorded with the options set as specified in the
template (including automatic captions, recording narration, and
other settings). You can change these if you want to.
9.
Click the
Record
button and perform the actions for your new
movie.