Graphics Reference
In-Depth Information
unchecking its check box; this provides a quick way to hide video and mute audio elements during playback,
which can be useful when you want to mute all the music elements in a sequence or deactivate connected cut-
away clips from appearing in the Viewer.
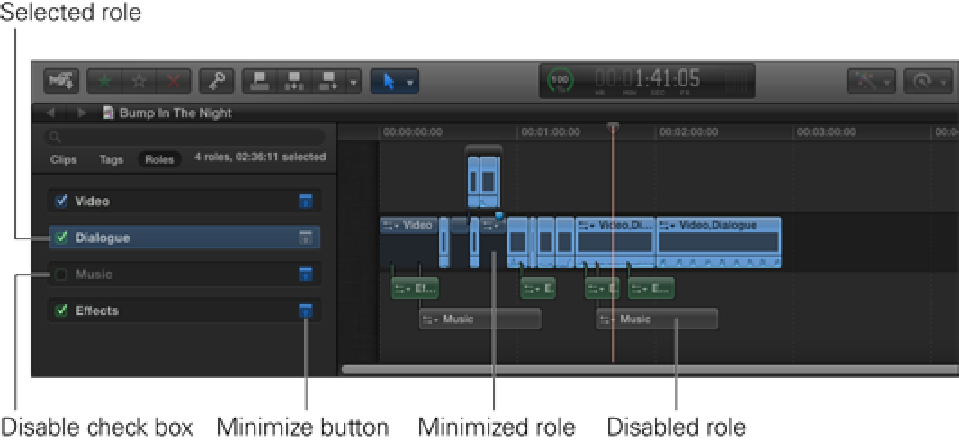
The Video, Music, and Effects roles in the sequence shown in Figure 5.19 have had their clips minimized to
make the dialogue clips stand out more. The music roles also have been disabled so that they don't play back
with the sequence, which is why they are grayed out in the Timeline.
Figure 5.19
Working with roles in the Timeline Index.
Using markers and to-do's
Markers are a way to indicate a specific reference point on a piece of media and can be used in a variety of dif-
ferent ways. Markers can be used to specify a particular frame on the Timeline where you want to add media,
such as indicating where a sound effect or music cue should begin. They also can be used to remind you of an
action that you need to carry out on a certain clip. Markers can be added to media residing in the Event Browser
as well as the Timeline, and they're placed at the skimmer's position on a clip.
To add a new marker at the skimmer position in a clip, choose Mark
⇒
Markers
⇒
Add Marker or press M.
Once a marker has been added, it appears as a blue icon at the top of the clip and can be renamed by calling up
the marker's dialog box, adding text to the entry field, and pressing Done (see Figure 5.20).