Graphics Programs Reference
In-Depth Information
Stage 3: Exporting to Artlantis Format
Objective
: To get the SketchUp model into Artlantis.
Data
: SketchUp model.
Tool
: Artlantis export plug-in.
It is possible to export directly to Artlantis format if you have the correct
plug-in installed. The plug-in can be downloaded from Artlantis's website
(www.Artlantis.com) under
Downloads > Plug-Ins
. Once installed in SketchUp's
plug-ins directory, the program can export in native Artlantis format.
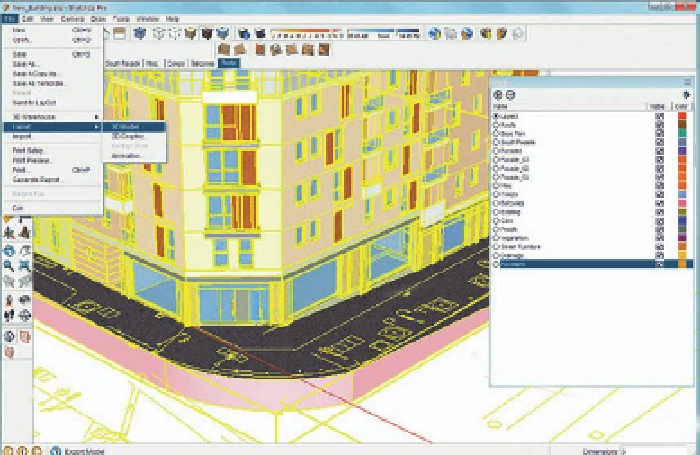
Before the model is exported, it is good practice to select all the elements in the
model (Ctrl-A in Windows and Cmd-A on the Mac) before calling up the export
dialog box (see Figure 11.6). Doing this will prevent you from exporting hidden
layers or groups. Once everything is selected, from the Menu Bar, choose File >
Export > 3D Model… and choose ATL format from the drop-down menu.
Stage 4: Modifying the SketchUp Model and Updating
the Artlantis Scene
Objectives
: To modify and add detail to the SketchUp model and to
update these changes in Artlantis.
Data
: Imported 3D model.
Tool
: Artlantis' Use Reference File… function.
When using a third-party piece of software with SketchUp, it is extremely
important to make sure that any changes made to the SketchUp a model can
be easily reflected in the external software (in this case Artlantis). This enables
both projects to develop in parallel.
Luckily, Artlantis has just such a function, and it can be found under the File
menu as Use Reference File…. (See Figure 11.7). The following describes how to
use this function:
FiG 11.6
Exporting the SketchUp
model to Artlantis format.

Search WWH ::

Custom Search