Graphics Programs Reference
In-Depth Information
Draw (D)
The Draw brush type draws a stroke out
from the surface, moving the surface without
changing the details underneath. If you use
Draw early on when sculpting large-scale forms,
it may make life difficult, as it can result in a
rather lumpy look (which is why the Clay brush
is more useful). Later on though, when adding
fine details, the Draw brush type is very handy.
Pinch (P)
This brush type pulls faces under the
brush closer together, creating a pinching effect.
This brush is useful for tightening creases and
wrinkles or for sharpening edges between forms
on hard-surface sculpts. In Subtractive mode,
this brush pushes the faces farther apart.
Rotate
This brush type rotates the area under
the brush around the mesh's origin. I find this
pretty useless as a brush type.
Fill
This brush type fills in valleys in the surface
of the mesh without touching the peaks. It is
useful for smoothing out and filling in concave
areas in a mesh without affecting the surround-
ing areas. Subtractive mode deepens the valleys
instead of filling them in.
Scrape
The Scrape brush type scrapes away the
peaks of a mesh without touching the valleys.
This brush type is really useful for establish-
ing planes, eliminating lumps and bumps, and
smoothing transitions between overlapping
forms. Subtractive mode builds the peaks up
rather than scraping them down.
Flatten
The Flatten brush combines the Fill and
Scrape brush types, filling in valleys and scrap-
ing away peaks to create a smoother surface.
Unlike the Smooth brush type, this brush flat-
tens the surface in addition to smoothing it. In
Subtractive mode, this brush type exaggerates
the valleys and peaks instead of flattening them.
Snake Hook
This brush type allows you to pull
out a tentacle-like surface from your mesh. Use
this brush type sparingly because the topology
underneath will probably not support it too well.
This option is good for pulling out peaks to look
like strands of hair or horns, especially if you
plan on correcting the ugly topology later.
Grab (G)
This brush type grabs the area under
the brush and lets you pull it around. You'll find
this to be a very useful brush type.
Thumb
The Thumb brush type slides the surface
of the mesh around under the brush but only on
the plane of the direction the surface is facing.
This is similar to the Grab brush, except that it
allows you only to shift the surface of the mesh
around rather than letting you push or pull the
surface of the mesh outward or inward.
Inflate (I)
The Inflate brush type inflates the
mesh in much the same way the Shrink/Fatten
operator does in Edit mode. Inflate is useful for
establishing volumes and is sometimes a good
alternative to the Draw or Clay brushes, but be
sure to keep the strength of this brush low or
it can do some damage. Also, be aware that in
addition to pushing the surface outward (or
inward), this brush usually makes faces bigger,
reducing the amount of detail that the modi-
fied area can support. In Subtractive mode, this
brush shrinks the mesh instead, often causing
the mesh to self-intersect. Use it carefully.
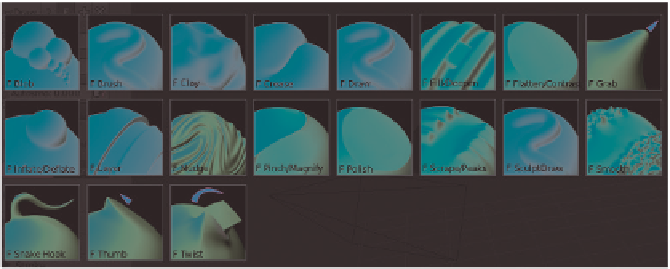
All of the brushes in Blender's Brush panel
(see Figure 6-4) are just variations on the types
listed above, with various tweaks to give each brush
slightly different effects. For example, the Polish
brush is a variation on the Flatten brush with the
Autosmooth setting (which adds a smoothing effect
to any brushstroke) turned up.
Layer (L)
This brush type
builds out an even layer from
the surface of your mesh or
subtracts an even layer in
Subtractive mode.
Nudge
Like the Grab brush
type, this brush type only
nudges the mesh a small
distance, and you can keep
moving your cursor around
to other areas to nudge them
as well.
Figure 6-4: Blender's default sculpt brushes
Search WWH ::

Custom Search