Graphics Programs Reference
In-Depth Information
stroke over your mesh, centered around the
starting point of the stroke and with a radius
determined by how far you drag. This option
is extremely useful for dragging out textures
over the surface of your mesh in order to create
surface detail. Another option,
Smooth Stroke
,
causes your strokes to lag behind your cursor as
you pull it around, resulting in clean, smooth
curves.
symmetrical. This is a useful option for a lot of
sculpting as most organic creatures are broadly
symmetrical.
Appearance
This panel contains some aesthetic
options for changing the color of the brush cur-
sor or adding a custom icon for your brush.
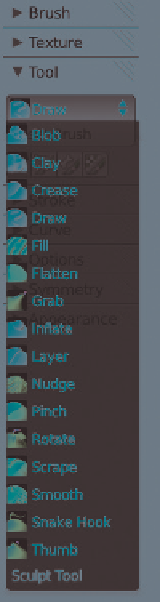
Brush Types
The default brush types, which
are found in the Tool panel
(see Figure 6-3), are discussed
below. Some have hotkeys
(in brackets) that allow you
to quickly cycle through any
brushes of that type that you
have created. Almost all brushes
(Grab, Nudge, Thumb, and
Snake Hook are the only excep-
tions) also have a Subtractive
mode (
alt
) that usually does
the opposite of what the brush
does in Additive mode.
Curve
This panel lets you choose the brush's fall-
off curve (see Figure 6-2) and gives you fine
control over how the depth of your strokes fades
away from the center. You can either define the
curve manually by dragging and clicking to move
and adding points to the Curve editor, or you can
choose one of the presets from the icons below
the Curve editor. The default
Smooth
curve is fine
for most brushes, but when dragging out alphas,
the flat
Max
curve is useful. For fine creases, the
Sharp
curve is best.
Sharp
Curve
Blob
This brush type creates
blob-like inflated lumps in
the surface of your mesh.
This option is a bit of a
mix between the Draw and
Inflate brushes. Additive
mode builds out, while
Subtractive cuts in.
Spherical
Curve
Smooth
Curve
Linear
Curve
Figure 6-3: The
Tool panel lets you
choose between the
different base brush
types.
Clay (C)
One of the most
important brush types, the
Clay brush builds up the
surface of your mesh evenly,
filling valleys first and then
building up smoothly from
the surface of the mesh.
You'll find this brush type useful throughout the
sculpting process, though beware when adding
fine details, as it will build up over them (use
the Draw brush instead). Additive mode builds
out, and Subtractive mode carves into the mesh.
Figure 6-2: Different Falloff settings
Options
This panel contains mainly miscellaneous
options. One option is whether to constrain
sculpting to individual axes. Another deter-
mines whether to keep your brush size and
strength universal or to let you set it for each
brush. (Maintaining a universal brush size is
often less confusing, but it's usually preferable
to choose strength for each brush individually,
as you may want different strengths for different
tools.)
Crease (
shift
-C)
This brush type combines the
Draw and Pinch brush types, drawing a stroke
out on the mesh and then pinching it to make
it tighter. It is most useful in Subtractive mode,
where it's great for creating wrinkles and creases
in a character's skin, but it can also be used in
Additive mode to create sharp edges by tracing
along the edge of a form.
Symmetry
Just as you would use a Mirror modifier
for a normal mesh, you can enable Symmetry
when sculpting to keep your brushstrokes


Search WWH ::

Custom Search