Graphics Programs Reference
In-Depth Information
Using the Automated Technique
When creating the exploded view in the presentation file, you have two primary
ways of placing the assembly. One automatically separates the parts based on the
values of the assembly constraints; the other simply places a representation of
the intact assembly in the Design window for you to separate.
1.
Verify that the 2013 Essentials project file is active, and then open the
c13-01.iam
file from the
Assemblies\Chapter13
folder.
2.
Click the New tool on the Quick Access toolbar.
3.
Double-click the
Standard(mm).ipn
template in the Metric folder to
create a new presentation file.
4.
Once the new file is loaded and the Ribbon updates with the new
Presentation tab, click the Create View tool on the Create panel.
5.
Set the Explosion Method option to Automatic, make the Distance
value 60 mm, and click OK.
6.
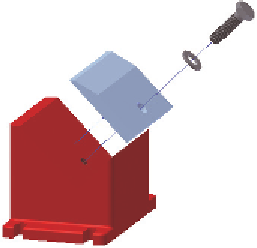
Use the Orbit tool to see the results, as shown in Figure 13.1.
FIGURE 13.1
Creating an
exploded view with trails
This assembly was constructed using Insert constraints to align the parts.
Typically the Automatic explosion method does not produce such ideal results if
the assembly isn't built this way.
Building One Step at a Time
When you want complete control over the explosion separation and order, it is
necessary to place the view intact and then move the components using the
Certification
Objective


Search WWH ::

Custom Search