Graphics Programs Reference
In-Depth Information
4.
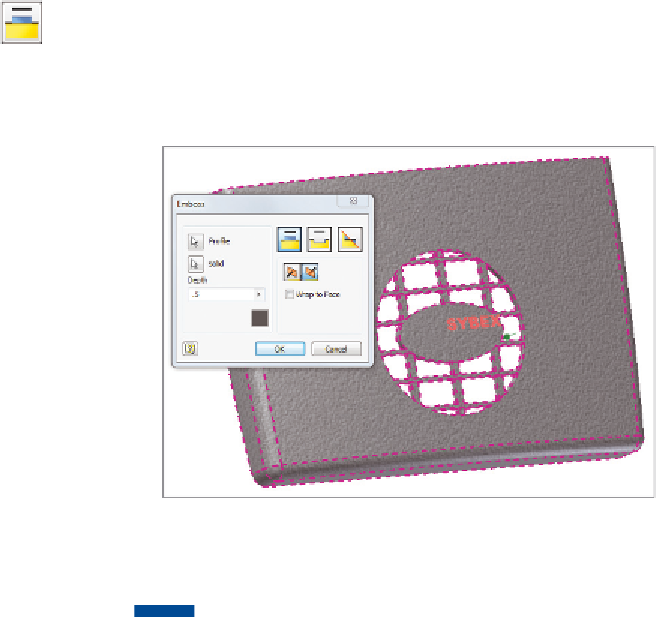
When the Emboss dialog box opens, click the text.
The Emboss tool has three options. One will add geometry, one will
remove, and the third will do both if the sketch plane intersects a face
on the part.
5.
Keep the Emboss From Face option active, and set the depth to .5.
6.
Make sure the direction indicator is pointed toward the part
(Figure 9.12). It might be necessary to change it. Then, click OK to
create the feature.
FIGURE 9.12
Adding text to the face of a part
TIP
The Emboss tool also has the ability to wrap a profile or text
around a face so that the edges of the feature are normal to the surface
they're wrapped on.
The Snap Fit Tool
The two options for the geometry for this tool are the hook and the loop. The fea-
tures are created with a wizard, so all that is needed is a work point or a sketch point.
1.
Verify that the 2013 Essentials project file is active, and then open
c09-10.ipt
from the
Parts\Chapter9
folder.
2.
Orbit the model so that you can clearly see the open portion.
3.
Start the Snap Fit tool from the Plastic Part panel on the 3D Model tab.
A preview of two features appears, because there are two points in
the sketch.


Search WWH ::

Custom Search