Graphics Programs Reference
In-Depth Information
Using Open Profiles
All of the sketched features you've created have used closed profiles to generate
solid features and open sketches to create a surface feature. An open profile is
capable of creating a solid when it can intersect with existing solid geometry.
You'll take advantage of that to create a stop on the neck of the bottle.
1.
Make certain that the 2013 Essentials project file is active, and then
open
c07-17.ipt
from the
Parts\Chapter7
folder.
2.
Set your view to look at the front of the ViewCube.
3.
Start the Revolve tool from the Create panel on the 3D Model tab.
4.
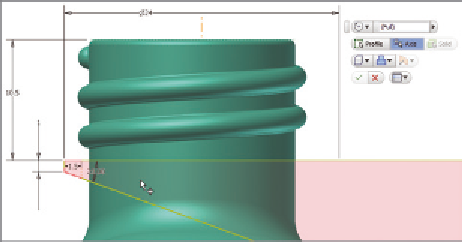
Click the open profile that is in the sketch and move the mouse
toward the solid until it shows a preview of the area the sketch that
will be projected toward the body of the part. See Figure 7.26.
FIGURE 7.26
Previewing a projected profile
5.
Click the mouse when the correct area is highlighted to use this profile.
6.
Click the y-axis in the browser for the axis or the centerline in the sketch.
7.
Once selected, the preview will change color. Click OK to create the
complete feature. Figure 7.27 shows your finished part.
Open profiles work well for dealing with parts that include draft on faces. It is
difficult to align a close profile with these faces.


Search WWH ::

Custom Search