Graphics Programs Reference
In-Depth Information
5.
Rotate the part so you can see the bottom.
6.
Select the sharp inside edge, and select the Chamfer tool.
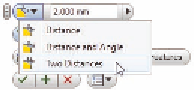
7.
Set the option to Two Distances (you may have to reselect the edge).
8.
Set the first value to 2 and the second distance to 4.
9.
Finish the chamfer. See Figure 3.28 for the finished adapter.
FIGURE 3.28
Adding the second chamfer with two different sizes
Now you can add the final touches to your part by placing holes.
Placing Concentric Holes
Hole features are critical geometry, and having the standards included in
Inventor makes it easier to add them.
Certification
Objective
1.
Make certain that the 2013 Essentials project file is active, and then
open
c03-15.ipt
from the
Parts\Chapter3
folder.
2.
Start the Hole tool from the marking menu or the Modify panel of
the 3D Model tab.
3.
In the Hole dialog box, set the placement to Concentric.


Search WWH ::

Custom Search