Graphics Programs Reference
In-Depth Information
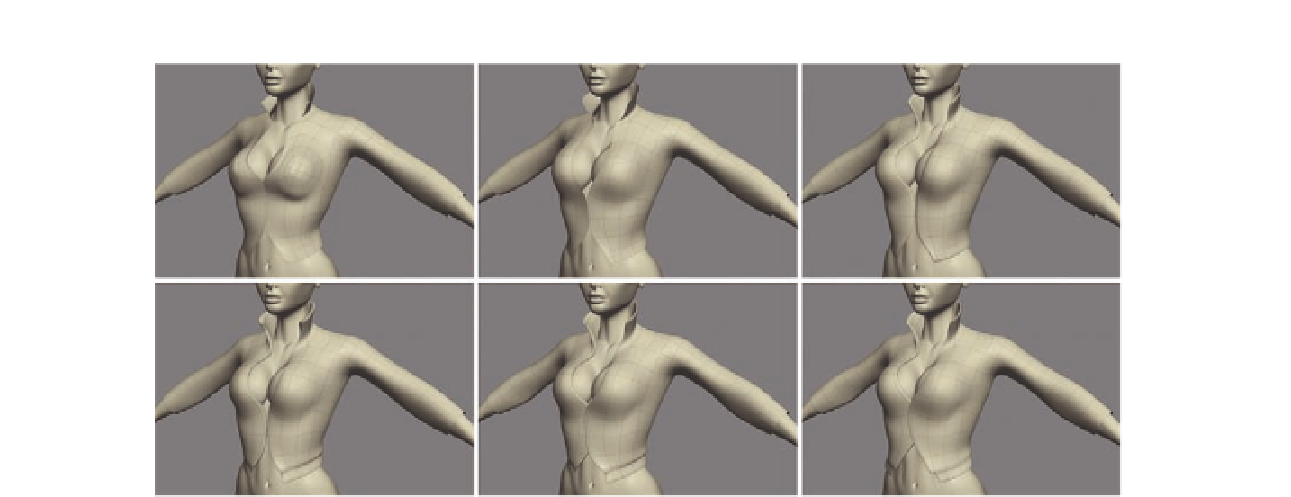
FIG. 9.4
Adjust the jacket, building in the main areas.
Figure 9.4 illustrates the main changes we need to make to the jacket; these
are also detailed in the following steps.
●
First, we need to address the topology around her chest. We no longer
need the circular edge loops that formed her breasts, so i rst l atten this
area out, returning the topology to the default grid shape in Figure 9.4b.
●
Next, we want to give the jacket some depth and thickness, so
Extrude
the edges around the outside of the jacket and collar, moving them
toward the body.
●
Because we will be able to see the inside of the collar, it is important to
now build this area, extending the polygons down to her neck.
(Tip: Do not waste time building areas you will not see; only add them if they
are needed to help the topology.)
●
The edges around the opening of the jacket will now appear soft when
subdivided (Figure 9.4c), which is not what we want.
Bevel
these edges
now to give it a harder looking edge as in Figure 9.4d.
●
Up to now, you have probably been working with symmetry enabled.
Turn this of so we can start to make each side of the jacket unique.
Begin by folding the left side over the right slightly, as if it were fastened
( Figure 9.4 e).
●
Finally, add a few more edge loops around the arms. The polygons are
currently too long, and ideally, we want them to be square, so adding
more geometry will help us when we sculpt in the details.
The base for the jacket is completed; save your work now before we move on
to her trousers.