Graphics Programs Reference
In-Depth Information
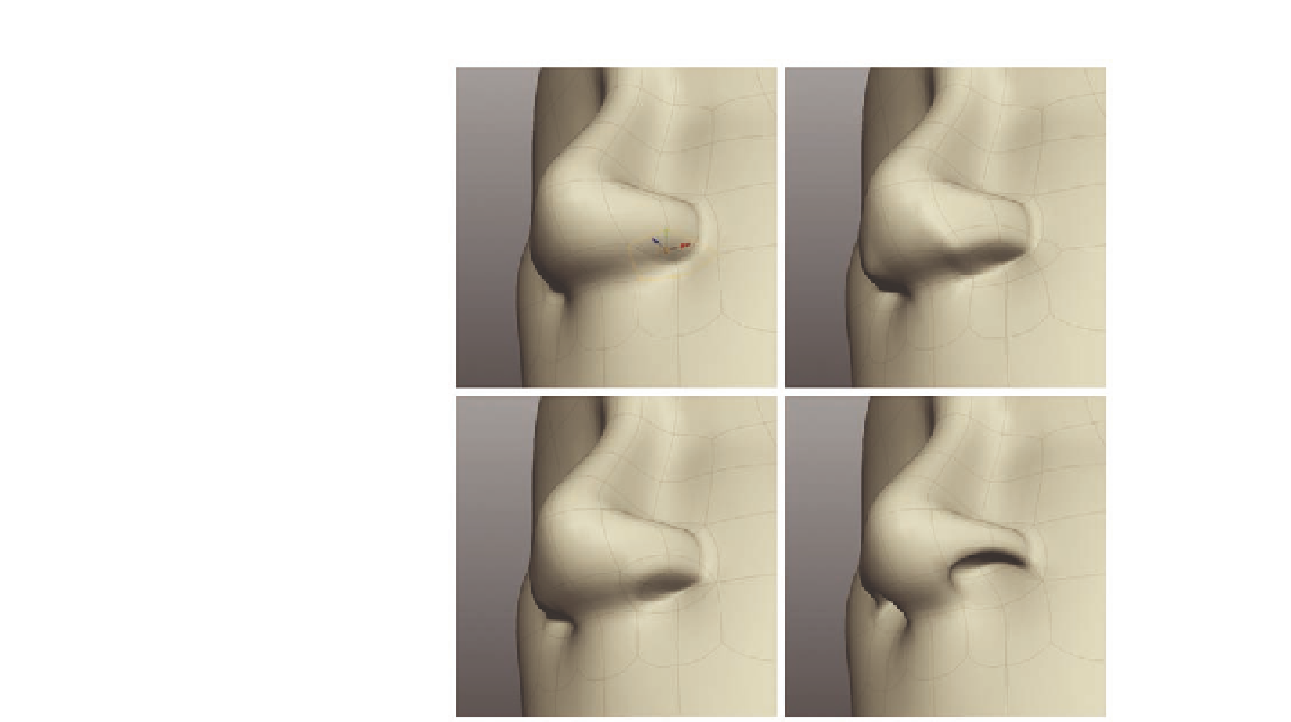
FIG. 8.5
Bevel the nostril to help create the nostril cavity.
●
Perform a
Bevel
on these edges, removing any triangles created in the
process and sealing the edge loop (Figure 8 5c).
●
Next, move the middle three quads up into the nose to create the cavity
seen in Figure 8.5d.
The nose is starting to take shape, but we still have work to do. Let's focus
back on the main areas of the nose next.
●
First, create a new horizontal
Cut
across the front of her nose, carrying this
onto her cheeks ( Figure 8.6b ).
●
Now select the edges around the base of the nostril and up the end of her
nose ( Figure 8.6c ).
●
Bevel
these edges, cleaning up any stray triangles or edges created in the
topology ( Figure 8.6e ).
●
With the extra geometry in place, enhance the shape of the nose, as
shown in Figure 8.6f.
●
In Figure 8.7, you will see that we have an n-gon on top of the nostril.
Quickly create the
Cut
shown in Figure 8.7b, running across the n-gon and
up the side of her nose.
Let's go back to the nostril now. This is just a personal preference, but when
working on a nose we like to delete the inner polygons of the nasal cavity.