Graphics Programs Reference
In-Depth Information
Photoshop: Dodging and Burning with “Soft Light”
While dodging and burning may be familiar terms to anyone brought up
with traditional darkroom techniques, the ability to open shadows and burn
highlights selectively and skillfully using a paintbrush tool is one of the most
astounding tools Photoshop has to of er the black and white photographer.
In fact, this is the technique that convinced me to move into the digital
darkroom! With this method you can lighten and darken subtle detail work
with the precision of a paintbrush. This is dodging and burning control and
accuracy never dreamed possible!
Photoshop CS4 has made improvements to the Dodge, Burn, and Sponge
tools - doing a much better job of maintaining the original color of an image,
and maintaining exposure sensibility longer as you dodge and burn. However,
as the Dodge and Burn tools are destructive unless used on a duplicate layer,
which increases i le size exponentially, I still prefer to use a non-destructive
approach built around adjustment layers and blended layers.
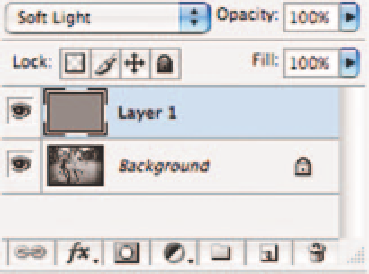
Step 1: Create a new blank layer
At the bottom of the Layers palette, click on the new layer icon or go
to Layer Menu New Layer.
Step 2:
Go to the Edit Menu Fill.
Step 3:
Select, for the Contents, Use: 50% Gray.
Make sure the other settings read 100% for opacity and
“Normal” for the blending mode.
Step 4:
In the Layers palette, set the blending mode to “Soft Light” or “Overlay”.


Search WWH ::

Custom Search