Graphics Programs Reference
In-Depth Information
underneath the eyedropper. Click in the black area created by the threshold
layer to place a color sampler target black point.
Step 6: Throw away the threshold adjustment layer
Drag the threshold adjustment layer to the trash can at the bottom of the
Layers palette, or just turn the visibility of in the Layers palette.
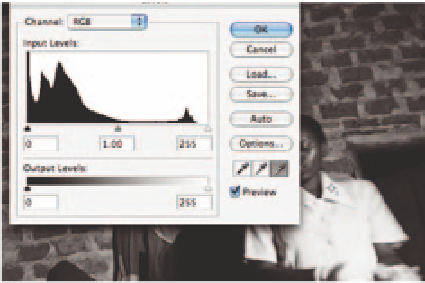
Step 7: Create a Levels adjustment layer
Go to the adjustment layer icon at the bottom of the Layers palette and
choose Levels or Curves.
Step 8: Set the White Point
Single-click on the white eye dropper to select the dropper, and click on your
image in the center of the color sampler target you created for the white
point.
Step 9: Set the Black Point
With the Levels dialog box still open, single-click on the black eye dropper to
select the dropper, and click on your image in the center of the color sampler
target you created for the black point.
Hint:
Finding a neutral point
in an image for color
corrective purposes is
often a matter of “click
i shing”. Try clicking on
gray hair on humans or
animals; shadow areas,
rocks and clouds are
often places that contain
a good neutral.
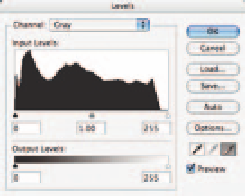
Step 10: Set Neutral Point if there is one
Click on the gray dropper, and click on an area within the image that should
be a neutral gray. It is ok to go “i shing”, i.e. just clicking around the image
with the gray eyedropper to get dif erent results if you do not know where a
neutral exists.


Search WWH ::

Custom Search