Graphics Programs Reference
In-Depth Information
1
Create a new blank layer so you do not permanently edit your image.
2
With the Brush tool selected, press and hold the Alt (Windows) or Option (Mac OS) key to activate the
eye dropper and click any Orange in the image to sample it and add it as your Foreground color.
3
Select the gum machine path in the Paths panel.
4
Select the Stroke path with brush button at the bottom of the Path's panel; your custom stroke is ap-
plied to the path.
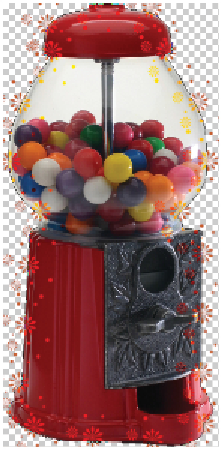
5
Since you applied this stroke on a blank layer, you can experiment with different blending modes and
opacities. In this example, Vivid light was selected from the Blending drop-down menu in the Layers
panel.
The custom stroke applied to the path.
6
Choose File > Save. Keep the file open for the next part of the lesson.
Saving the image for other applications
If you are using this image in other Adobe applications, you can save it in the native Photoshop file and
then choose to Place the image into the other application. By selecting File > Place, transparency is sup-
ported. If you choose to copy and paste this image, you will most likely see a white background appear in
the other application.
If you want to save this image for use in an application that does not support the Photoshop format, you
can choose from two main formats: PNG and EPS (which includes DCS 2.0).
PNG-24
The PNG format is a raster graphics file format that supports lossless data compression. PNG was created
as an improved, non-patented replacement for Graphics Interchange Format (GIF), and is the most used
lossless image compression format on graphics that appear on the screen. PNG works well for web, ap-