Graphics Programs Reference
In-Depth Information
1
Press
C
to select the Crop tool ( ). Transformation handles appear around the four corners of the crop
area and also in the center of each side.
2
From the Crop tool presets drop-down menu in the Options bar, confirm that your selection is set to
Ratio.
3
If you do not see rulers in your workspace press Ctrl+R (Windows) or Command+R (Mac OS) to dis-
play the rulers. Right-click (Windows) or Ctrl+click (Mac OS) the actual ruler to open a contextual
menu and confirm or change your values to Inches.
4
Click and drag the transformation handle in the center of the right side towards the right until the cen-
ter target in the crop area is about equal distance between the nostril and snout, or until you have
reached about the 14.5-15 inch area in your ruler. Click the Commit button in the upper-right of the
Options bar, or press Enter (Windows) or Return (Mac OS) to commit the crop. A transparent canvas
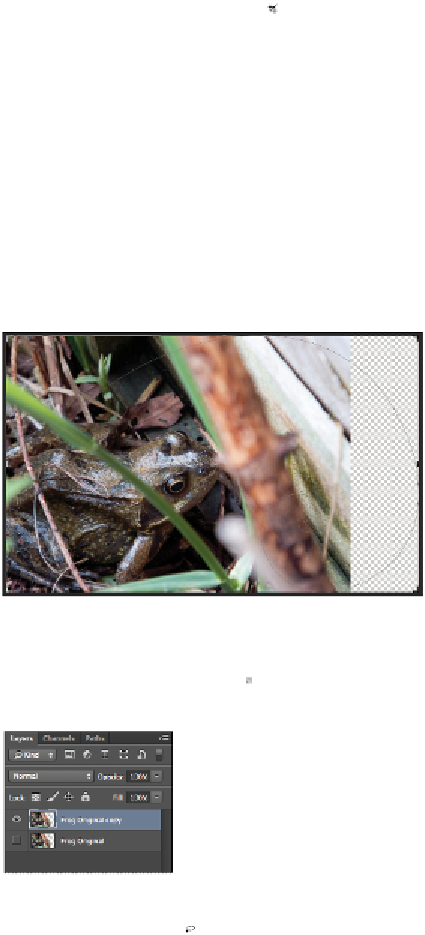
area has been added to the image.
Using the Crop tool to add canvas area to the image.
5
You will now duplicate this layer to keep an unedited version. Click and drag the Frog layer down to
the Create new layer button ( ) in the Layers panel. A new layer named Frog Original copy is created.
6
Hide the Frog Original layer by clicking the corresponding visibility eye icon in the layer stack.
Duplicating a layer.
7
Select the Lasso tool ( ). You will set the feather (vignette) value before you make the selection.
When selecting a feathered amount, you can choose the setting before you create a selection. You
can also choose the setting afterwards using Refine Edge in the Options bar.