Graphics Programs Reference
In-Depth Information
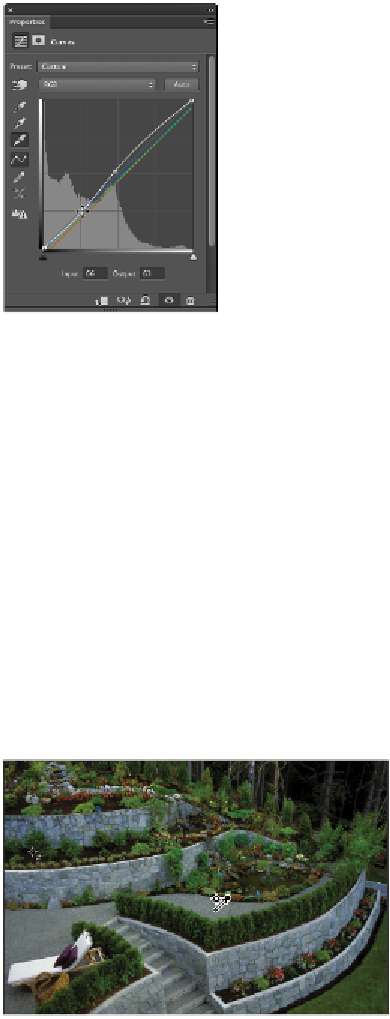
Click and drag the three-quarter tone up slightly to lighten the image.
3
Keep the Curves Properties panel open for the next section of this lesson.
In this next part of the lesson, you will choose to neutralize this image. Although there are many auto-
matic tools that you can use in Photoshop to neutralize an image, you will make the steps manually. This
will help you to better understand what you are doing and lead you into more advanced corrections.
Balancing the neutrals in an image
In this next part of the process, you will use the gray stones in the image as a ruler to check the gray bal-
ance. As mentioned earlier in this lesson, reading a gray value helps you measure color, since a neutral
gray is composed of equal amounts of red, green, and blue. Knowing this allows you to adjust for color
inaccuracies.
1
With the
advps0502_work.psd
file still open, position your cursor over the gray sidewalk on the right
side of the image and Shift+click to add a color sampler at this spot. A #3 color sampler appears.
As mentioned earlier in this lesson, the values in the Info panel indicate that the neutrals in this image
are not balanced. You will now discover what to do with that information.
Shift+click the sidewalk.
Note that in the Info panel a third color Sampler has been added. Note also that there are two sets of
values separated by a backslash (/). The values on the left side of the backslash are the values the im-