Graphics Programs Reference
In-Depth Information
1
Click the Background thumbnail in the Layers panel to select it.
2
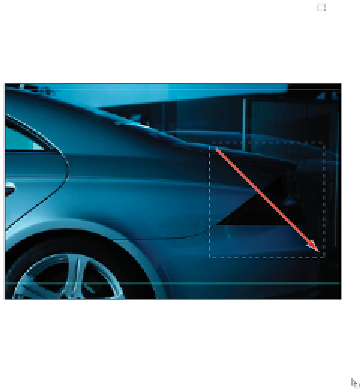
Select the Rectangular Marquee tool ( ) and position your cursor over the taillight of the car. Click and
drag while holding the Shift key. Note that your selection is constrained, creating a square selection.
When you have created a square (size doesn't matter), first release the mouse and then the Shift key.
Click and drag while holding the Shift key.
3
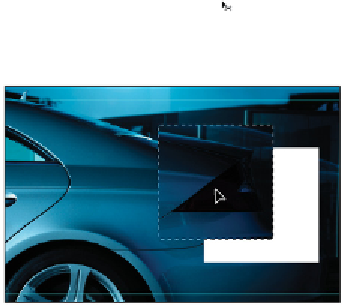
With the square selection still active, position your cursor over the selected region of the image. Notice
that an arrow with a dashed box appears ( ). This indicates that the selection shape can be moved
without moving any of the pixel information in the image.
4
Click and drag the selection to another location. Only the selection moves. Reposition the selection over
the taillight.
5
Select the Move tool ( ) and position the cursor over the selected region. Notice that an icon with an ar-
row and scissors appears ( ). This indicates that if you move the selection, you will cut, or move, the
pixels with the selection.
6
Click and drag the selection; the selected region of the image moves with the selection.
When the Move tool is selected, the pixels are moved with the selection.
7
Select Edit > Undo Move, or use the keyboard shortcut Ctrl+Z (Windows) or Command+Z (Mac OS) to
undo your last step.
8
You'll now alter that section of the image. Note that in this example you edit a region of an image
without creating a layer; you are affecting the pixels of the image and cannot easily undo your edits
after the image has been saved, closed, and reopened. You will discover more ways to take advantage
of the Adjustments panel later in this lesson.
9
Choose Image > Adjustments > Hue/Saturation.