Graphics Programs Reference
In-Depth Information
A very important tip to remember when using the Pen tool is to zoom in closely to the item you want
to create a path around. If you are too far out, you will not follow the path as tightly as you should.
Starting your path
You will now start the path that will silhouette the flower. In this exercise, you will be provided with pre-
cise instructions to start your path. You will then take the techniques that we covered and complete the
path on your own.
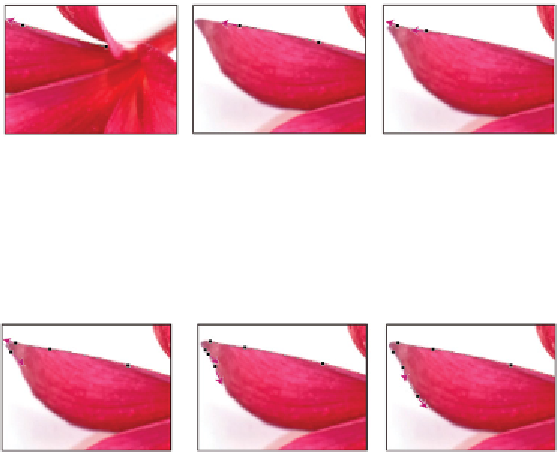
1
Using the Pen tool, click and drag a short bit to the left on the base of the petal on the left side of the
flower. You should keep the directional line that you are creating parallel to the side of the petal; the
directional line is resting on the petal.
Start your path from the base of the left petal.
2
Move the cursor approximately halfway up the petal and click and drag again. Keep the directional lines
parallel to the side of the petal again. Repeat this clicking and dragging until you reach the edge of the
petal.
Keep the directional lines parallel with the petal.
3
Click and drag from one anchor point to another, keeping the directional lines resting on the side of the
petal.
When you reach the top of the petal, you will need to curve back around to go down the other side.
4
Click the other underside of the petal, almost exactly in line where your last anchor point was placed
and click and drag down to form the arch in the petal.
Continue adding additional anchor points while clicking and dragging.
5
Click and drag down; again, keep the directional lines along the side of the petal. Stop when you reach
the part of the petal that touches the next petal.