Graphics Programs Reference
In-Depth Information
Switch to the Direct Selection tool to edit the path.
Drawing hinged curves
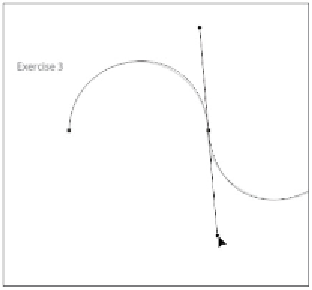
In the previous exercise, you created S-curves; that is, lines curved in the opposite direction from the pre-
vious one. In this exercise, you will create hinged curves, which are lines that curve in the same direction;
in this case, they will all curve up like a scallop.
1
If necessary, use the spacebar to access the Hand tool and push up the image area so you can see Exer-
cise 4.
2
Select the Pen tool and position your cursor over the first square in the path in Exercise 4. As you did in
the previous exercise, click and drag your cursor up slightly above the arch to create your first anchor
point.
3
Place your cursor over the second square and click and drag straight down to create the second anchor
point. Continue to drag the mouse until you form the curve that you are copying.
4
Press and hold the Alt key (Windows) or Option key (Mac OS). This temporarily changes the Pen tool
into the Convert Point tool ( ), which is a separate tool in the Pen tool grouping. Among other things
(covered later in this chapter), this tool is used to edit direction handles. Position the Convert Point tool
over the direction handle for the exiting direction line, and click and drag this point so that it points up-
ward. The two direction lines now form a V.
Create your first path.
Press and hold the Alt/Option key and hover over anchor.
Click and drag upwards.