Image Processing Reference
In-Depth Information
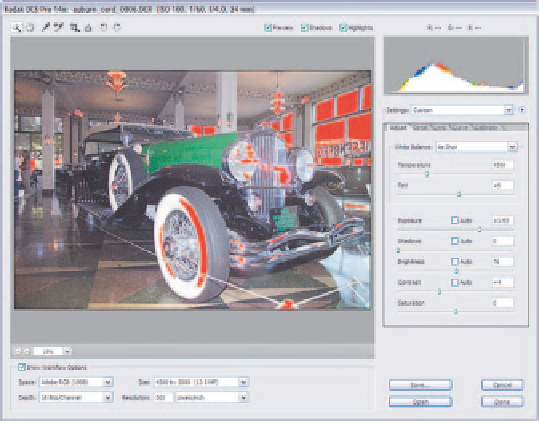
Make corrections to Shadows, Brightness, and Contrast, as shown in Figure 7.4,
and then convert the image by clicking OK (Photoshop Elements) or Open (Photoshop).
Figure 7.4
Make all additional adjustments
in Camera Raw to get the maxi-
mum shadow detail possible.
130
Note:
Photoshop Elements users must convert the image to 8 bit for these techniques. Choose Image
>
Mode
>
Convert to 8 Bits/Channel if you converted as a 16-bit file.
The second copy of the RAW image will be optimized for highlight detail. Open
the same image in Camera Raw. Using the Alt/Option key technique described above,
drag the Exposure slider to the left until highlight clipping is eliminated. Once again,
the image will show clipping, this time in the shadows. Once again, ignore the clipping
because you are only worried about highlight detail in this copy of the image.
After making corrections to Shadows, Brightness, and Contrast the image will
look like Figure 7.5. Convert the image with the OK or Open buttons.
Figure 7.5
The second copy of the RAW file
is optimized for highlights. Lost
shadow detail isn't a concern
here; it will be recovered when
the images are combined.


Search WWH ::

Custom Search