Image Processing Reference
In-Depth Information
The second method takes advantage of that Synchronize button. Select the image
that you want to use for your adjustments and correct it until you have the settings you
want. Now, select all the desired thumbnails and click Synchronize. The dialog box
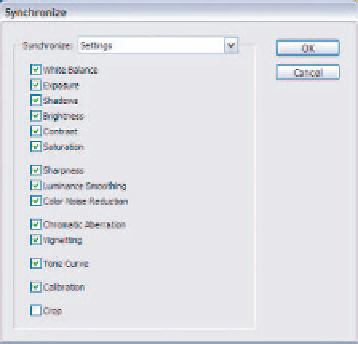
shown in Figure 5.8 will open, letting you select which adjustments to apply to all
images.
Figure 5.8
The Synchronize dialog has
options to apply all settings or
subsets. (It should look familiar;
it's the same as the Paste Camera
Raw Settings dialog seen earlier.)
93
After selecting which settings to apply, click OK and all selected images will be
updated.
Finally, after all your adjustments have been made, click the Done button to
apply the changes and close Camera Raw. Alternatively, you can select Save or Open.
Open will launch Photoshop if it isn't already running, launch Camera Raw to apply
the changes to your RAW files, and leave the selected files open for post processing.
Save does the conversion work for you and saves the files in the selected format with-
out going into Photoshop for editing. I'll cover why you'd want to do that in just a bit.
Converting Images
Of course, the end goal when working with a RAW file is to convert it into a actual
image file, whether that is a JPEG for web use or a TIFF for high-quality output such
as printing. Converting a single image is straightforward enough: just click the OK but-
ton or Open button in Camera Raw and all settings are applied to the image, which is
then opened in Photoshop Elements or Photoshop. But, since the theme of this chapter
is automating Camera Raw, let's focus on batch, or multiple file, conversions. Both
Photoshop Elements and Photoshop support batch conversions, but each does it in a
different way.
Converting from File Browser
Photoshop Elements handles batch conversions from within File Browser. All the pro-
cessing work is done through the Process Multiple Files command, which can convert,
rename, and resize your images without opening and saving each one manually.
1.
To get started, select File
>
Browse Folders and navigate to the folder containing
the RAW files you want to convert.

Search WWH ::

Custom Search