Graphics Programs Reference
In-Depth Information
The much-improved Contrast slider in CS6's Camera Raw will still only take you
so far, but luckily there's Curves, which is a powerful ally in your fight against
flat-looking photos. While I've got you here, there's something else new in this
new version, another feature from regular Photoshop made its way into Camera
Raw: the ability to edit individual R, G, and B channels with Curves. Okay, I don't
use this feature, but somebody could really have some fun with it (for cross-
processing effects, if nothing else).
Using Curves
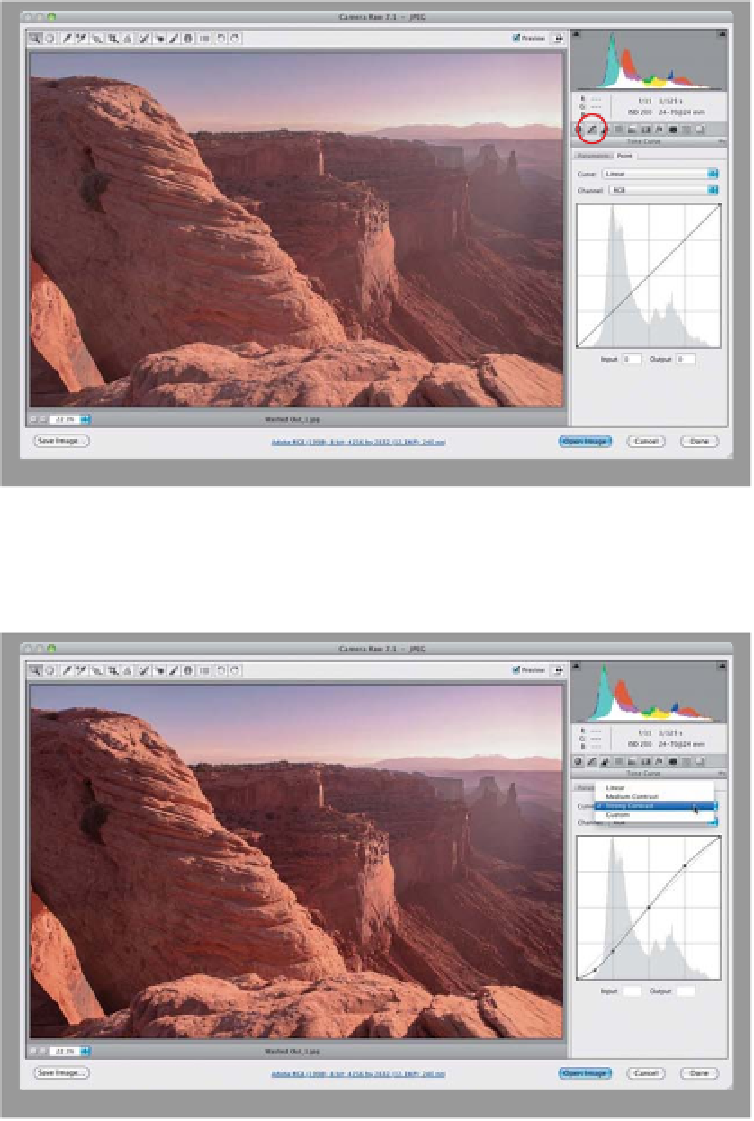
Step One:
After you've done all your exposure
adjustments in the Basic panel, and you
feel you need more contrast (hey, it's
possible), it's time to head for the Tone
Curve panel (click on the second icon
from the left, near the top of the Panel
area, shown circled here in red). There
are two different types of curves avail-
able here: the Point curve, and the Para-
metric curve. We'll start with the Point
curve, so click on the Point tab at the
top of the panel. Here's what the photo
shown here looks like with no added
contrast in the Point curve (notice that the
Curve pop-up menu above the curve is
set to Linear, which is a flat, unadjusted
curve).
Note:
In previous versions of Cam-
era Raw, RAW images had the default
curve set to Medium Contrast (since your
camera didn't add any contrast), but
now in CS6, just like when you shoot
in JPEG, no additional contrast will be
added by default.
Step Two:
If you want more contrast, choose
Strong
Contrast
from the Curve pop-up menu
(as shown here), and you can see how
much more contrast this photo now has,
compared with Step One. The difference
is the Strong Contrast settings create a
steeper curve, and the steeper the curve,
the more contrast it creates.